EasyManua.ls Logo

Rockwell Automation Allen-Bradley CompactLogix 1769-L32E - User Manual

Rockwell Automation Allen-Bradley CompactLogix 1769-L32E
40 pages
To Next Page IconTo Next Page
Loading...
Installation Instructions
CompactLogix Controller
Catalog Numbers 1769-L32E, 1769-L35E
Topic Page
Important User Information 2
Environment and Enclosure 3
North American Hazardous Location Approval 4
European Hazardous Location Approval 5
About the Controller 5
Before You Begin 6
Connect the 1769-BA Battery 7
Install a 1784-CF64 or 1784-CF128 CompactFlash Card (optional) 8
Assemble the System 9
Mount the System 11
Make RS-232 Connections to the Controller 15
Make Ethernet Connections to the Controller 18
Load the Controller Firmware 25
Select the Controller’s Operating Mode 29
Controller Status Indicators 31
RS-232 Serial Port Status Indicators (Channel 0) 33
CompactFlash Card Status Indicator 33
Module Status (MS) Indicator 33
Network Status (NS) Indicator 34
Link Status (LNK) Indicator 35
Specifications 36
Additional Resources 40
Question and Answer IconNeed help?

Do you have a question about the Rockwell Automation Allen-Bradley CompactLogix 1769-L32E and is the answer not in the manual?

Rockwell Automation Allen-Bradley CompactLogix 1769-L32E Specifications

General IconGeneral
Catalog Number1769-L32E
SeriesCompactLogix
Processor Type32-bit
Ethernet Ports1
Ethernet Speed10/100 Mbps
Power Supply Voltage24V DC
Relative Humidity5% to 95% non-condensing
Product TypeController
Communication PortsEthernet
I/O Modules Supported1769
Operating Temperature0°C to 60°C

Summary

Important User Information

Environment and Enclosure

Prevent Electrostatic Discharge

Guidelines for handling the controller safely to prevent damage from electrostatic discharge.

North American Hazardous Location Approval

European Hazardous Location Approval

About the Controller

Before You Begin

Parts List

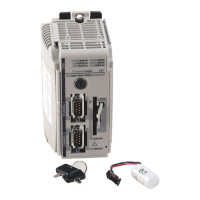
Lists components that ship with the controller and optional components that may be used.

Connect the 1769-BA Battery

Install a 1784-CF64 or 1784-CF128 CompactFlash Card (optional)

Assemble the System

Mount the System

Minimum Spacing

Specifies required spacing around the controller for ventilation and electrical isolation.

System Dimensions

Ground the Wiring

Mount the Panel

Mount the Controller on the DIN Rail

Make RS-232 Connections to the Controller

RS-232 Cable

Details the pinout and wiring for the RS-232 serial cable connection.

Default Serial Configuration

Use the Channel 0 Default Communication Push Button

Make Ethernet Connections to the Controller

Assign an IP Address

Use BOOTP to Set the IP Address

Instructions for configuring the controller's IP address using the BOOTP utility.

Use RSLinx Software to Set the IP Address

Steps for setting the controller's IP address using RSLinx software.

Use RSLogix 5000 Software to Set the IP Address

Procedure for assigning an IP address to the controller via RSLogix 5000 software.

Install the Appropriate EDS Files

Load the Controller Firmware

Use the ControlFlash Utility to Load Firmware

Detailed steps for loading controller firmware using the ControlFlash utility.

Use AutoFlash to Load Firmware

Instructions for loading firmware automatically through RSLogix 5000 software.

Use a CompactFlash Card to Load Firmware

Method for loading firmware onto another controller using a CompactFlash card.

Select the Controllers Operating Mode

Controller Status Indicators

RS-232 Serial Port Status Indicators (Channel 0)

CompactFlash Card Status Indicator

Module Status (MS) Indicator

Network Status (NS) Indicator

Link Status (LNK) Indicator

Specifications

1769-L32 E, 1769-L35 E - Environmental Specifications

1769-L32 E, 1769-L35 E - Certifications

Additional Resources

Related product manuals