R&S FSH Two-port measurements with the tracking generator
1309.6275.12 4.57 E-2
Connect the DUT to the measurement port of the
VSWR bridge.
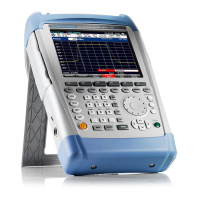
The R&S FSH displays the return loss of the DUT.
Entering the display unit:
Press the AMPT key.
Press the RANGE softkey.
The submenu for selecting the display ranges will
open. The available display units depend on the
selected reflection measurement format: return loss in
dB, linear in %, standing wave ratio (VSWR), reflection
coefficient (REFL COEFF (ROH)) and reflection
coefficient (REFL COEFF (mROH)). Select the desired
display unit by using the cursor keys or rotary knob.
Note:
In the case of return loss and linear display, scaling is
directly selected. In the case of all other units, a
window for selecting the display range scaling opens.
You can select a display range by using the cursor
keys or the rotary knob.
Confirm the selection by pressing the ENTER key or
the RANGE softkey.
The R&S FSH displays the reflection coefficient of the
DUT.
The reflection calibration remains valid until the center frequency or the span is changed on the
R&S FSH to such an extent that the new span falls outside the calibrated frequency range. UNCAL is
displayed in the upper area of the screen when calibration is no longer valid.
If the reference is changed after calibration, a larger measurement uncertainty must be anticipated. The
R&S FSH retains the calibration data but indicates a possible increase in measurement uncertainty by
displaying APPROX in the upper area of the screen.
Changing other parameters like bandwidth, detector, sweep time or measurement range has no effect
on measurement accuracy. This means they can be changed after calibration without any reduction in
accuracy.
When a data set for scalar reflection measurement is stored with calibration performed, the calibration
data can be stored along with the other settings (see Chapter 2, section "Saving Calibration Data").
Thus, once the setting has been retrieved, measurement can be performed without first performing a
calibration.

 Loading...
