Part No. 4801-5329 Rev 3-09 SW 100 Sidewall Curtain System Page 10
Figure 8 - Mount the Drive Motor
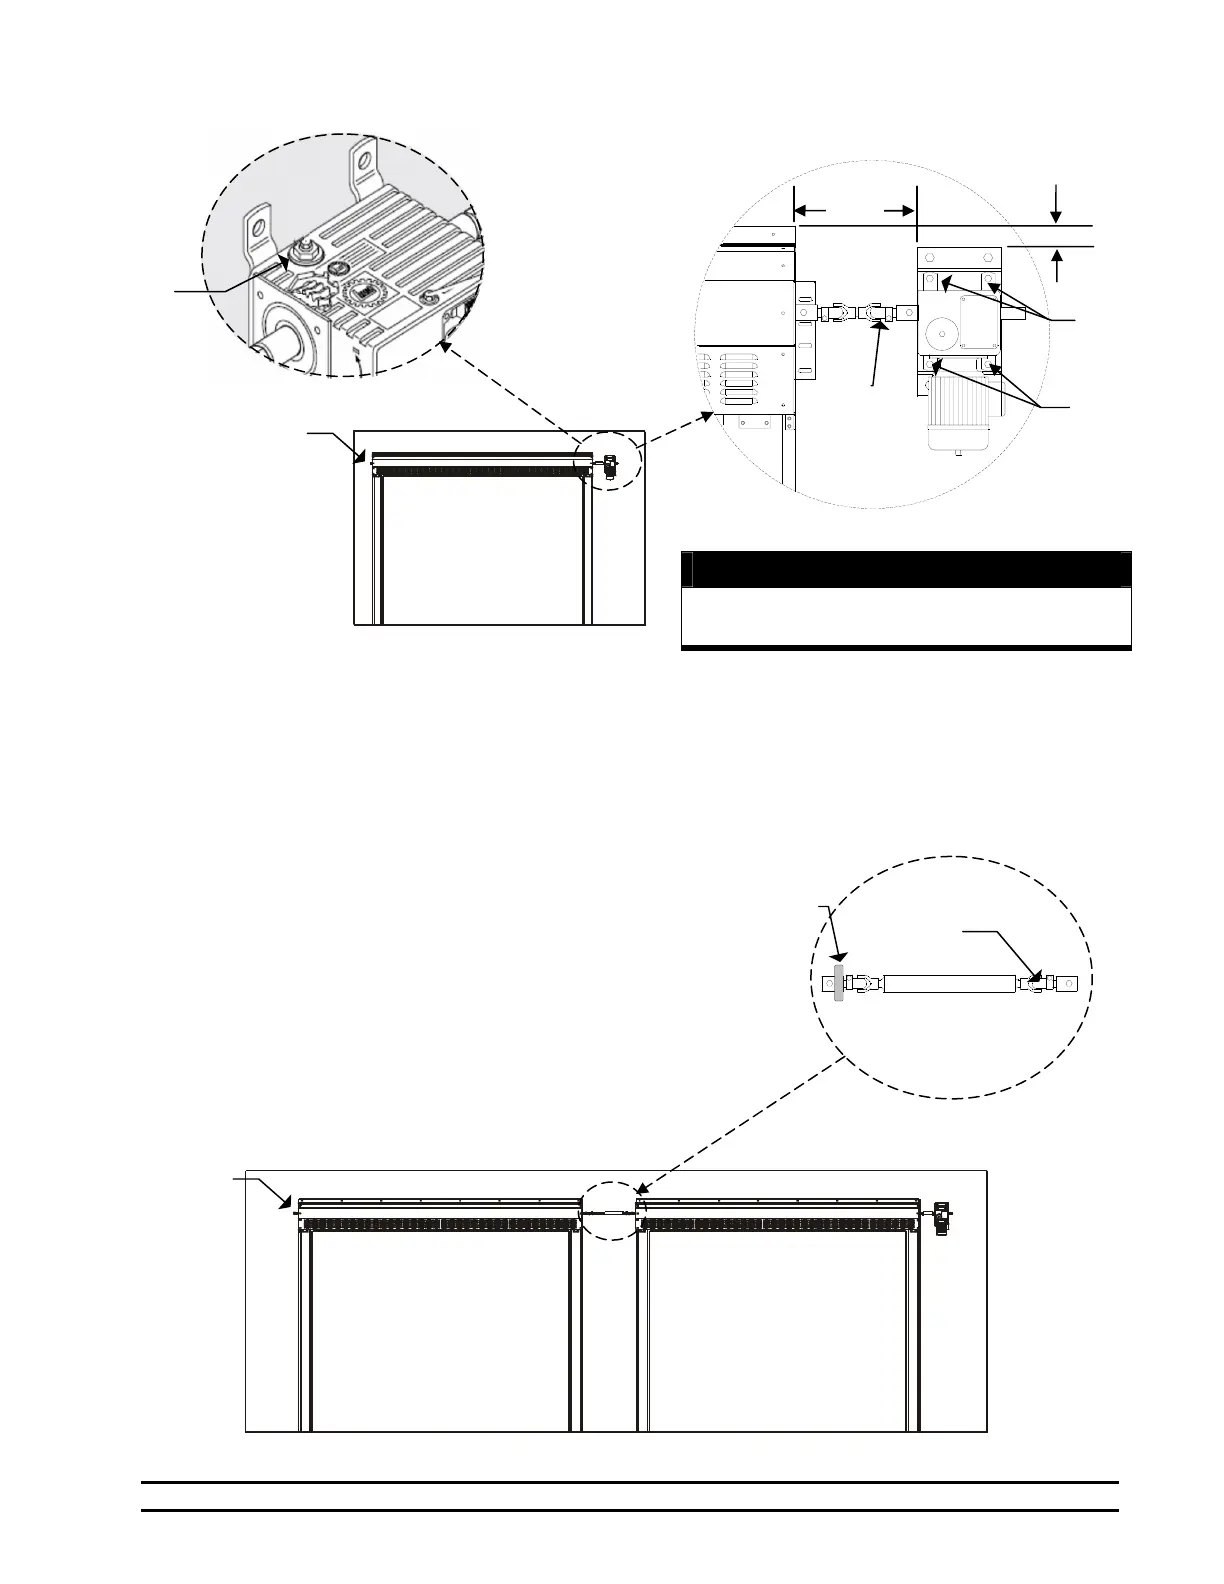
Figure 9 - Connecting Doors
Detail A
Detail B
9. Replace with new Vent Screw. See Detail B.
7.7 Connecting Two or More Doors
CAUTION: Do not remove the bracket securing the Drive Pipe to the Head Unit. Without the drive shafts
properly secured, the panel will drop rapidly and injury may occur. Leave one securing bracket attached until
the gear drive or telescopic shaft is properly secured. NOTE: The distance between the two doors should be
between 23 and 28 inches for a standard coupling. If the distance between the two doors is greater that 28
inches, an extender coupling is available based upon the actual door separation.
1. Verify that there is a Safety Bracket holding the curtain drive
shaft at the other end of the Telescoping Shaft. See Figures 7
and 9.
2. Install the Telescoping Shaft between the Two Drive Shafts of
the doors. See Figure 9. NOTE: If the Telescopic Shaft is too
short, DO NOT MODIFY THE SHAFT. This will cause unsafe
operation. Use the 0411-10550 Shaft Extender.
3. If there is a Ring Spacer on the Telescoping Shaft, remove it and
discard.
4. Connect the Telescoping Shaft to the two door Drive Shafts
using the hardware provided with the Telescoping Shaft.
Mounting
Holes in
Plate
Mounting
Holes
(behind
motor)
Telescoping
Shaft
Ring
Space
Safet
Bracket
Safet
Bracket
Vent
Screw
13"
2 5/8"
CAUTION
Do not let the motor hang from the shaft without
adequate support
.
Shaft
 Loading...