Part No. 4801-5329 Rev 3-09 SW 100 Sidewall Curtain System Page 8
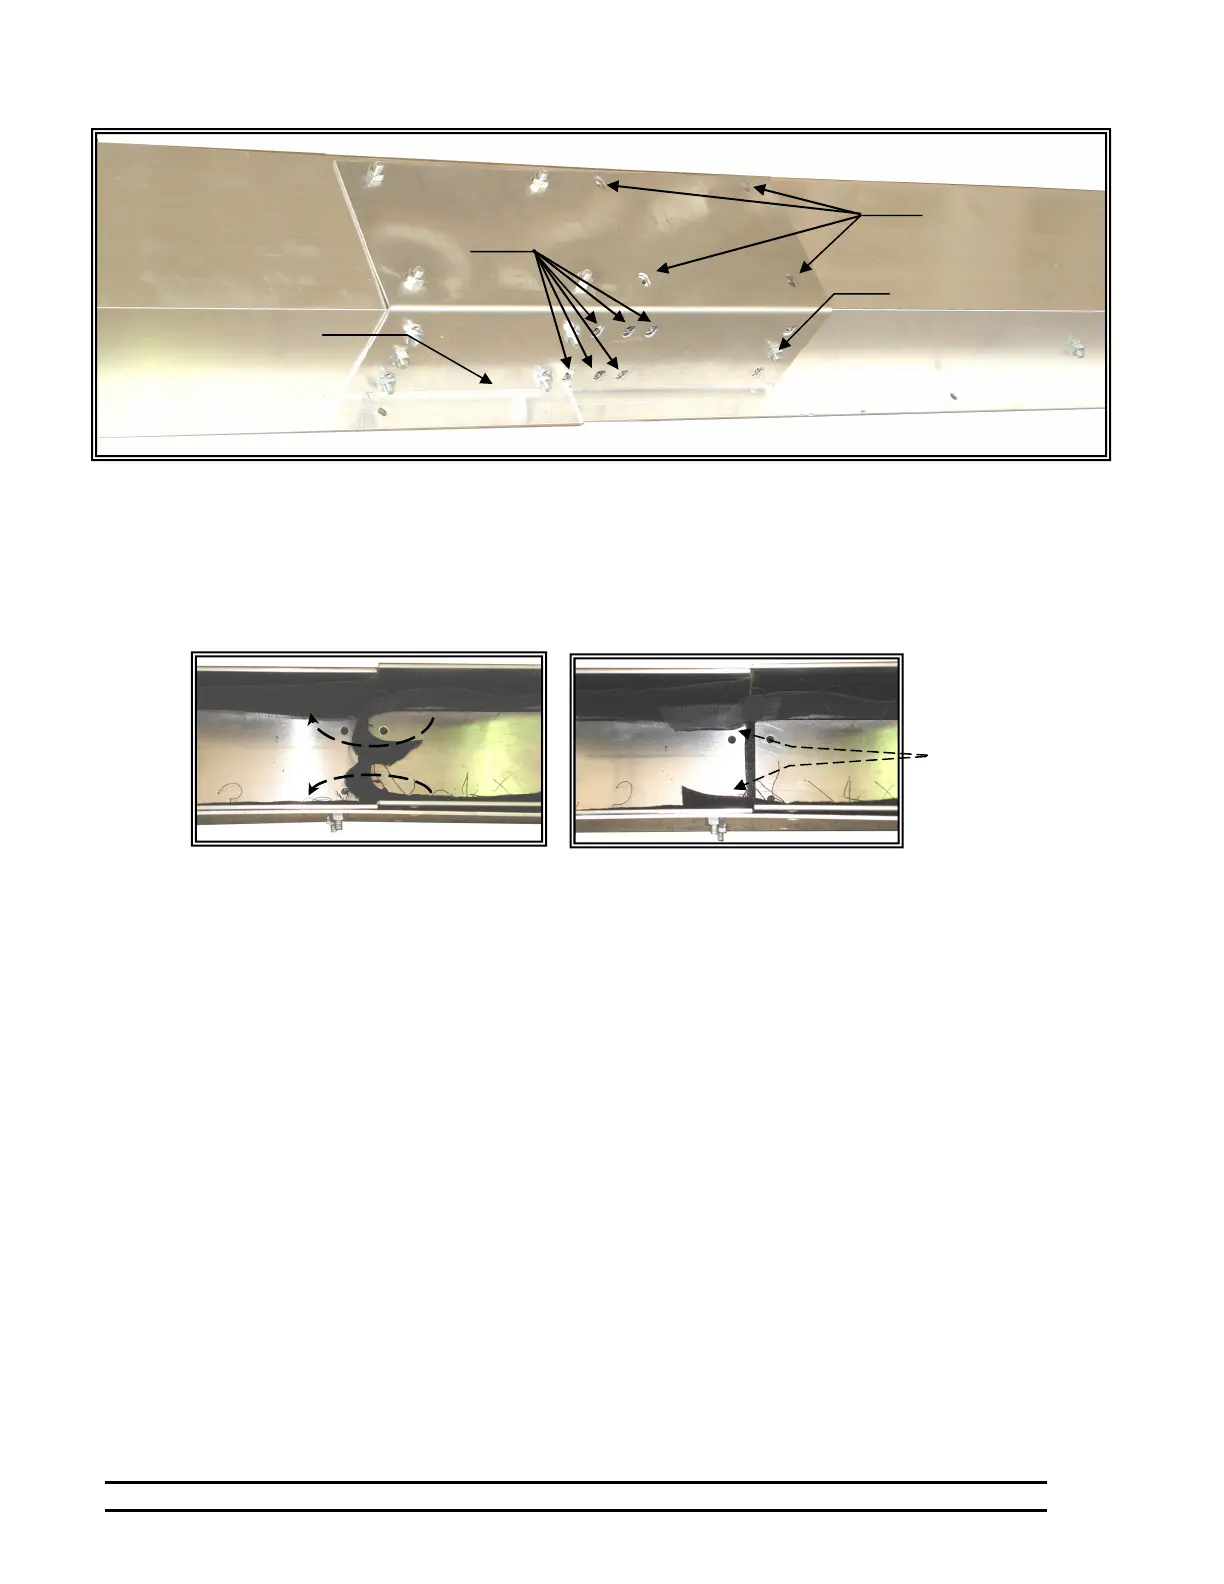
Reattach bolt
to lower PIM
Stud
Fasten with
¼" PEM studs,
washers and
and nuts.
Fasten with
¼" PEM studs,
washers and
nuts.
Track Splice
Bracket
2. Fasten the two sections of track with a Track Splice Bracket (0401-7981) and ten 1/4" threaded studs,
washers and nuts. See Figure 4. Verify that the top and bottom sections line up straight before tightening
the PIM Studs
3. Flip (turn-over) the track and fold the Floating Velcro flaps down against the sides of the track. Verify
that the flaps lay smooth against the side of the track. See Figure 5.
7.5 Fastening Door Assembly to
Clear Opening
The Head Unit is shipped with two Safety Brackets
attached to the drive shaft. Refer to Figure 6.
CAUTION: Do not remove the bracket securing
the Drive Pipe to the Head Unit. Without the drive
shafts properly secured, the panel will drop rapidly
and injury may occur. Leave one securing bracket
attached until the gear drive or telescopic shaft is
properly secured.
1. Use a tape measure and make sure that the overall
height and overall width of the clear opening meet
the requirements from Table 1.
2. Make sure that the door assembly is plumb &
square. (Diagonal measurements, etc.) See Figure
9.
3. Install the Right and Left tracks to the wall. Verify
that the clear opening from Table 1 is correct and
the tracks are plumb.
NOTE: The vertical members should be aligned so that
their outer flanges will exactly overlap with the
framing boards or posts when the door assembly is
raised into position.
4. Carefully press flanges of the door
assembly flush against faces of framing
boards or posts. When the openings are
matched, level the top and sides using a
float level on the header, on each track,
and verify the inside diagonal
measurements are within 1/8".
Figure 4 – Slide the Top and Bottom Sections Together and Fasten
RH
Figure 5 – Fasten the Velcro Flaps on the Track Sides
Flaps should lay
smoothly against the
sides of the track.
 Loading...