Part No. 4801-5329 Rev 3-09 SW 100 Sidewall Curtain System Page 9
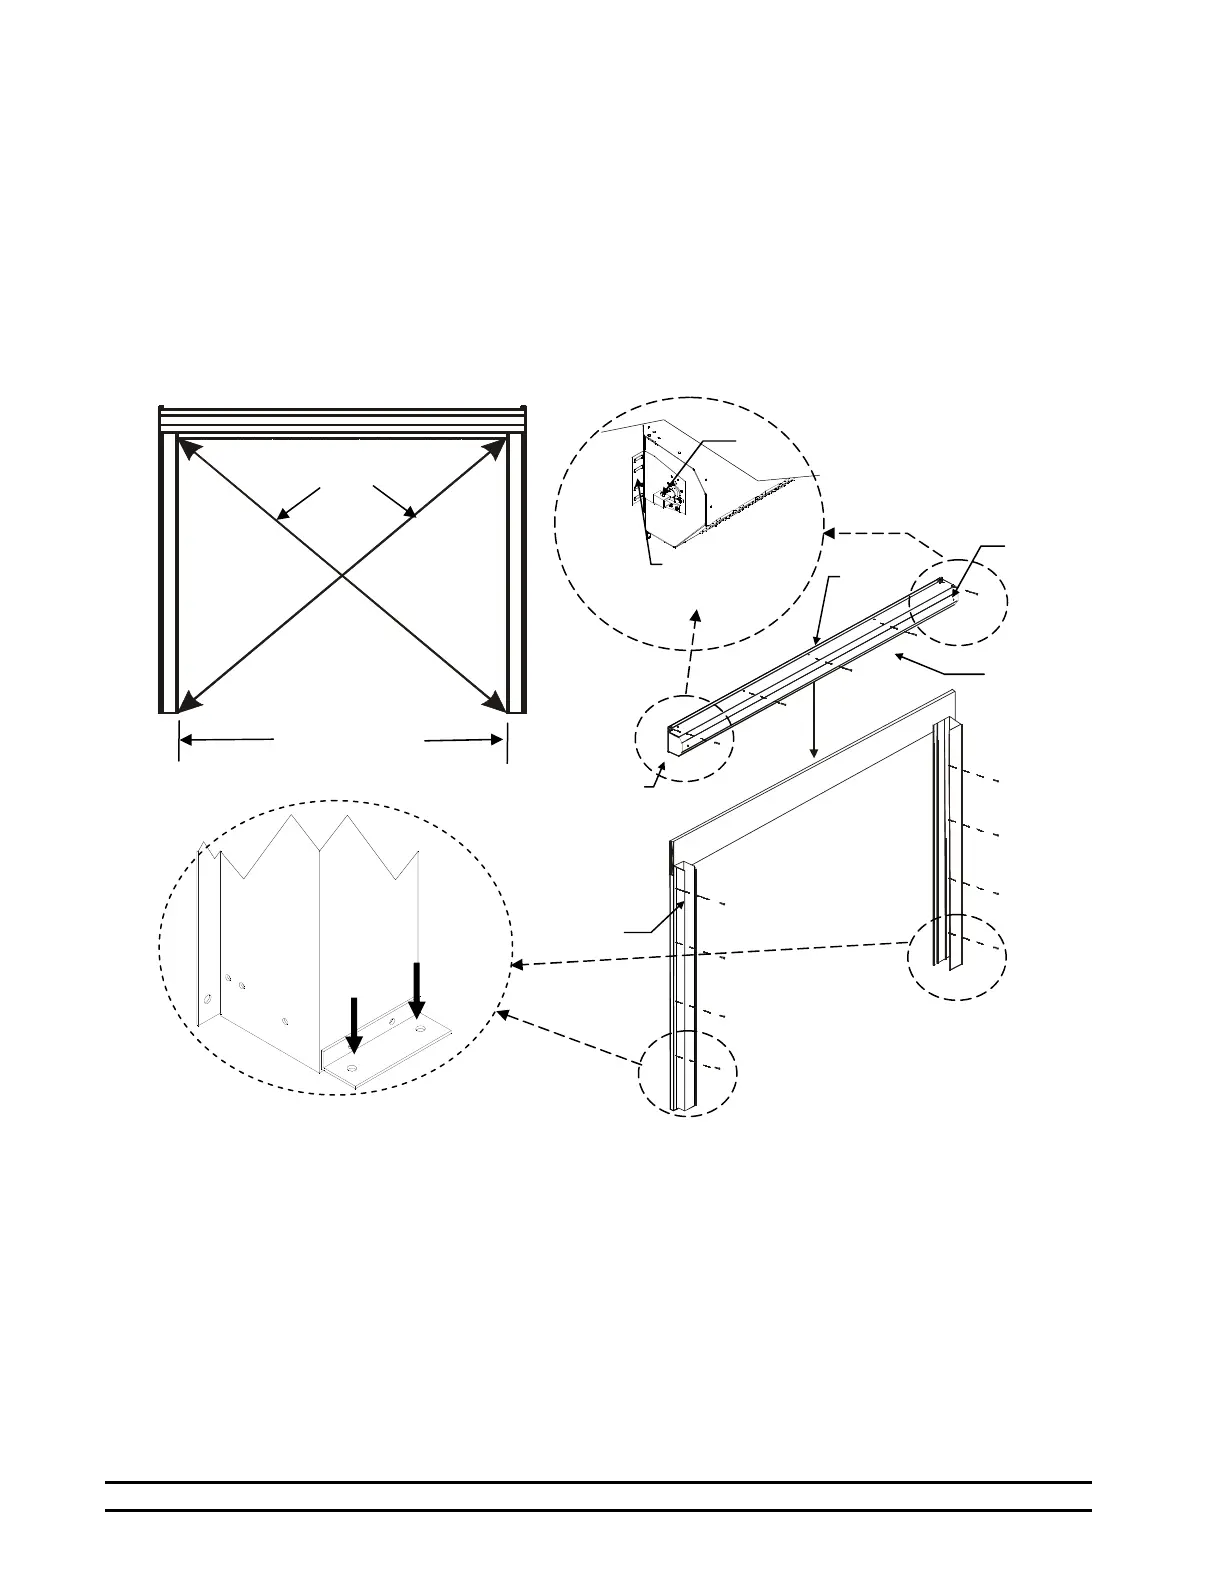
Figure 6 – Plumb and Square
FRONT
Figure 7 – Assemble Tracks
and Header
IMPORTANT: Leveling is very important
because the curtain may bind if not leveled properly.
5. As shown in Figure 6, fasten to the building
structure with (1002-8500) Titen HD 3/8x3
Threaded anchors through the flanges on sides of
door assembly. Securely tighten.
6. On the lower and upper flanges of the horizontal
member there are attachment points for fastening
screws. Fasten using (1004-6032) 1/4 x 2 1/4 hx
Tapcon. This secures the top of the door to the clear
opening.
7. Place Butal Roll tape (supplied) between the head
unit and tracks and the wall. If necessary use
silicone caulking (not supplied) for rough places in
the wall surface. This prevents water from entering
the building.
8. Locate the two floor mounting holes at the bottom
of the left and right tracks. See Detail A.
9. Drill a 1/4" hole and install Hammer Set Anchors
(1002-6030) in both right and left tracks. See Detail
A.
7.6 Mounting the Drive Motor
CAUTION: Do not remove the bracket securing the Drive Pipe to the Head Unit. Without the drive shafts
properly secured, the panel will drop rapidly and injury may occur. Leave one securing bracket attached until
the gear drive or telescopic shaft is properly secured.
1. Verify that there is a Safety Bracket holding the curtain at the other end of the motor. See Figures 7
and 8 Detail A.
2. Line up center axis of drive shaft and motor shaft. NOTE : Angular alignment must not exceed 20°.
3. Attach the motor to the mounting plate. See Figure 8 Detail A.
4. Temporarily attach motor and mounting plate to drive shaft on door long enough to mark mounting
holes in wall. See Figure 8.
5. Remove the motor and drill four 1/2" mounting holes.
6. Reinstall motor with wedge anchors (supplied).
7. Tighten the bolts on the Motor/Drive Coupling and shaft.
8. Remove the old Vent Screw. See Detail B.
Install Left &
Right Tracks
Verify dimensions
from Table 1.
The two diagonals must be
within 1/8 inch.
Lower Head
Unit into
place
Safety
Bracket
Silicone
lk
Silicone
Silicone
lk
Detail A
Drill 1/4" Hole
and Install
Place two
Titen HD
n
h
r
 Loading...