Configuring Internet Settings
Obtaining and Assigning an IP Address
ZoneFlex P300 Wireless Bridge User Guide, 800-70956-001 Rev B 44
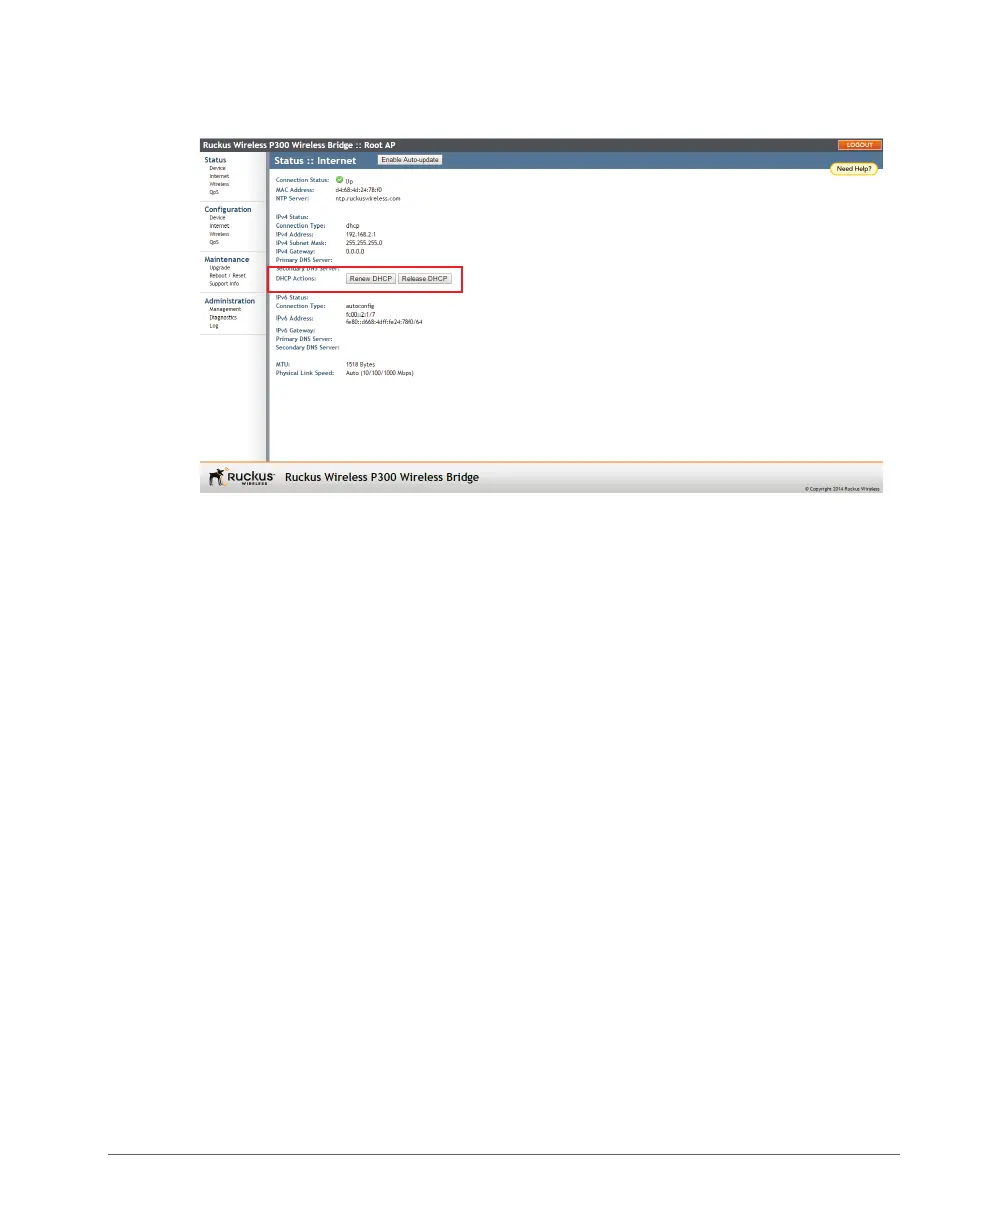
Figure 19. Renew or release DHCP
2 If the current Connection Type is dhcp, then you are able to see the currently-
assigned IP address and subnet mask listed below.
• To force the ZoneFlex P300 to release its DHCP-assigned IP address, click
Release DHCP. This disconnects the user from Web interface as the system
reverts to its default IP address. Log into the device using the default IP
address (
192.168.2.1 for a root bridge or 192.168.2.254 for a non-root
bridge) and click Renew DHCP to request a new lease from the DHCP server.
• Click Renew DHCP to request a new IP address lease from the DHCP server.
Note: The IP address may or may not change depending on the lease time
offered to this device.
Configuring IPv4 DHCP with Auto or Manual DNS Configuration
If you leave the ZoneFlex P300 at its default configuration, it attempts to obtain an
IPv4 address from a DHCP server on the network.
1 Navigate to Configuration > Internet. The ZoneFlex P300 Web GUI displays
the Configuration > Internet page (Figure 18).
2 In IPv4 Connection Type, select DHCP.
3 In IPv4 DNS Mode, select Auto or Manual.
• When you select Auto, the ZoneFlex P300 automatically searches for an IPv4
DNS server.
• When you select Manual, also make the following entries:
 Loading...