SAFETYTEST 1ST User Manual
SAFETY
SAFETYTEST GmbH June 15
2015 Page 8 of 22
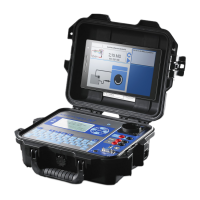
4.1 Connections (Figure 2)
Before connecting the tester to the mains, the appropriate warnings in chapter 1 have
to be observed, as well as the warnings for connecting the leads and accessories
attached. It is safe to use the instrument for its intended use only. The testing of the
rotective conductor potential takes place through using the fingercontact after the
tester is connected.
4.2 Mains connection “Input“, Type Schuko
The tester may be connected only to a power system of 230 V AC 40 – 60 Hz,
protected by a circuit breaker of max 16 A.
4.3 Measuring socket “GND“ (Figure 2/9)
Connection for the negative pole for temperature and voltage measurements and the
current clamp.
4.4 Measuring sockets “Probe“ (Figure 2/8)
Connection for the probe for earth bond and touch current measurements. Check the
polarity when connecting the key probe!
4.5 Schnittstelle PC-COM (Figure 2/11)
Connection for a 9 pin D-sub connector for the serial interface
RS 232 (19200, N, 8, 1) for:
Transferring data to and from the PC (alternative to using USB)
Firmware updates (limits, test sequences, measuring functions, languages,…) (alternative to
using USB)
Barcode scanner
Transponder scanner
Printer - a separate power supply is needed.
Note: The interface may be connected to a USB port by using an optional USB-RS232
converter.
4.6 Interface USB (Figure 2/12)
Connection to a USB connector to communicate with the PC via a virtual Com
interface. The driver of FTDI has to be installed and is available on the CD which
comes with the tester. This took place during the installation of the software.
4.7 Test sockets (Figure 2/4)
Connection for a USB plug to connect a USB memory stick, a HID barcode, a
transponder reader or a keyboard.
NOTE!!!
When connecting a faulty appliance to the test socket a hazardous voltage may
occur when mains is applied on accessible conductive parts not connected to the
protective earth and on the housing if the protective earth is out of order.
4.8 Keyboard and Display
The keyboard allows an easy way to perform all tests and the display shows all
results.