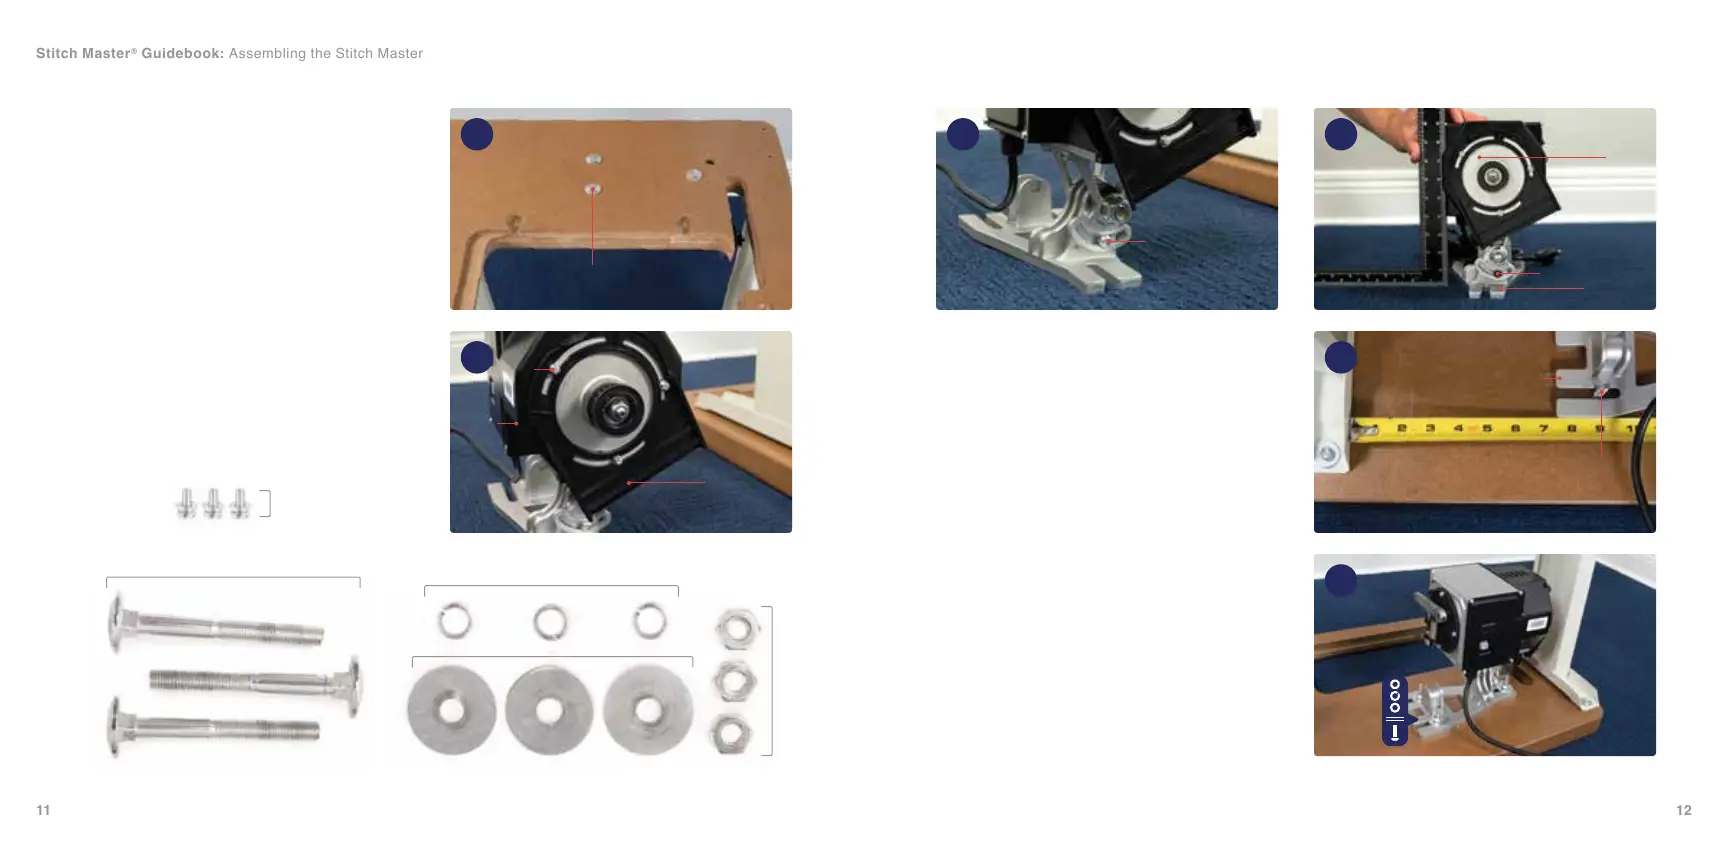
4. Loosen the pivot screw (E) on the
Workhorse Servo Motor (14). When the
motor bracket (F) is placed at on the
ground, the side of the Workhorse Servo
(C) should be perfectly vertical with the
ground. Use a Triangle or Square to set the
angle and tighten the pivot screw (E) (15).
5. Slip the Workhorse Servo (C) and motor
bracket (F) onto the three carriage bolts
(A). Use a tape measure to measure 7-1/4
inches to the inside of the table leg from
the motor bracket (16). Once in the desired
position, drop one washer (G) onto each
carriage bolt (A), then a lock washer (H),
and nally thread on a nut (I).Tighten each
with crescent wrench or a 14mm deep
socket wrench (17).
6. Flip the table so that it is upright before
continuing to the next step.
Tabletop Motor Attachment
1. Use a mallet or hammer to pound the three
carriage bolts (A) into the three through-
holes in the tabletop (12).
2. Flip the table over again, legs up.
3. Within the motor box nd the plastic belt
cover and its mounting bracket. Secure
the belt bracket (B) to the end of the
Workhorse™ Servo Motor (C) using the
three small screws (D). Orient the bracket
as shown using the screw locations in the
slots as a reference (13).
15
16
17
1412
13
Hardware is scaled 50%
A
D
I
H
G
A
B
D
E
C
C
F
F
A
E
Stitch Master
®
Guidebook: Assembling the Stitch Master