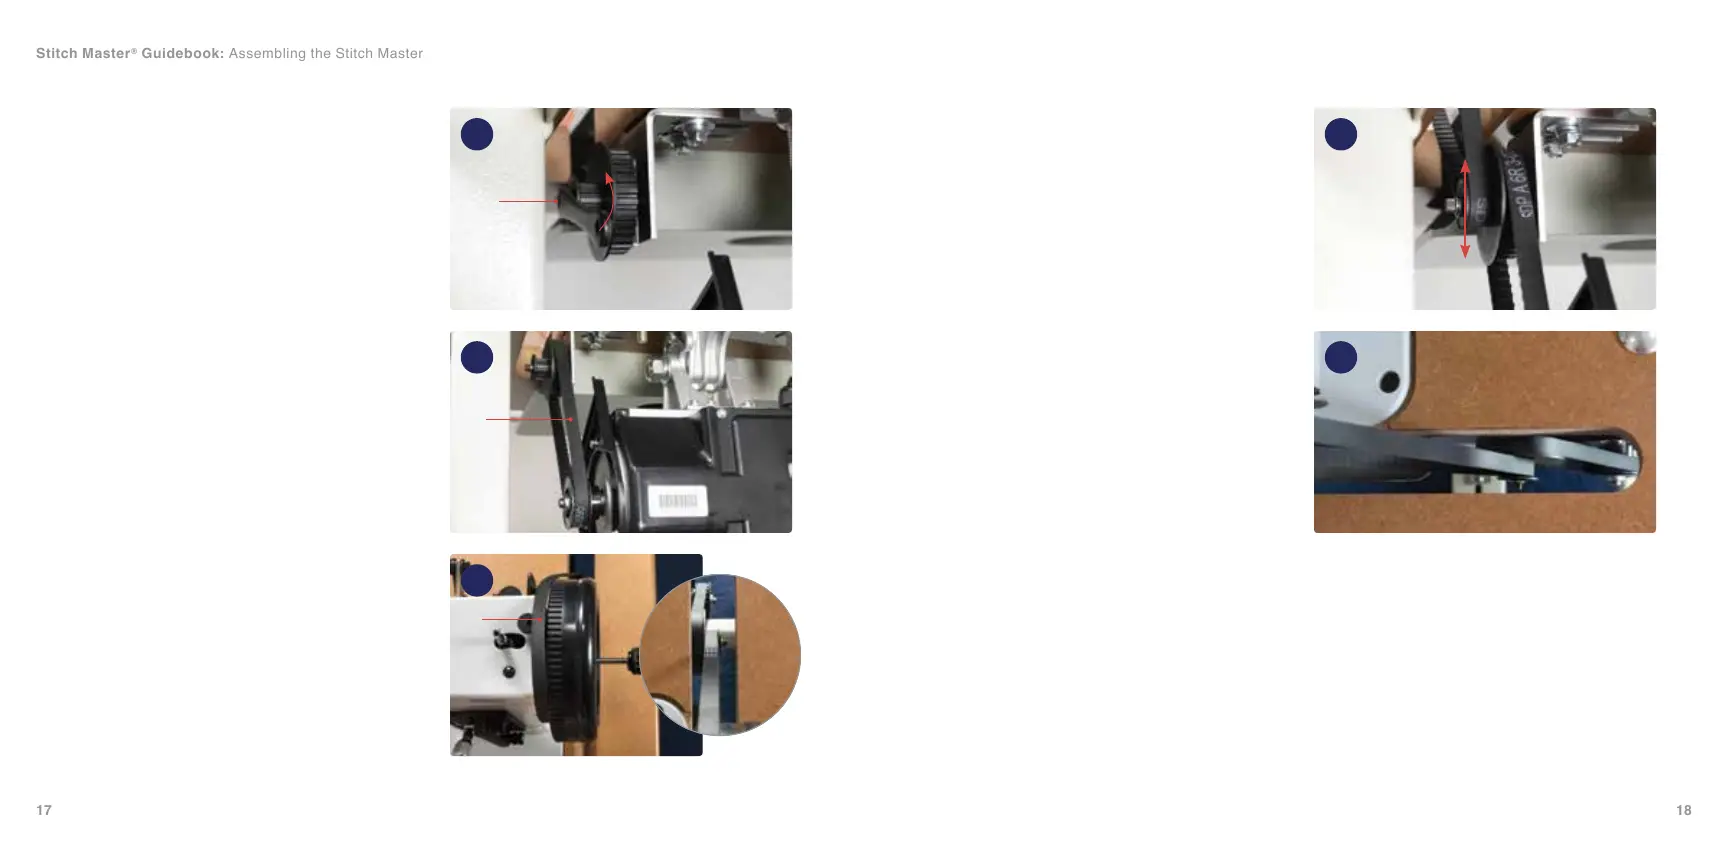
Installing Timing Belts
1. Find the long and short timing belts (A &
B) and box end wrench in the accessory
box. Use the box end wrench to loosen
the shaft of the idler pulley (C) so that
the pulley shaft will be able to move up
and down (29). Take the shorter timing
belt (B) and place it over the big pulley
of idler pulley (30) and around the motor
pulley. Then push the shaft and pulley up,
tensioning the belt and tighten with the box
end wrench.
2. Place the larger timing belt (A) over, and to
the left of, the Power Plus™ Flywheel (D).
Feed the belt through the belt slot and onto
the small pulley of the idler pulley (31).
Turn the Flywheel while guiding the belt
into place around the Power Plus wheel
from the inside (just like a bicycle chain).
Rotate the Power Plus Flywheel to make
sure that both belts are aligned correctly.
The position of the Idler Pulley L-bracket
and the Workhorse™ Servo Motor can be
adjusted for perfect alignment.
3. Check the tension of both timing belts by
pressing at the middle of each belt. There
should be equal tension between the two
belts. If one is more loose, use the box
end wrench to loosen and tighten the idler
pulley accordingly (32).
4. To check the belts at speed plug in the
Workhorse Servo Motor and turn on the
motor by toggling the power switch. Press
the treadle to make sure the Power Plus
Flywheel is rotating from the top toward
you. Both timing belts (A and B) should
track without side-to-side movement and
be well clear of the belt slot edges (33).
The needle will not move since the Posi-
Pin
®
is not yet in the engaged position.
If you nd you need to change the motor
rotation, the steps below will assist you.
30
32
31
33
29
C
B
A
D
A
B
Stitch Master
®
Guidebook: Assembling the Stitch Master