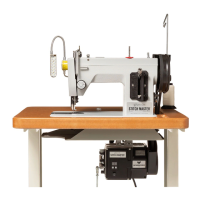
Stitch Master Specifications
Max. Sewing
Speed
Stitch-by-Stitch up to 412
stitches/minute
Shuttle
Oscillating (Cam/Rocker Arm
Driven)
Max. Straight
Stitch Length
6mm
Needle Bar Stroke 34mm
Needle System 135 x 17, 135 x 16
Bed Size 14.5" x 7"
Underarm Space 7" x 4.5"
Presser Foot Lift 3/8" (0.375")
Bobbin Size
Class 15/ Style A (20.5mm
Dia. x 10.8mm H)
Needle Size Range #10-22
Thread Range Home Sizes to V-92 (T-90)
Voltage
110-120V or 220-240V (check
motor to conrm voltage)
H.P. 0.75
Power 550W
Power
Consumption
4.5 amps
Motor RPM 4,500
Speed Control Digital
Motor Dimensions
(Bracket Included)
9.75" L x 9" H x 6" W
Workhorse™ Servo Motor Error Codes
ERROR CODE (WILL SHOW
ON LED DISPLAY)
SOLUTION
“E1”: Operational failure
Machine is locked. Check to see if the machine
is difcult to turn by hand with the Power Plus™
Flywheel. Remove material and attempt to operate,
if it works, material was too heavy for motor.
“E2”: Over current or under voltage
Check the power source to ensure that the motor
voltage matches the outlet voltage.
“E3”: The board cannot read the parameter.
Turn the power off and on twice, and try again. If the
problem still occurs, contact Sailrite
®
.
“E4”: Hall signal error
Replace the main fuse. To do this, turn off and
unplug the motor, remove the front external plastic
cover and replace the main fuse with one of the
extras sent with the motor. If the problem continues
to persist, please contact Sailrite.
“E5”: Needle position problem
1. Press and release the “S” button and the LED
display will change to “P.”
2. Press the “P” button 2 times and the display will
changes to “n1.”
3. Press the “S” button and the display will change
to “1.”
4. Press the “S” button again and the display will
change to “0” (disable needle positioner).
5. Press the “P” button to save the value.
6. Turn the power off and then on again to complete
the programming.
Stitch Master
®
Guidebook: Specifications