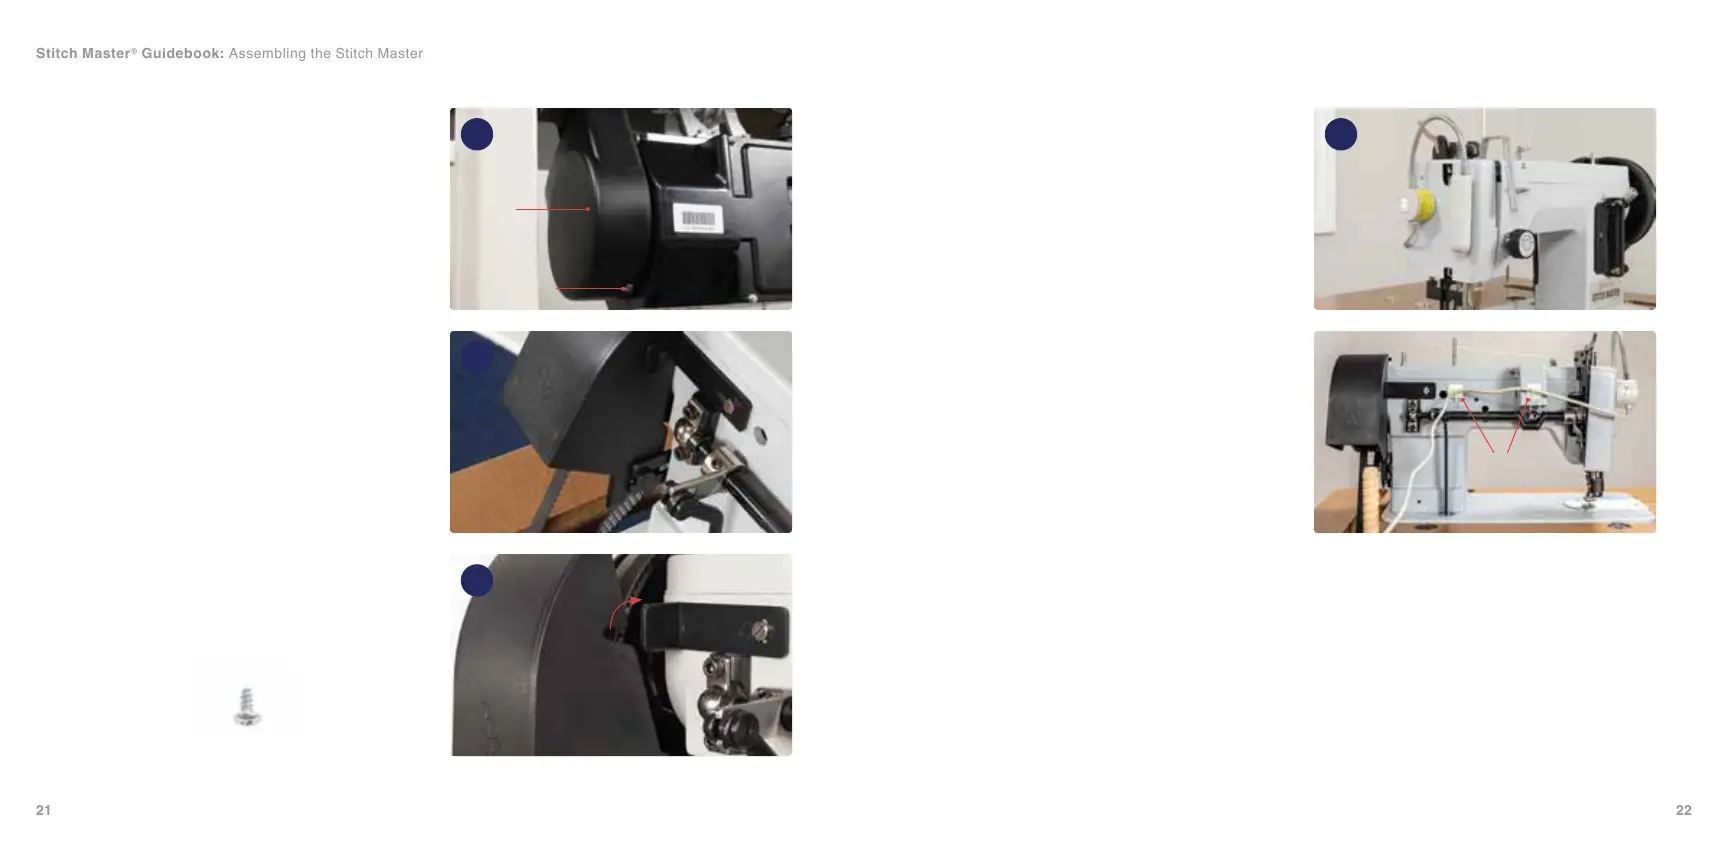
Install Motor Cover
and Belt Cover
1. Find the motor belt cover (A) and the
included small screw (B). Slide the motor
cover (A) over the belt bracket on the
Workhorse™ Servo Motor. Thread the
small screw (B) through the hole in the
motor belt cover and tighten with a #1
Stubby Phillips screwdriver to connect it to
the motor bracket (36).
2. The nal belt cover part (C) has a pointed
forked end that will slide between the
washer and the black bracket (37). The
keyway cut on the belt cover (C) will lock
onto the shaft of the key of its mating
component (38).
Install Light and Wire
1. To attach the LED light, place the magnetic
light in your desired location (39). If it is
a 110-volt sewing machine, the light will
plug into the back of the Workhorse Servo
Motor. If it is a 220-240 volt machine, the
light will plug into a wall outlet.
2. Use the included adhesive pieces and
wire ties (D) to secure the light cord in
your desired locations. Make sure to keep
the cord out of the way of any machine
moving parts.
36
37
38
39
Hardware is scaled 50%
B
A
B
C
C
D
Stitch Master
®
Guidebook: Assembling the Stitch Master