CUSTOMIZATION OF SETTINGS
Revised 5/19/2010 3.1
General Information
The four Tissue-Tek
®
AutoTEC
®
main tabbed screens
(MONITOR, UTILITIES, ERROR LOG, and RUN
HISTORY) are shown in the following figures.
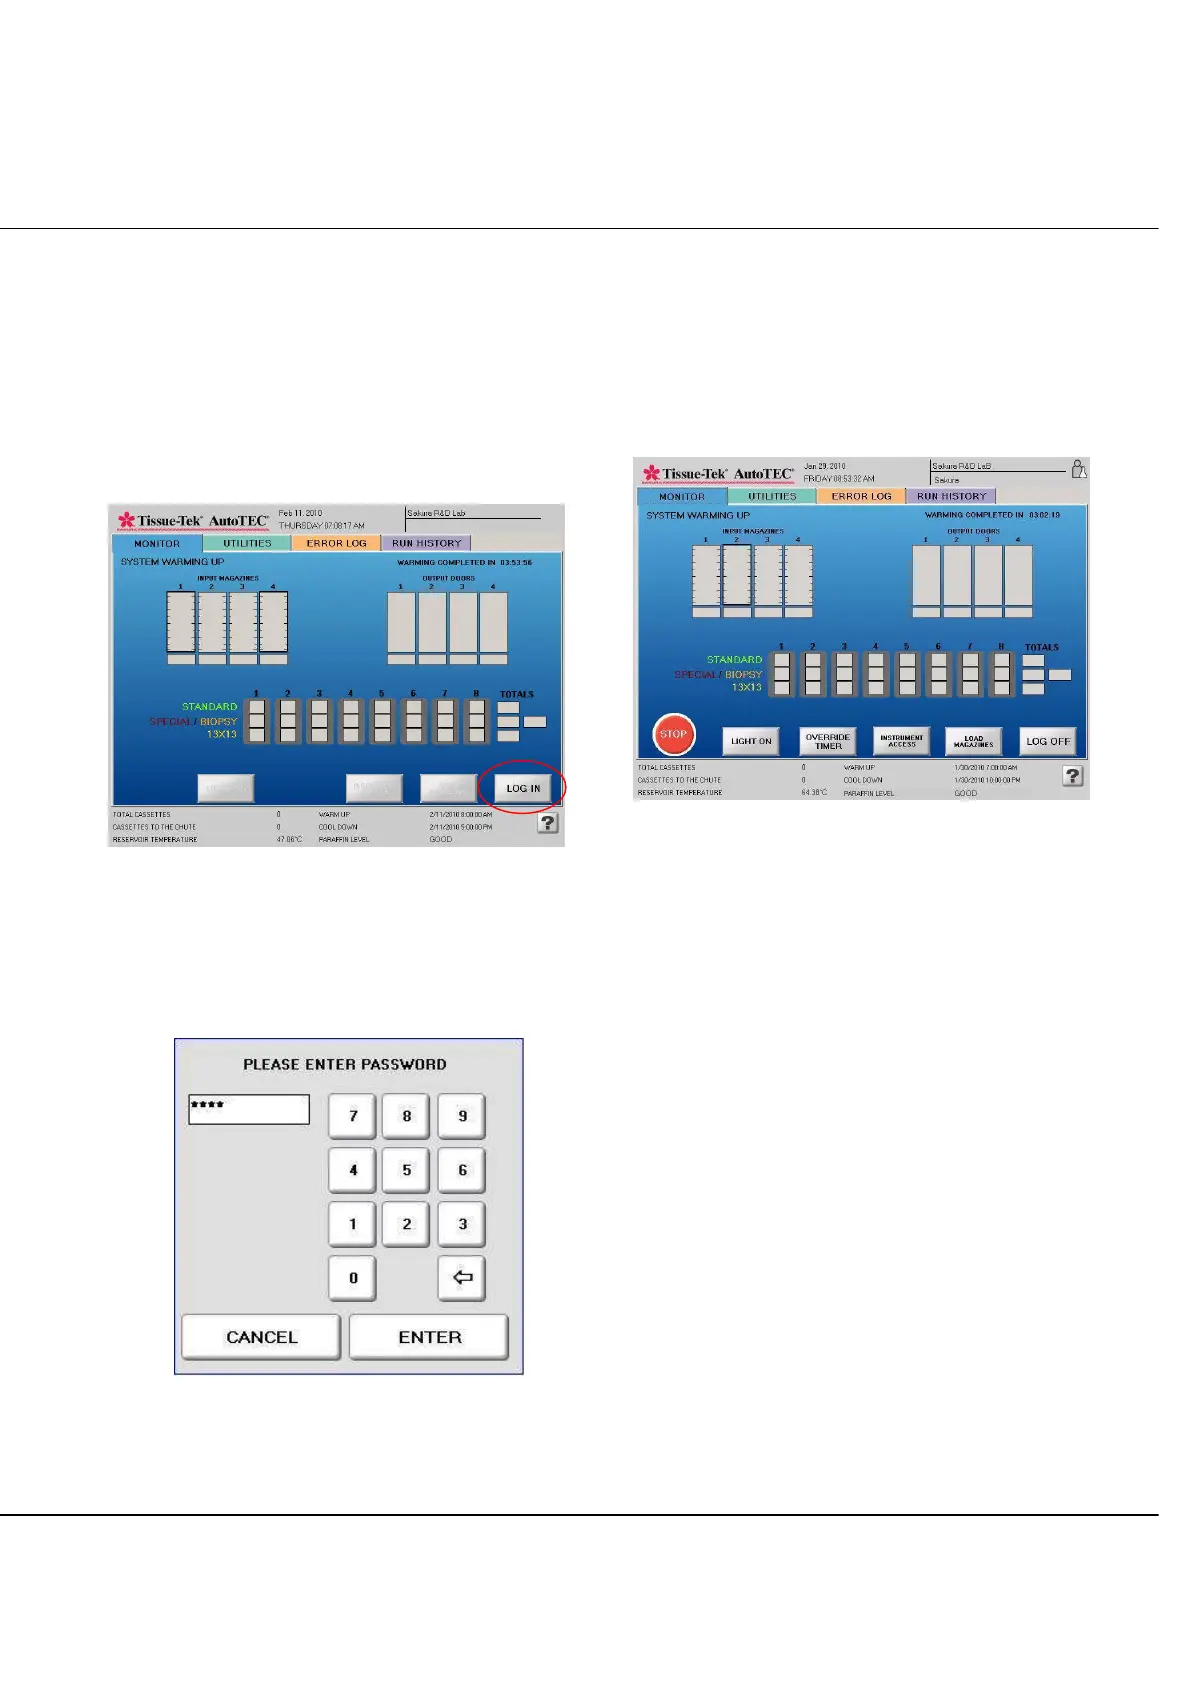
Before a user logs in, only the MONITOR screen is
available for viewing the status of the instrument with all
buttons disabled (grayed out) and tabs not functioning
(Figure 3-A).
Figure 3-A
To log in to the AutoTEC, press the LOG IN button on the
MONITOR screen to access the Enter Password keypad.
Type in the password followed by pressing the ENTER
button to log in (Figure 3-B).
After a successful log in, display screens can be changed
by selecting the tab for each screen and buttons are
enabled to allow the initiation of the embedding process.
MONITOR Screen
Monitor screen is displayed when the MONITOR tab is
selected (Figure 3-C).
Figure 3-C
− Time and date are displayed at the top center of the
screen.
− Institution name and the current logged in user name
are displayed at the top right corner of the screen.
− Tabs to allow screen changes between MONITOR,
UTILITIES, ERROR LOG, and RUN HISTORY.
(There is a SERVICE mode which is only shown with
Service level log in).
− Graphical representation of Input Doors and Output
Doors area. There are individual counters for the
number of cassettes in the Input Doors and the
number of embedded blocks in the Output Doors.
− Graphical representation of the Base Mold area with
individual counters for each of the 6 cassette types.
(Standard, Biopsy, Orientation, Core Biopsy, Shaved
Biopsy, and 13x13).
Figure 3-B
 Loading...