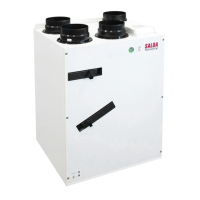
EN | 35SMARTY v2023.1
6LQFHWKHSUHKHDWHUPXVWEHFRQQHFWHGDFFRUGLQJWRWKHIDFWRU\VHWWLQJVWKHVHWWLQJVVKRXOGEHFKDQJHGLQWKHHQYLURQPHQWRIWKH0%*DWHZD\
WEB application service or on the ST-SA-Control panel.
SETTINGS IN THE ENVIRONMENT OF THE MB-GATEWAY WEB APPLICATION SERVICE
&KDQJHWKHVHWWLQJVDVIROORZV
• 6HUYLFHSDVVZRUG
• Service > Heaters > Heater and pre-heater position;
• 6HOHFWHLWKHUWKHKHDWHURUSUHKHDWHUWREHVZLWFKHGRQWKH0LQL0&%EDVLF
1
For the Stouch control panel, changing of the settings is not possible
• Service > Digital inputs > Heater protection inputs
Set the manual and automatic protection device modes of the heater or pre-heater (NC by default).
• Service > Heaters > Supply air heater or outdoor air pre-heater
6HWHLWKHUDKHDWHURUSUHKHDWHUDQGWKHW\SHRIWKHKHDWHURUSUHKHDWHUDVZHOODVWKHVWHSVWREHSHUIRUPHGLQFDVHRISURWHFWLRQVLJQDODFWLYDWLRQ
SETTINGS WITH THE ST-SA-CONTROL PANEL
*RWR0HQX6HUYLFH+HDWHUV(QWHUWKH6HUYLFHSDVVZRUGWKHLQLWLDOSDVVZRUG±
6HOHFW&RQWURO3RVLWLRQDV+HDWHURQEDVLFRU3UHKHDWHURQEDVLF
3. Go to Menu / Service / Heaters / Heaters and set the heater type
• 9'&±FRQWURO
• 212))±2Q2ႇFRQWURO
• 1RQH±KHDWHUVZLWFKRႇDQGDOVRVSHFLI\WKHV\VWHPUHVSRQVHSURWHFWLRQVLJQDO
*RWR0HQX6HUYLFH+HDWHUV3UHKHDWHU6HWW\SH¶9'&¶FRQWURO¶212))¶2Q2ႇFRQWURO¶1RQH¶±SUHKHDWHUVZLWFKRႇ6HWWKH
system response protection signal.
5. Go to Menu / Service / Digital inputs / Heater protection. Set the manual and automatic protection device modes (NC by default).
6. Go to Menu / Service / Digital inputs / Preheater protection. Set the manual and automatic protection device modes (NC by default).
Pre-heater installation diagram
Installation based on air direction Air Damper M2 > Pre-Heater PE1 > Air Handling Unit.
2QO\SUHKHDWHUVZLWKXSWRN:SRZHUFLUFXLWFDQEHFRQQHFWHGGLUHFWO\WRWKHFRQWUROERDUG7KHSUHKHDWHUVRIKLJKHUSRZHUPXVWEHFRQQHFWHG
WRVHSDUDWHHOHFWULFSRZHUFLUFXLW
Heater Installation Diagram
(OHFWULFKHDWHUPXVWEHLQVWDOOHGLQVLGHWKHDLUGXFW7KHOD\RXWLVEDVHGRQDLUÀRZGLUHFWLRQELECTRIC HEATER > SUPPLY AIR SENSOR (TJ).