34
6
INSTALLATION & OPERATION
Warning!
This unit will be damaged if the battery is connected in reverse polarity.
ENSURE that the battery + and - wires are correctly connected before proceeding.
Damage due to reverse battery connection is not covered under warranty!
Installation Steps
This section provides a brief overview of how to get started using the SCC-30AB
controller. However, please review the entire manual to ensure best performance and
years of trouble-free service.
Notes:
• The SCC-30AB prevents reverse current leakage at night through an internal
MOSFET Switch, so an external Blocking Diode is not required in the system.
• The connector terminals will accept a maximum wire size of AWG #10 (up to 5.2
mm2).
• Tighten each terminal clamping screw to 20 inch-pounds of torque.
• The SCC-30AB is designed to regulate power from a PV array. Other chargers can
be connected directly to the battery, however, with no effect on the SCC-30AB.
Steps
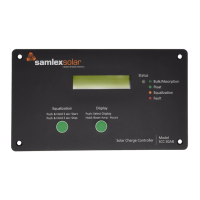
1. As explained earlier in Chapter 4, SCC-30AB is designed for ush mounting on a wall
panel. It has a face plate and a projecting part at the back consisting of the PCB with
the Terminal Strip, connector for the Battery Temperature Sensor (BTS) and the DIP
switches. The wall / panel will be required to be cut to accommodate the projections
of the circuit board mounted on the back of the faceplate. All the wiring – 2 wires
from the Solar Array, 2 wires to the battery and 2 wires to the Battery Temperature
Sensor (if used) will be led to the connections at the back of the unit from behind the
wall / panel. Make sure that the pocket created behind the cut-out in the wall / panel
is clear so that the back portion carrying the PCB is not damaged when the unit is
pushed back into the cut-out section of the wall / the panel for ush mounting.
The front face plate of the SCC-30AB acts as the heat sink for the heat dissipating components
mounted on the PCB at the back of the Front Panel face plate. Hence, please ensure that the
Front Panel face plate is not located near a heat generating source and that there is adequate
cooling air ow across the face plate to remove the heat dissipated from its surface.
A drawing for making the cutout in the wall / panel is given at Fig 6.1 (not to scale). A
full scale template is also included in the gift box to help direct marking the area to be
cut out. 4 screws have been provided to x the unit to the wall / panel.