36
6
INSTALLATION & OPERATION
6. Connect the Solar Panel (Module)/Array next. The green LED indicator will light if
the Solar Panel (Module)/Array is connected during the daytime and the Solar Panel
(Module)/Array is wired correctly.
• Remember that the Solar Panel (Module)/Array will generate power whenever in
sunlight. Also, be careful not to short circuit the Solar Panel (Module)/Array while
connected to the controller, since this will damage the controller.
7. For most effective surge protection, it is recommended that the Negative system
conductor be properly grounded.
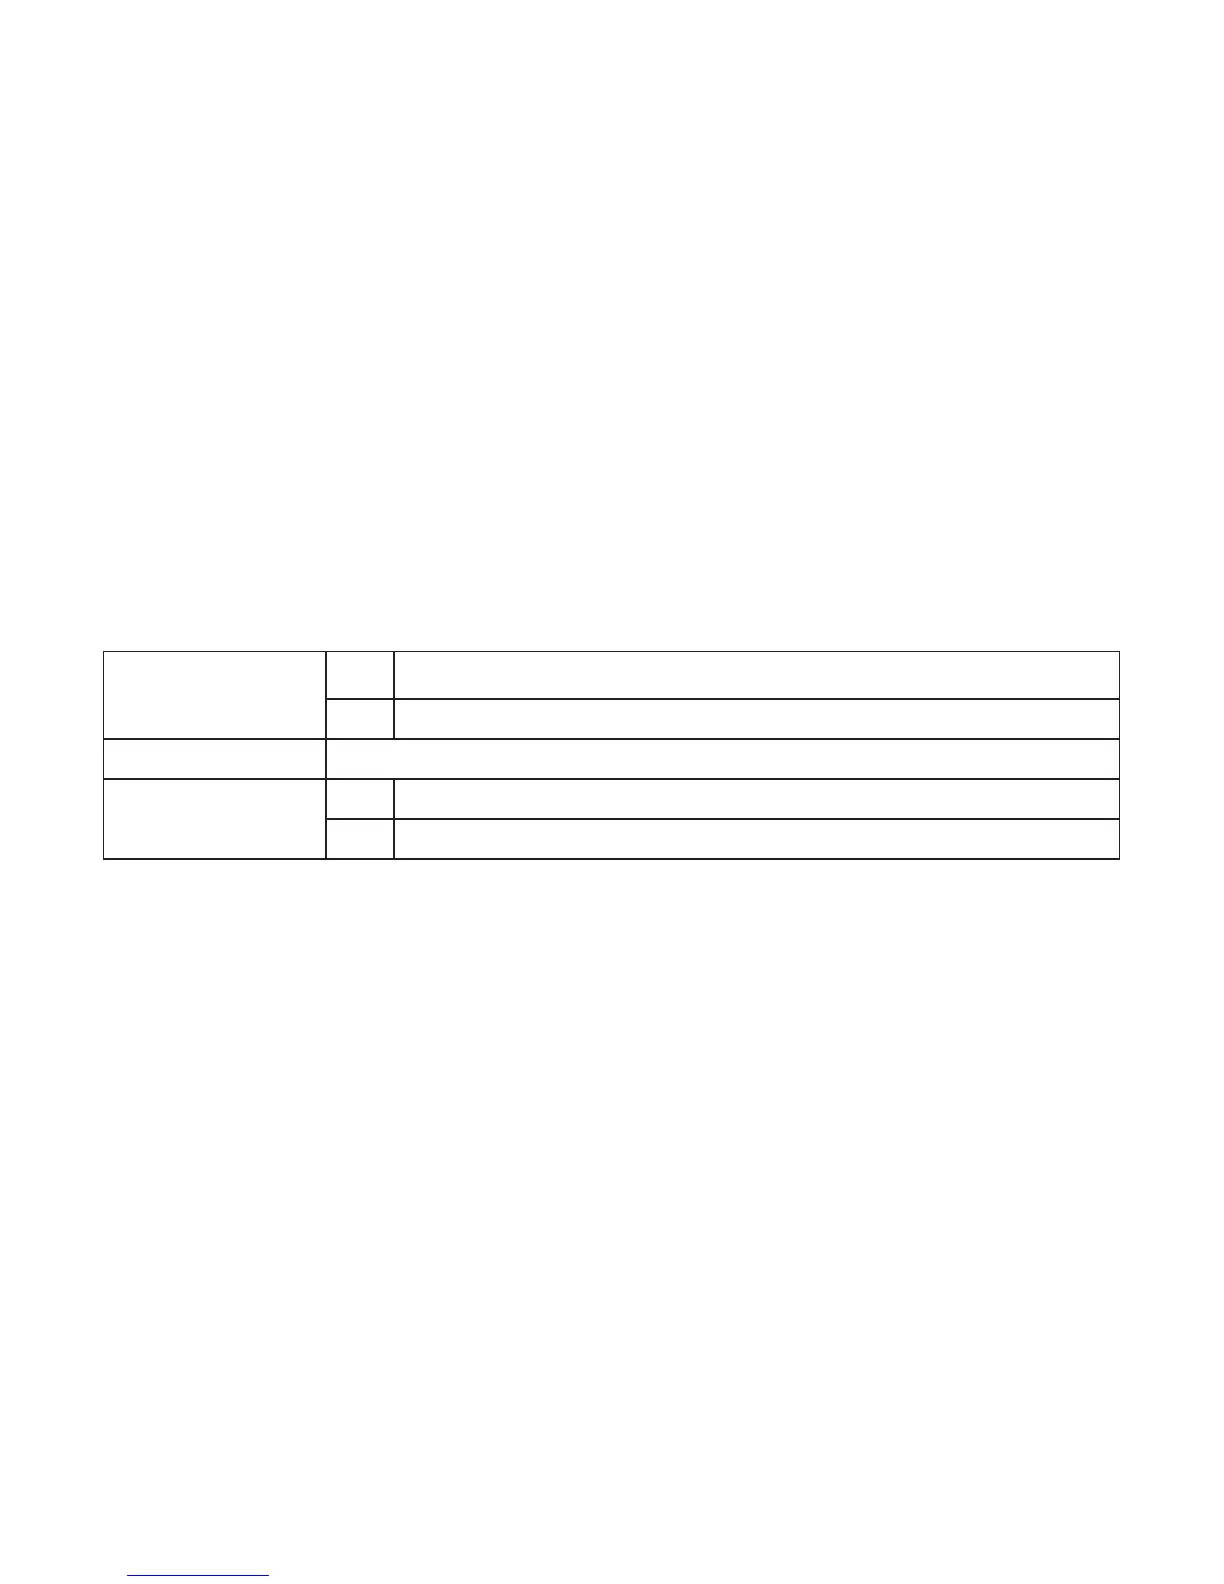
Dip Switch Settings
Five DIP Switches permit the following parameters to be adjusted at the installation
site:
DIP Switch 1
ON* Selection of battery voltage for 12V system
OFF Selection of battery voltage for 24V system
DIP Switch 2, 3, 4 Battery charge control mode: Battery charging algorithm (see Table 6.1)
DIP Switch 5
ON Selection of Auto Equalization
OFF* Selection of Manual Equalization
*NOTE: Factory preset condition
Battery Charging Notes
The SCC-30AB manages many different charging conditions and system
congurations. Some useful functions to know are given below.
Solar Overload: Enhanced radiation or “edge of cloud effect” conditions can
generate more current than the controller’s rating. The Budget will reduce this
overload up to 130% of rated current by regulating the current to safe levels. If the
current from the solar array exceeds 150%, the controller will interrupt charging.
Battery Types: The SCC-30AB’s standard battery charging programs are suitable for
a wide range of Lead-Acid battery types. These standard programs are select by DIP
Switch 2~4.