EB 8222-1 EN 9-5
Service and conversion work
9.5 Service work
Î Before performing any service work,
preparations must be made to the control
valve (see section9.2).
Î After all service work is completed, check
the control valve before putting it back
into operation (see the 'Installation' sec-
tion > 'Testing the installed valve').
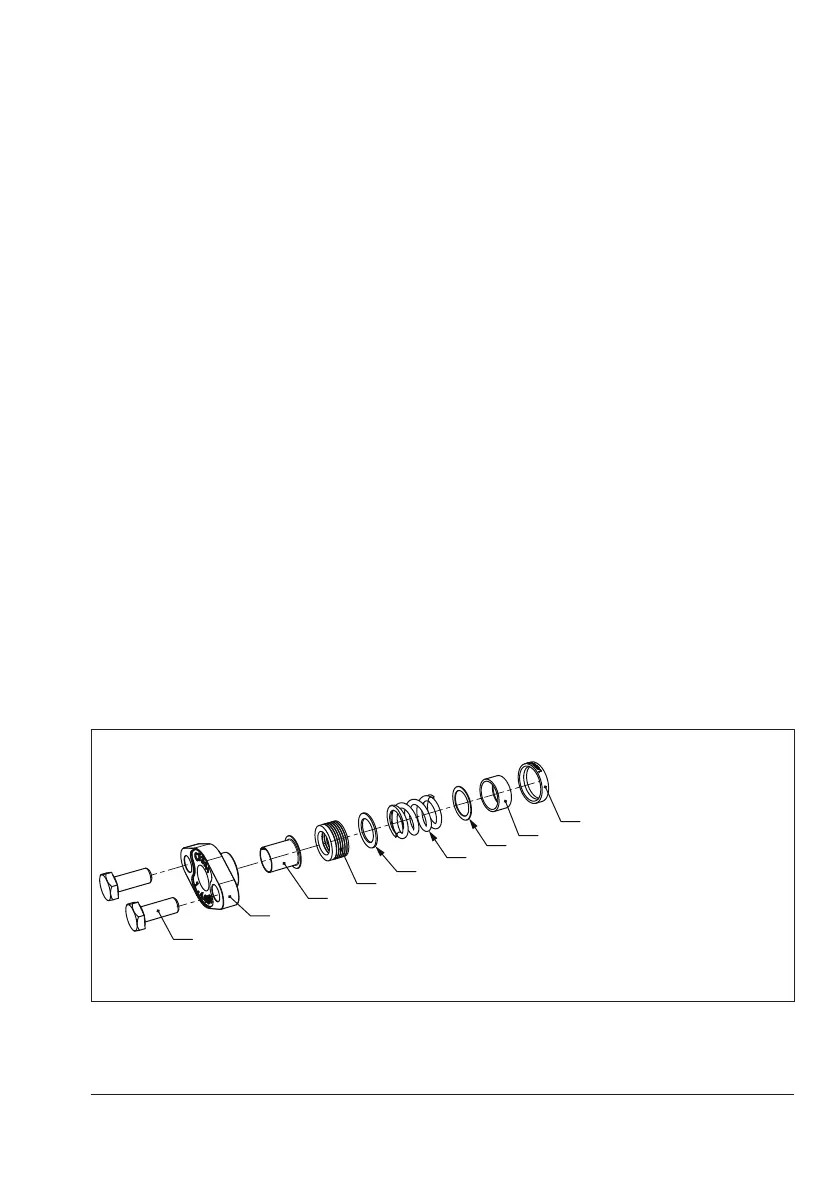
9.5.1 Replacing the packing
See Fig.9-2 and Fig.9-3
The segmented ball valves are tted with a
V-ring packing to seal the valve shaft.
a) Standard version
1. Undo the bolted connection (60 or 65,
75). Lift off the packing gland (15) and
the bearing bushing (17).
2. Clean the packing gland (15) and the
bearing bushing (17). Apply lubricant to
the inside diameter of the packing gland
(15) and insert the bearing bushing (17)
from below into the packing gland.
3. Pull the entire packing parts (35, 40, 20,
10, 24, 49) out of the packing chamber
using a suitable tool.
4. Clean the packing chamber thoroughly.
5. Apply lubricant to each V-ring before
adding it to the new packing (40).
6. Apply lubricant to the inside and outside
diameters of the packing (40).
7. Push the ring (35) over the valve shaft
(12) into the valve body. Make sure the
proper alignment is achieved by paying
attention to the beveled part (see
Fig.9-3).
8. Mount the spacer (49) in such a way that
it covers the shoulder of the valve shaft
(12). Make sure the proper alignment is
achieved by paying attention to the bev-
eled part (see Fig.9-3).
9. Slide the rst sliding washer (24), spring
(10) and the second washer (20) into the
packing chamber.
15
17
40
20
10
24
49
10 Spring
15 Packing gland
17 Bearing bushing
20 Washer
24 Sliding washer
35 Bushing
40 V-ring packing
49 Spacer
60 Screw
Fig.9-2: Packing