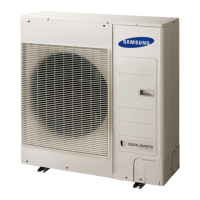
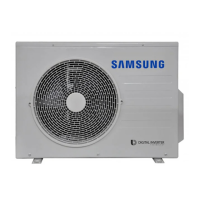
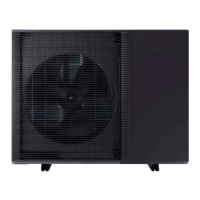
This manual provides a quick guide for the installation and setup of the Samsung HTQ R32 Monobloc heat pump system, specifically designed for use with third-party controls. The system is primarily intended for heating via a buffer tank and domestic hot water (DHW) production using a cylinder with a sensor pocket and immersion heater. It supports one heating circuit, which is controlled by a third-party programmable temperature controller.
Function Description:
The Samsung HTQ R32 Monobloc unit is a heat pump system designed to provide both space heating and domestic hot water. In the described setup, the monobloc unit's functions are managed by its own external controller (MIM), which is intended for technician use only, not for the end user. The end user interacts with the system through wired or wireless room thermostats to set the desired room temperature and control heating demand.
For domestic hot water, the heat pump directly controls the water temperature, including an optional sterilization cycle, utilizing a 3-port valve. Hot water production takes priority over space heating when the ambient temperature is above 0°C. The hot water control is specifically managed through the Samsung controller (MIM). It's important to note that the monobloc unit itself does not contain an electric heater.
The system requires a flow sensor to be installed, which is crucial for proper operation. A PWM (Pulse Width Modulation) pump must also be installed to allow the heat pump to control its differential temperature (DT). For system protection and longevity, a magnetic filter and strainer should be fitted in the return pipework, along with a suitably sized expansion vessel and safety relief valve.
Important Technical Specifications:
The manual provides specific minimum flow rates and recommended flow rates for different models, along with minimum water content requirements:
- AE080BXYDEG: Minimum flow rate to operate: 7 lpm*; Recommended flow rate: 22.8 lpm; Minimum water content: 30lt.
- AE120BXYDEG: Minimum flow rate to operate: 7 lpm*; Recommended flow rate: 34.2 lpm; Minimum water content: 50lt.
- AE140BXYDEG: Minimum flow rate to operate: 7 lpm*; Recommended flow rate: 40.2 lpm; Minimum water content: 50lt.
(*lpm = litres per minute; lt = litres)
Power supply specifications are also detailed:
- AE080BXYDEG: Max Fuse Size: 28.6 amp*; Min Circuit Amps: 26 amp*.
- AE120BXYDEG: Max Fuse Size: 35.2 amp*; Min Circuit Amps: 32 amp*.
- AE140BXYDEG: Max Fuse Size: 35.2 amp*; Min Circuit Amps: 32 amp*.
(*All cable and breaker sizes should be checked by a NICEIC accredited electrician.)
The internal MIM unit requires a 20Amp supply when the tank booster heater is connected, necessitating a suitably sized 4mm² cable. Communication cable and electrical supply should be kept separate (at least 50mm apart). The communication cable should be a 0.75mm², 2-core screened cable, earthed at the outdoor unit.
Usage Features:
The system is designed for user-friendly control through external room thermostats. The internal MIM controller is primarily for technician setup and diagnostics.
Starting Up the Unit for the First Time:
- Turn on power to the internal MIM unit first, then the external unit.
- The outdoor unit and internal controller will flash (scanning) while connecting.
- Once scanning disappears, the system is ready for testing.
Setting the Heating to ON:
- Using the Left and Right arrows on the MIM controller, highlight the desired zone.
- Push the Power button to enable.
- The screen will display "0.0".
- Push OK to view flow temperatures.
- Use the return key to exit. (Note: "0.0" must be displayed for the heat pump to detect a run signal from the system).
Setting the DHW to ON:
- Using the Left and Right arrows, highlight "Domestic Hot Water".
- Push the Power button to enable.
- "DHW" will be displayed.
- To set the DHW temperature, push OK while "DHW" is highlighted.
- Use the up and down arrows to set the value.
- Push the OK button to set the mode (should be "Standard").
- Use the up and down keys to select "Standard" and push OK.
- Use the return key to exit.
Control Wiring:
The manual provides a detailed wiring diagram for the MIM wiring center. Key connections include:
- Flow Sensor (CN5057)
- Tank Sensor (CN3042)
- Remote Controller (F4)
- Outdoor Unit (F2)
- PWM Primary Pump Signal (CN5002)
- Room Stat
- 3kW Tank Booster Heater (230VAC 20A)
- DHW High Limit (NO/NC)
- 3-Way Valve
Maintenance Features:
The manual emphasizes several critical pre-start checks and warranty conditions that are essential for proper maintenance and system longevity:
- Magnetic Filter: A magnetic filter must be installed in the return pipe, close to the system inlet. The system should not be switched on without it.
- Power Supply: Power must be supplied to the unit for at least 8 hours before initial operation to heat the compressor sufficiently. Starting the compressor from cold can lead to expensive failure.
- Buffer Tank: A buffer tank is required to ensure a minimum primary water volume (30lt for 8kW unit, 50lt for 12/14kW). If a low loss header is used, a volumizing tank is necessary.
- Pipe Diameter: Pipe diameter should be no smaller than 28mm copper (or larger if plastic).
- Freeze Protection: Propylene glycol (Class 1 toxicity rating) or Anti-Freeze Valves (with BH installed) should be used. Freeze protection solutions must be pre-mixed to the correct strength and checked annually.
- Water Quality: Water quality must be tested against Samsung's requirements.
- Unit Siting: The unit must be sited on a suitable base capable of supporting its weight, with means for condensate disposal, and at least 100mm clearance underneath for snow build-up. Good airflow around the unit is crucial.
- Flushing: The system must be fully flushed in both directions at 110% of the required flow rate.
- Strainer: A suitable strainer must be fitted to protect the outdoor unit and should be checked after flushing. An external magnetic filter is also recommended.
- Glycol: Pre-mixed glycol should be added to the system; neat glycol should not be used as it can cause circulation issues.
- Venting: Ensure the system is vented of air and all isolation valves are open.
- Expansion Vessel & Safety Valve: A correctly sized expansion vessel and safety valve must be installed.
- Immersion Heater: When starting the unit in low ambient conditions (inlet water temp less than 10°C), the immersion heater should be used. The immersion heater thermostat should be set to maximum when used as a booster heater.
- Annual Service: The unit should be subject to an annual service by the installing contractor or an authorized service company to meet warranty conditions.
- Commissioning Sheet: A commissioning sheet, available for download from the Secon Renewables website, must be filled in and returned to Samsung within 28 days of commissioning.
Troubleshooting and Fault Codes:
The manual includes comprehensive tables for troubleshooting and fault codes, providing error codes, their meanings, and recommended actions. These cover issues ranging from communication errors and sensor malfunctions to compressor overloads and flow rate problems. For example, an E911 (Emergency stop) error related to flow issues requires checking the flow switch installation, flow rate (above 16 lpm), air removal, pump speed, zone valves, and flow switch/pump direction.