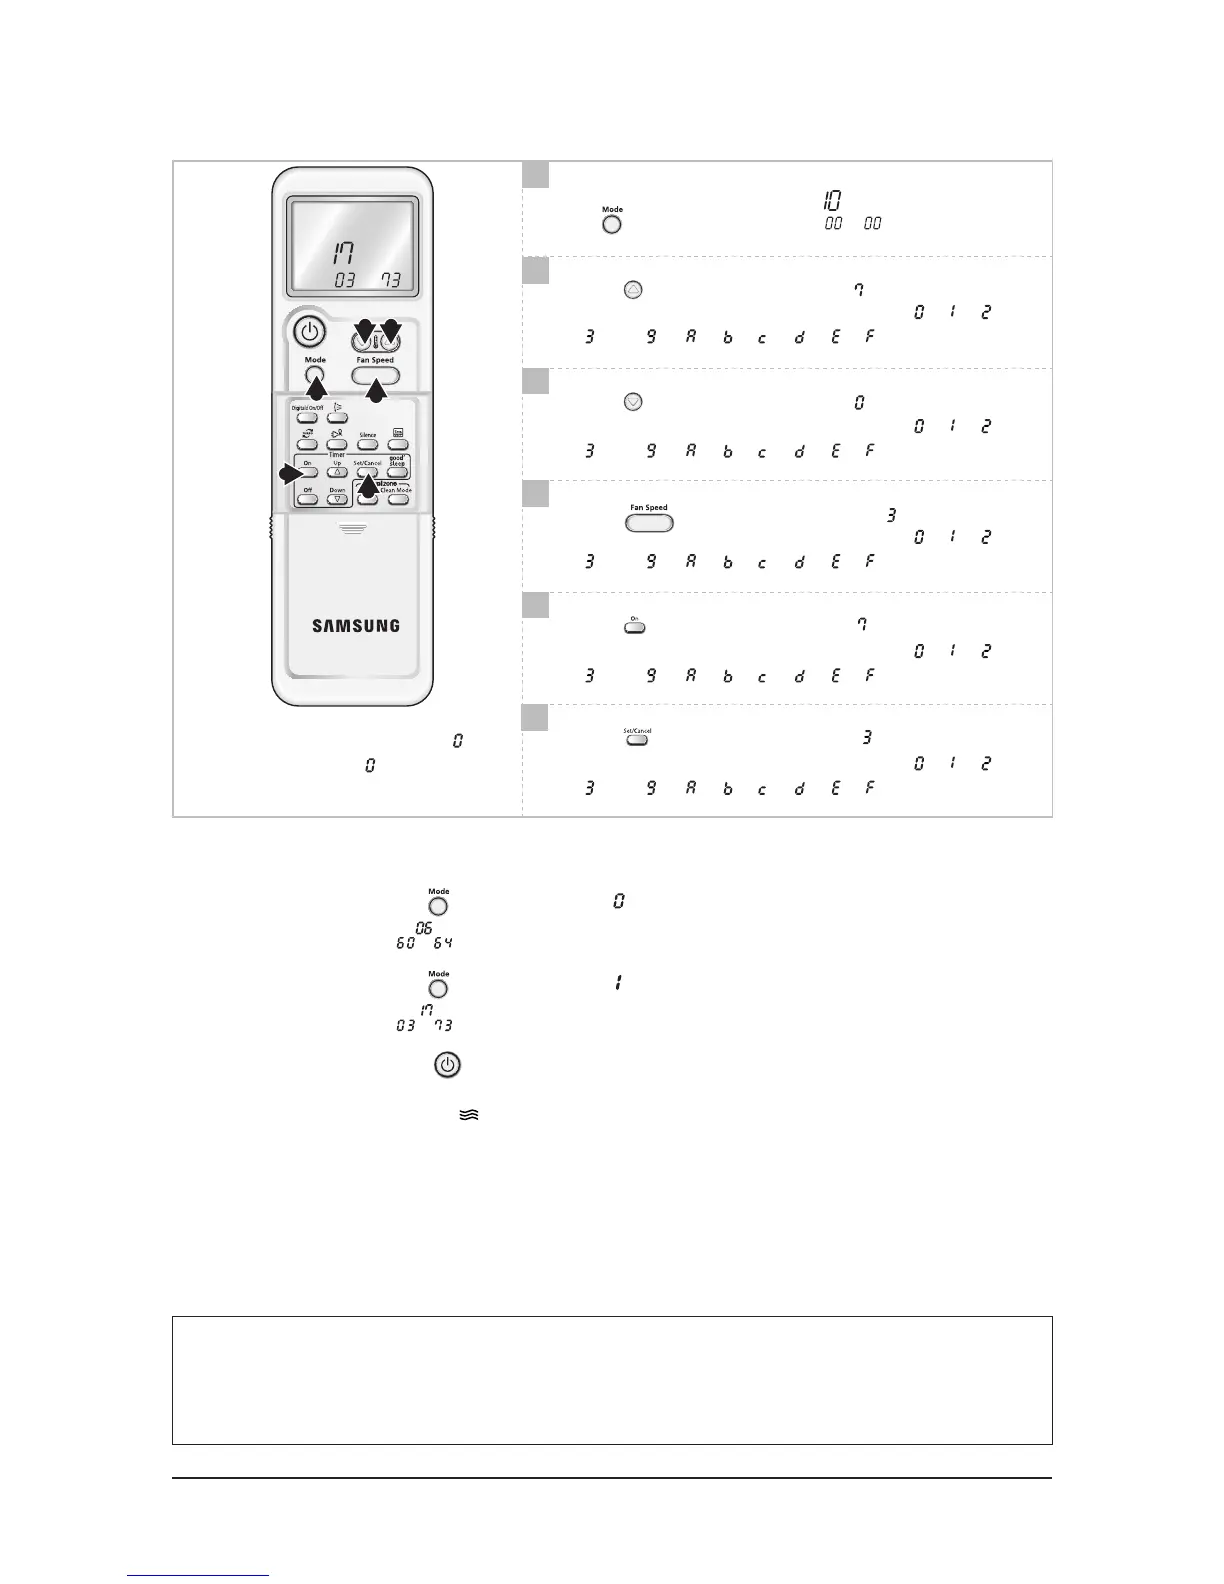
Alignment and Adjustments
Press button, then the default value is .
Push the button to set the display panel to
.
Every time you push the button, the display panel reads
. . . repeatedly.
Push the
button to set the display panel to
.
Every time you push the button, the display panel reads
. . . repeatedly.
Push the
button to set the display panel to
.
Every time you push the button, the display panel reads
. . . repeatedly.
Push the
button to set the display panel to
.
Every time you push the button, the display panel reads
. . . repeatedly.
Push the
button to set the display panel to
.
Every time you push the button, the display panel reads
. . . repeatedly.
1
7
Setting is not required if you must
a value which has a default.
8
9
10
11
12
Step 3 : Upon completion of the selection, check you made right selections.
Press the Mode Selection key,
to set the display part to and check the display part.
The display part shows .
Press the Mode Selection key,
to set the display part to and check the display part.
The display part shows .
Step 4 : Pressing the ON/OFF button
( )
When pressing the operation ON/OFF key with the direction of remote control for unit, the sound ’’Ding’’ or ’’Diriring’’
is heard and the OPERATION ICON( ) lamp of the display is flickering at the same time, then the input of option is completed.
(If the diriring sound isn’t heard, try again pressing the ON/OFF button.)
Step 5 : Unit operation test-run
First, Remove the battery from the remote control.
Second, Re-insert the battery into the remote control.
Third, Press ON/OFF key with the direction of remote control for set.
• Error Mode
1
st
If all lamps of indoor unit are flickering, Plug out, plug in power plug again and press ON/OFF key to retry.
2
nd
If the unit is not working properly or all lamps are continuously flickering after setting the option code, see if the
correct option code is set up for its model.
 Loading...