14
ASSEMBLED SPEAKER WALL MOUNT
You can use the wall mount bracket to mount this unit on a wall.
connections
Installation Precautions
• Install on a vertical wall only.
• For the installation, avoid a location with high temperature or humidity, or wall that cannot sustain the
weight of the set.
• Check the strength of the wall. If the strength of the wall is insufficient for the product installation, make
sure to reinforce the wall before the installation.
• Check the material of the wall. If the wall is made of plaster board, marble, or iron board, purchase and
use the appropriate fixing screws or mollys.
• Connect cables from the unit to external devices before you install it on the wall.
• Make sure the unit is turned off and unplugged before you install it. Otherwise, it may cause an electric shock.
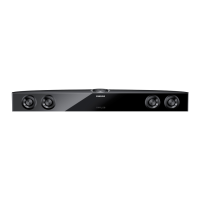
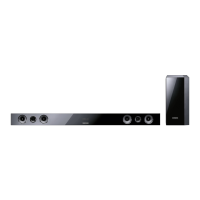
4. Then, fit the unit into the corresponding slots of the wall
mount bracket. For secure installation, make sure the
mounting studs slide firmly down into the bottom of the
slots.
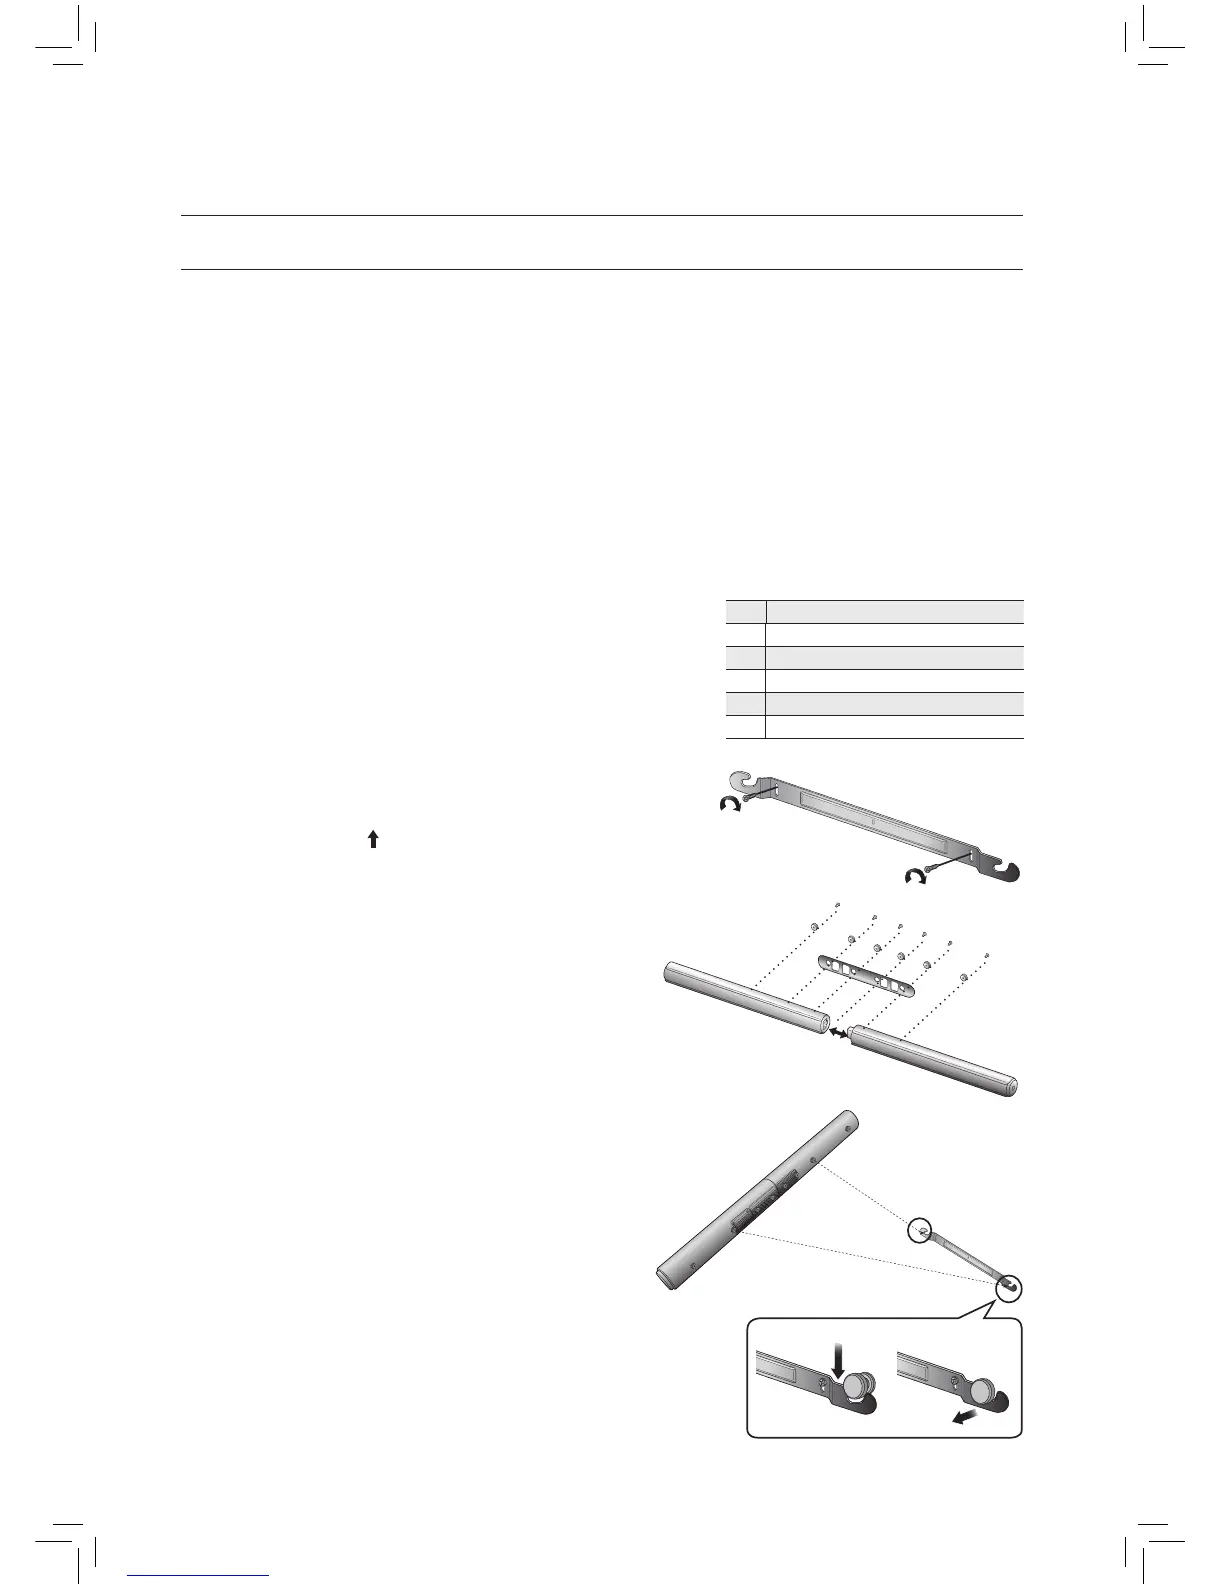
1. Place the F on a wall surface
and then secure it with two
screws (not supplied).
If you are hanging the unit below a TV, be
sure to install the
F so that the arrow ( ) is placed in the center of the TV.
Also make sure the unit is at least two inches (5 cm)
below the TV.
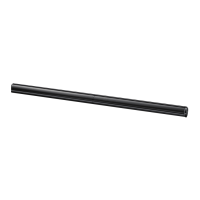
2. Assemble the MAIN SET A and B.
A
MAIN SET (RIGHT)
B
SPEAKER (LEFT)
C
BRACKET-BRIDGE
G
HOLDER-SCREW
E
SCREW
F
HOLDER-WALL-HORIZONTAL
F
3. Attach C to the rear side of connected A and B.
Check and align screw holes on the rear side of MAIN
SET and C, fix screws from G to E.
E
G
C
B
A
1 2