English 7
Display function
You can view all functions available on the display,
adjust the brightness of the display and select the
Display/LED either on or off.
Each time you press the DISPLAY button on the
remote control, the display mode will change as fol-
lowing:
◆
The Demo function
All functions available on the system appear on the
front panel display.
◆
The Dimmer function
The Dimmer function is selected and the display
darkens.
◆
LED OFF
The LED is turned off while the dimmer function
is working.
◆
Clock ON
The Clock you set is displayed.
◆
LED/Display ON
ALL Display and LED turned on.
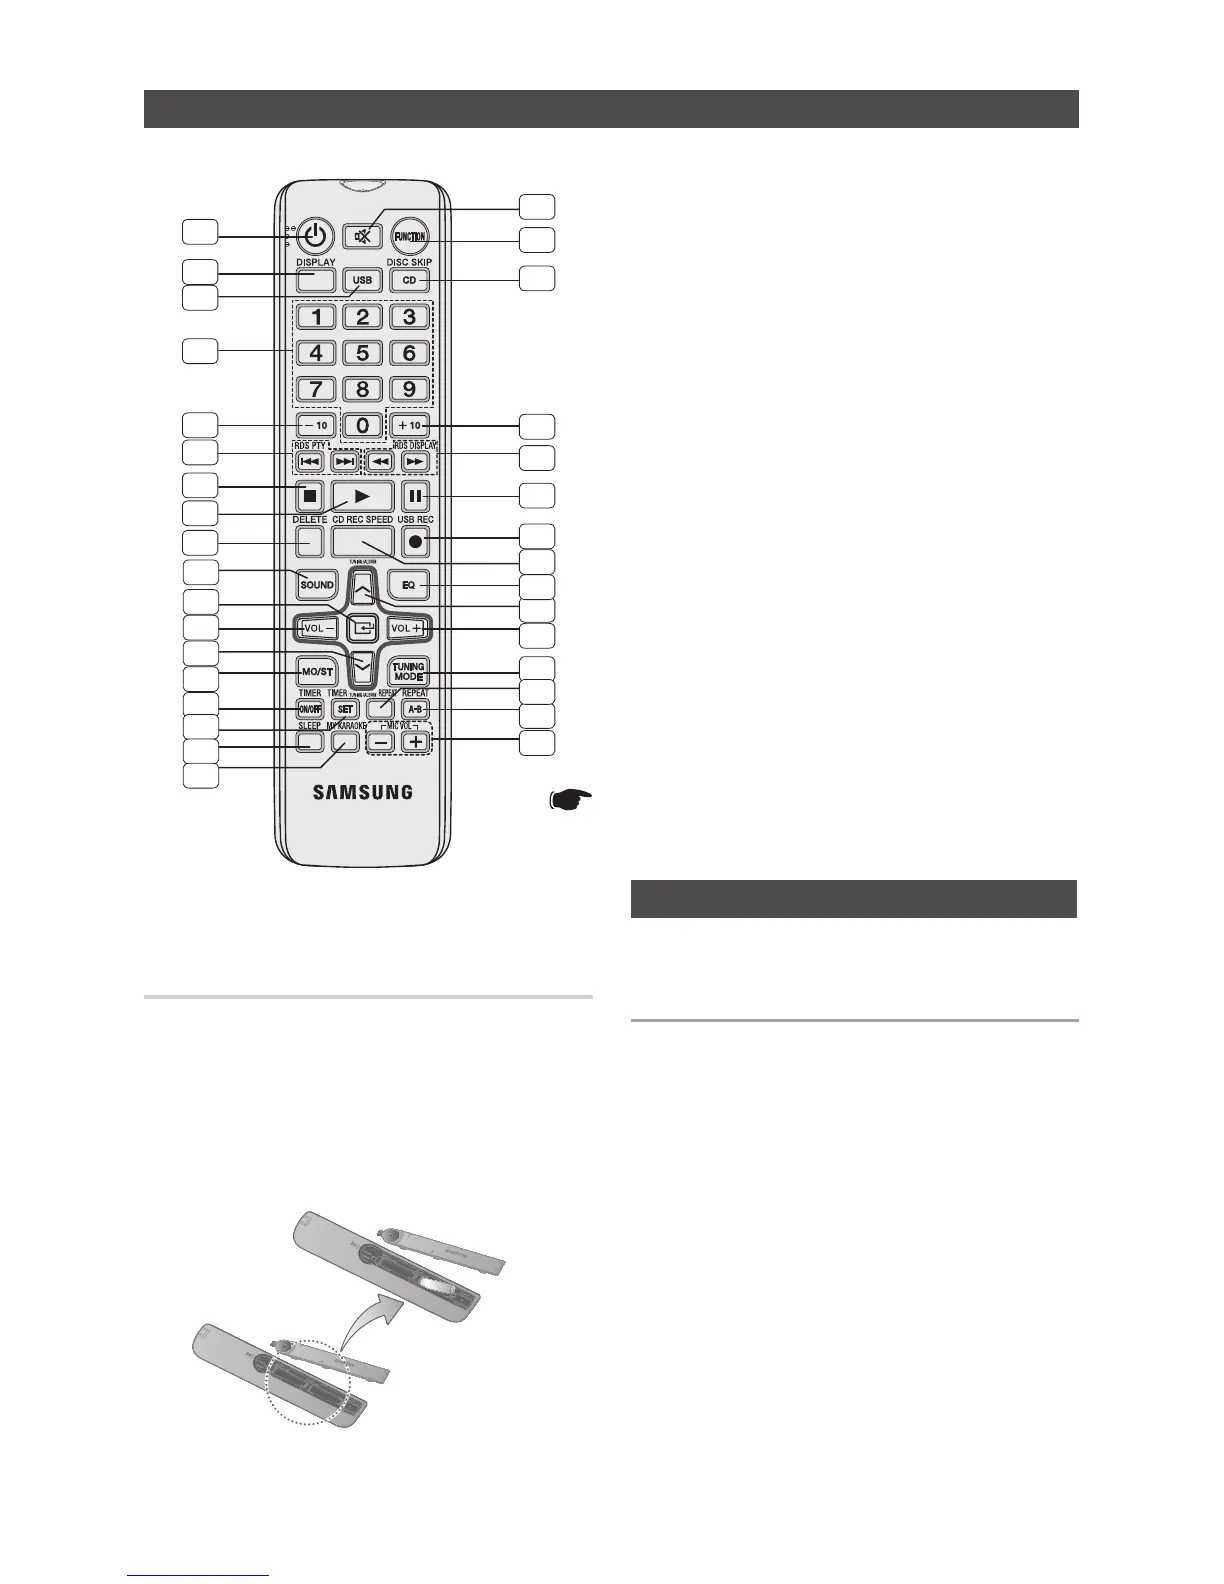
Remote Control
Installing batteries in the Remote
Control
1. POWER
2. DISPLAY
3. USB
4. Number(0~9) button
• Duringplayback,
pressthedesiredtrack
number.Theselected
trackisplayed.
5. -10
6. Skip, RDS PTY *
7. STOP
8. PLAY
9. DELETE
10. SOUND
11. ENTER
12. VOLUME -
13. TUNING/ALBUM
.
14. MO/ST
15. TIMER ON/OFF
16. TIMER SET
17. SLEEP
• Setasleeptimeto
shutofftheproduct.
18. MY KARAOKE
19. MIC VOLUME -, +
20. REPEAT A-B
21. REPEAT
22. TUNING MODE
23. VOLUME +
24.
TUNING/ALBUM
,
25. EQ
26. CD REC SPEED
27. USB REC
28. PAUSE
29. SEARCH,
RDS DISPLAY*
30. +10
31. CD DISC SKIP*
32. FUNCTION
33. MUTE
• Turnoffthesound
temporarily.
*
This product is not used the RDS PTY and RDS DIS-
PLAY function printed the [,
)
button above.
` Place batteries in the remote control so they match the
polarity : (+) to (+) and (–) to (–).
` Always replace both batteries at the same time.
` Do not expose the batteries to heat or a flame.
` The remote control can be used up to approximately 23 feet
(7 meters) in a straight line.
1
2
3
4
5
6
7
8
9
10
11
12
13
14
15
16
17
18
19
20
22
21
23
24
25
26
27
28
29
30
31
32
33
* Battery size: AAA