SAMSUNG Proprietary-Contents may change without notice
Exploded View/Disassembly&Assembly Instructions
5-8
This Document can not be used without Samsung's authorization
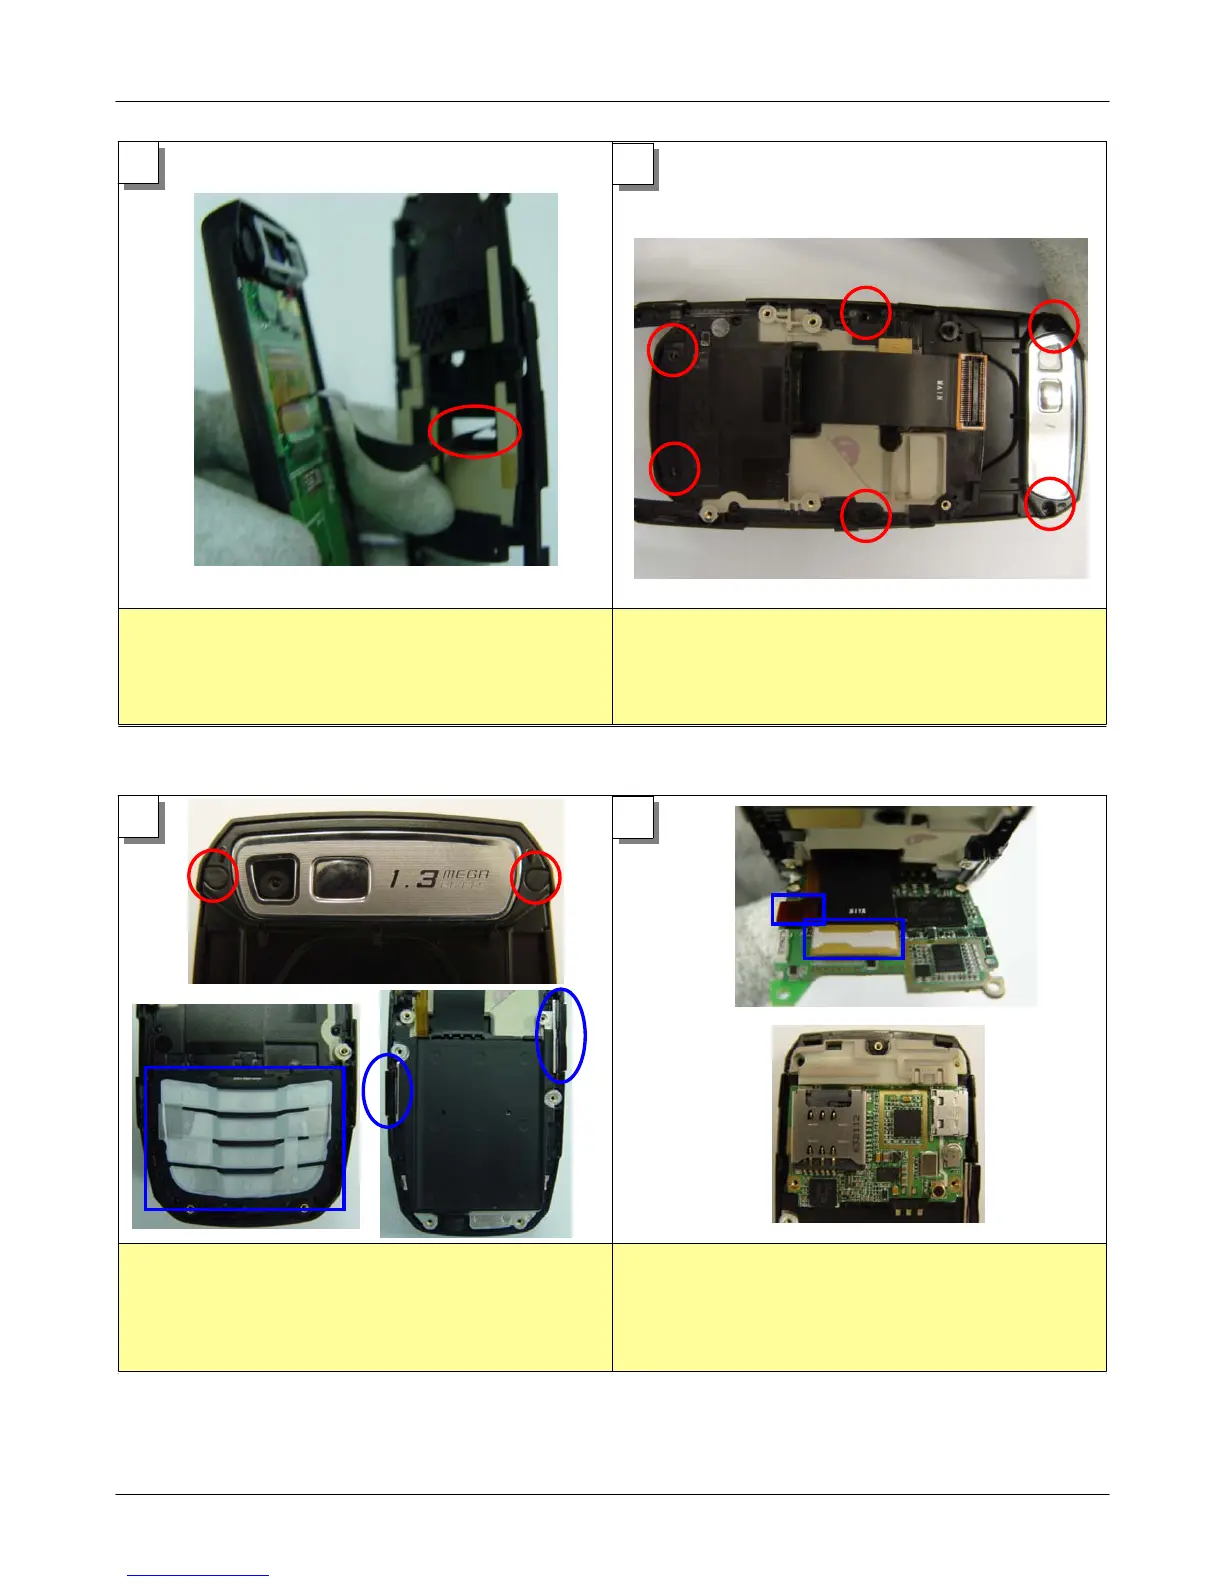
1. Combine slide upper and lower from top
side after sliding up.
2.Andpushtheedgesideforlocking.
3. FPCB should be put into the lower hole.
1. Fasten screws at 6 points with driver after
sliding up.
1. Put the 2 screw caps on screw hole.
2. Put the main keypad on front cover.
3. Put the 2 kind of side key after putting the
shield can.
1. Combine LCD connector and key connector
to main-PBA.
2. Put main-PBA and intenna on front cover.
5
6
7
8