S&C Instruction Sheet 761-545 11
Installation
Attaching the Bell-Crank Assembly
STEP 3. Attach the bell-crank assembly to its base or
bracket (pole-mounted arrangements only). See
Figure 5.
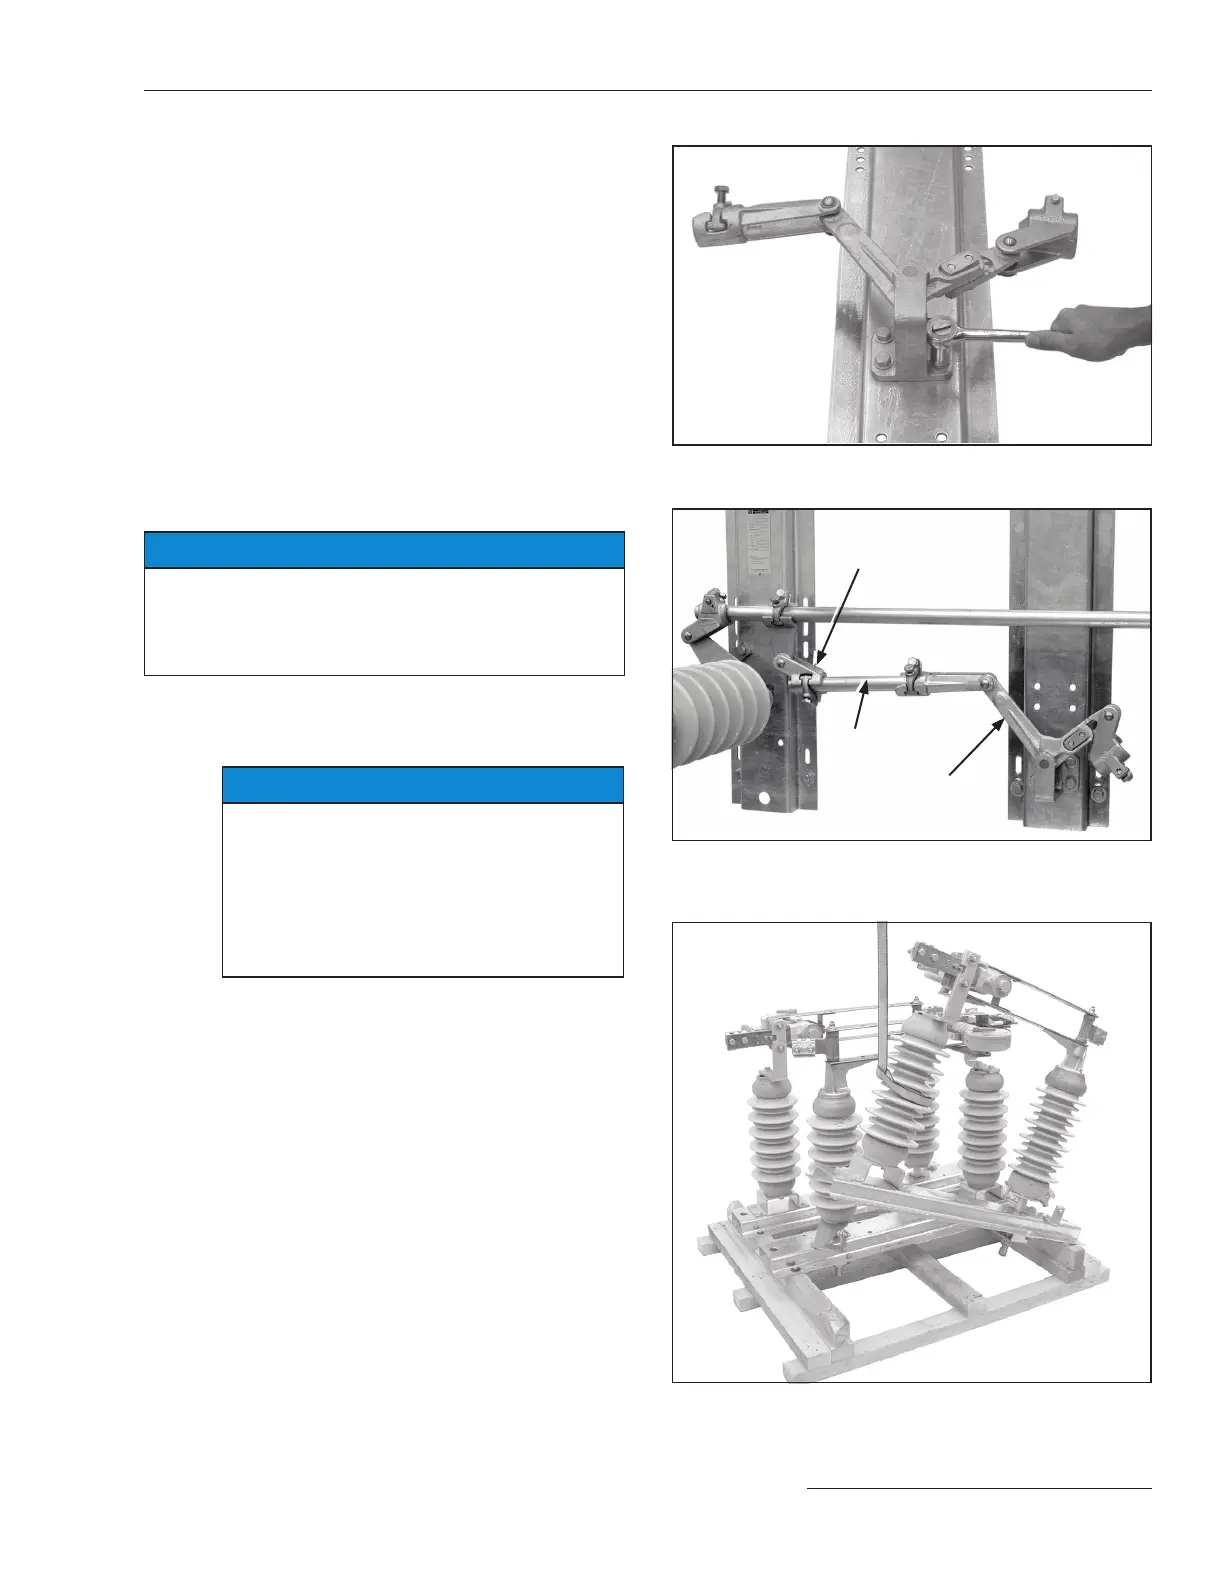
Attaching Couplings to the Bell-Crank
Assembly
STEP 4. If a bell-crank assembly is mounted between
switch poles, the bell crank will be connected to
the interphase pipe by a drag-link pipe section
and an offset coupling. Attach one end of the
drag-link pipe section to the driven arm of the
bell crank. Then, attach the specied offset
coupling to the other end of the drag-link pipe
section. See Figure 6.
Lifting the Switch
NOTICE
Do not lift the switch poles by rigging on the “live
parts” or subject these parts to undue stress from
slings or fall lines. Misalignment of the contacts and
the interrupters may result.
STEP 5. Hoist the individual switch poles and bolt them
into position on the pole or structure as shown
on the erection drawing. See Figure 7.
NOTICE
Make sure the surfaces on which the switch
pole bases are mounted are flat and true.
Mounting to an uneven surface can cause
the bases to twist, placing undue strain on
the insulators and throwing the blades out of
alignment, resulting in difficulties operating
the switch. Use shims as required.
Figure 5. Attaching the bell-crank assembly.
Figure 6. Typical outboard bearing configuration,
vertically mounted between switch poles.
Offset coupling
Drag link
Driven arm
of bell-crank
Figure 7. Hoisting the switch pole into position.
 Loading...


