www.SteamPoweredRadio.Com
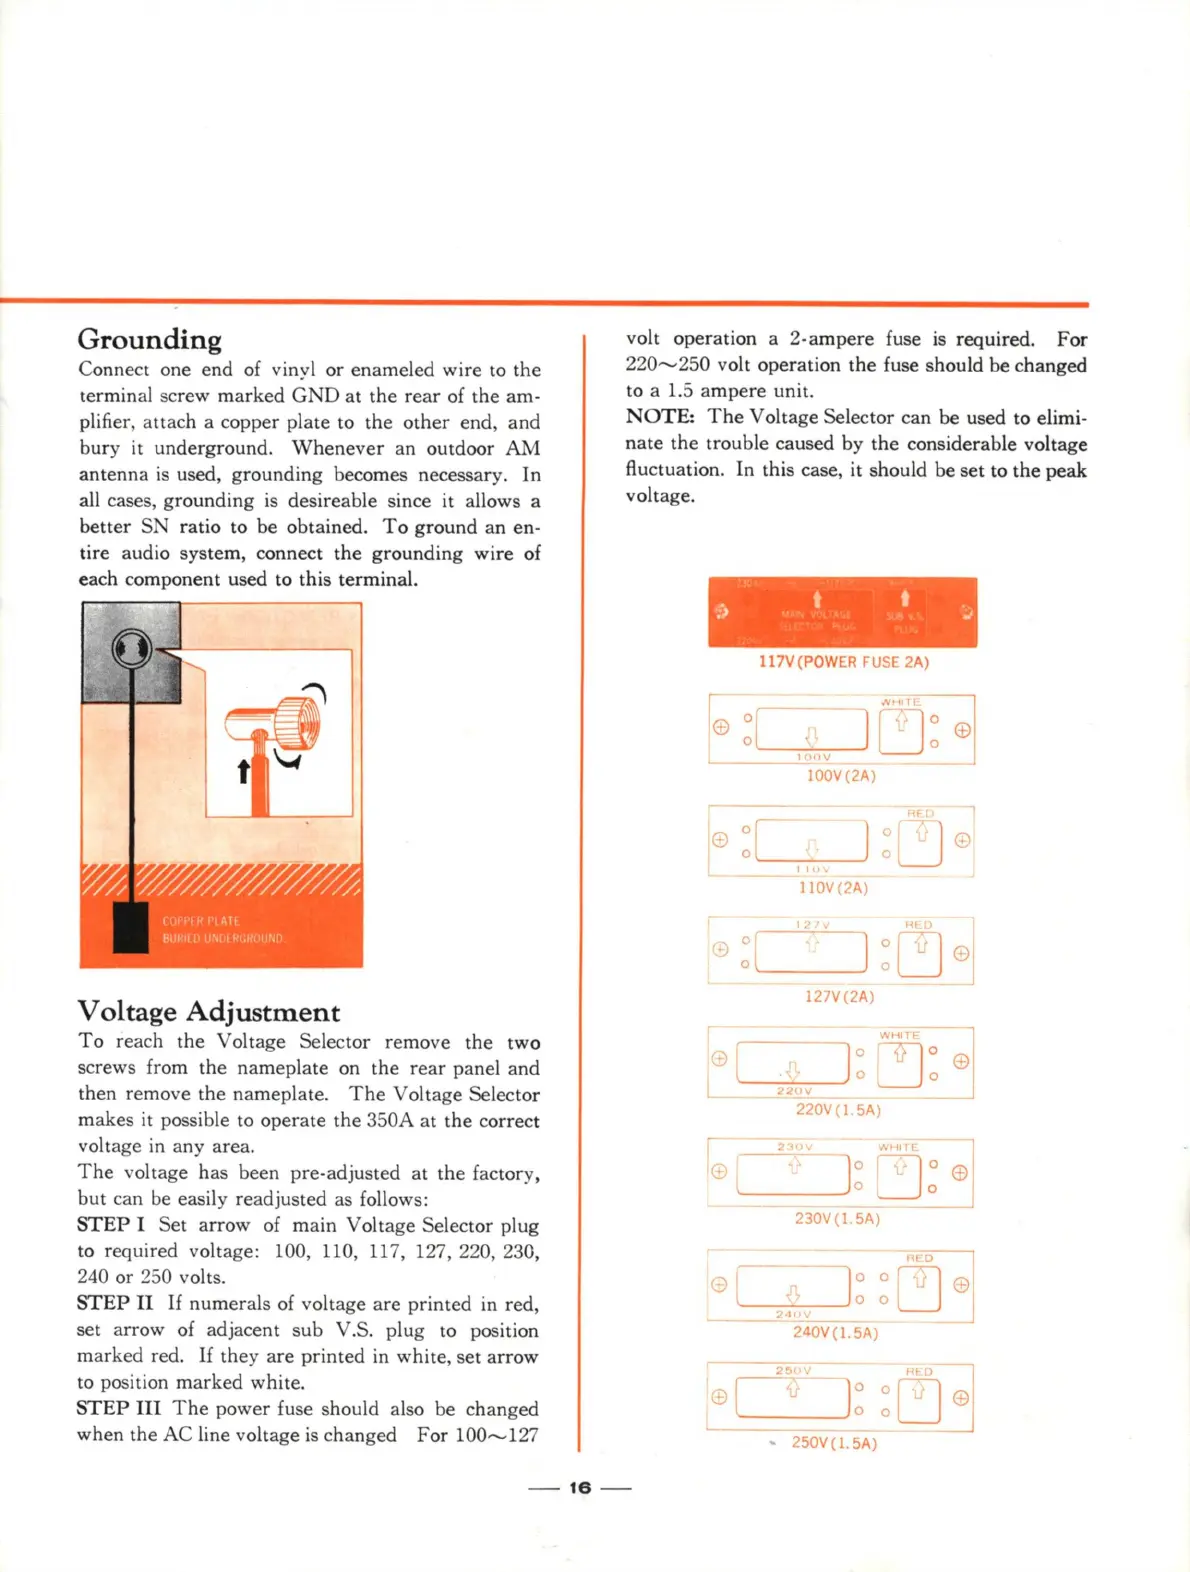
Grounding
Connect one end of vinyl or enameled wire
to
the
terminal screw marked
GND
at the
rear
of the am-
plifier, attach a copper plate to the
other
end, and
bury it underground.
Whenever
an outdoor
AM
antenna
is
used, grounding becomes necessary.
In
all cases,
gr
ounding
is
desireable since it allows a
better S ratio to
be
obtained.
To
ground an en-
tire audio system, connect the grounding wire of
each component used to this terminal.
Voltage
Adjustment
To
reach the Voltage Selector remove the two
screws from the nameplate on the rear panel and
then remove the nameplate.
The
Voltage Selector
makes
it
possible to operate the 350A at the correct
voltage in any
area
.
The
voltage has been pre-adjusted at the factory,
but can
be
easily readjusted as follows:
STEP
I Set arrow
of
main Voltage Selector plug
to required voltage: 100,
ll0,
ll7,
127, 220, 230,
240 or 250 volts.
STEP
II
If
numerals
of
voltage are printed in red,
set arrow of adjacent sub V.S. plug to position
marked red.
If
they are printed in white, set arrow
to position marked white.
STEP
III
The
power fuse should also be changed
when the AC line voltage
is
changed
For
100......,127
volt operation a 2-ampere fuse
is
required. For
220......,250
volt operation the fuse should be changed
to a 1.5 ampere unit.
NOTE:
The
Voltage Selector can be used to elimi-
nate
the trouble caused by the considerable voltage
fluctuation. In this case, it should be set to the peak
voltage.
117V(POWER
FUSE
2A)
r
·~"
18
I
:r
w
,v
_ )
~:
©
©
100V(2A)
<
7
©
:r-
) :
__j
e
110
l
10V(2A)
ej
;)
:[
0
127V(2A)
WHITE
0]
@(-
0
0
220V (I 5A)
r
2 (
>\HITE
ej
G[
]~
230V(l
5A)
Ill
D
7
e[
]:
:~
©
4
V
J
240V
(1.
5A)
2!1
V
H~ D
(El
0 0 ~
,
0 0
, 250V (
1.
5A)
-
16
-