Little maintenance is required, however in hard water areas the unit will require peri-
odic descaling to ensure efcient operation. To descale the unit:
7.1 Switch off and disconnect the electrical supply. Turn off the water supply to the
unit.
7.2 Open a hot tap to relieve any system pressure. Disconnect the plumbing
connections to the unit and remove (note full weights of units). Empty unit
through the outlet connection.
7.3 Remove the terminal cover as described in Section Six.
7.4 Disconnect the electrical terminations to the thermostat. Disconnect earth links to
the earthing stud.
7.5 Remove the element plate assembly by unscrewing the ve securing screws,
tapped jacking points are provided. Remove any loose scale from the container.
Carefully clean off any scale from the element and thermostat pocket. DO NOT
clean scale from interior container walls.
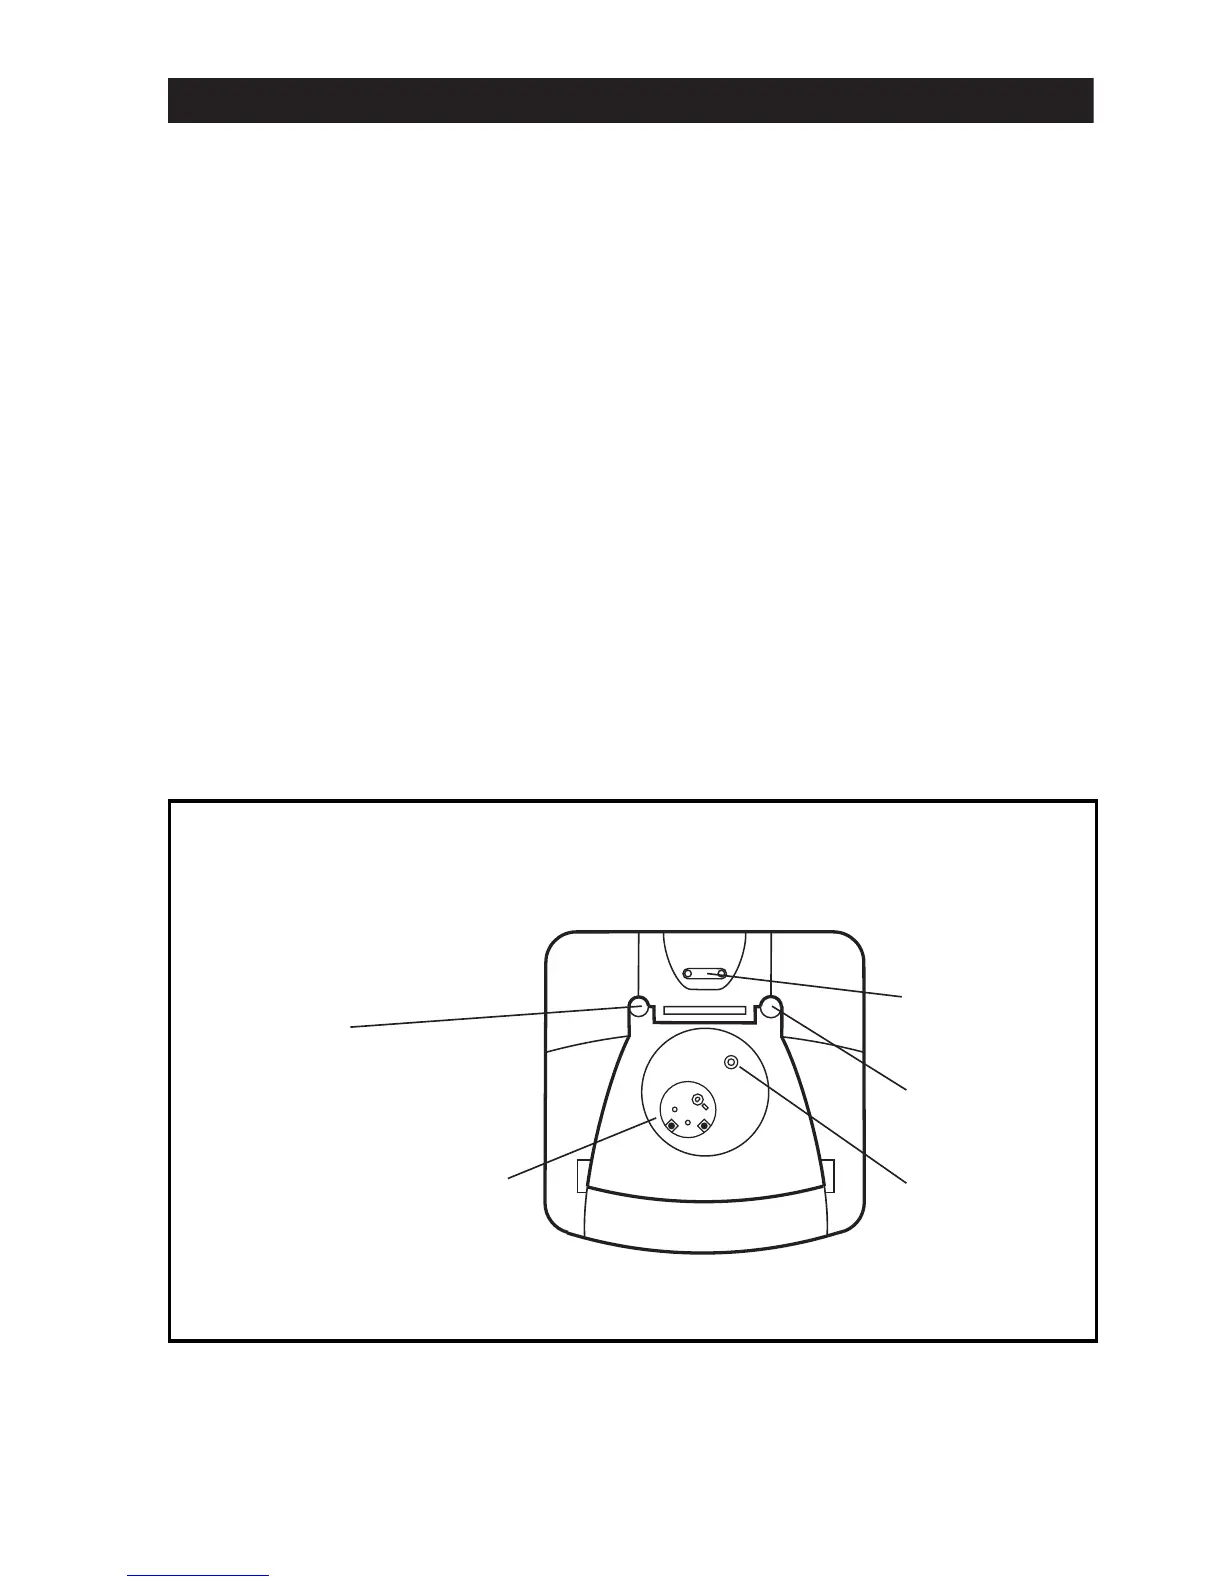
7.6 Re-t the element plate assembly using a new sealing gasket. Note the correct
orientation of the element plate by reference to Figure 7 overleaf. Rewire the unit
with reference to the Wiring Diagrams.
7.7 Re-commission the unit following the INSTALLATION and COMMISSIONING
instructions.