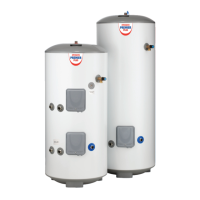
IMMERSION HEATER REMOVAL
Open the cover(s) to the immersion heater housing(s) and disconnect wiring from immersion heater thermostat(s). Remove
thermostat capillary sensors from the pockets on the immersion heater. Unscrew immersion heater backnut(s) and remove
immersion heater from the unit. A key spanner is supplied with the cylinder unit for easy removal/tightening of the backnut(s).
Over time, the immersion heater gasket may become stuck to the mating surface. To break the seal, insert a round bladed
screwdriver into one of the pockets on the immersion heater and gently lever up and down.
Carefully remove any scale from the surface of the element(s). DO NOT use a sharp implement as damage to the element
surface could be caused. Ensure sealing surfaces are clean and seals are undamaged, if in doubt t a new gasket
(part number 95 611 822).
Replace immersion heater(s) ensuring the lower (right angled) element hangs vertically downwards towards the base of the
unit. It may be helpful to support the immersion heater using a round bladed screwdriver inserted into one of the thermostat
pockets whilst the backnut is tightened. Replace thermostat capillaries into pocket. Replace the immersion heater thermostat
by carefully plugging the two male spade terminations on the underside of the thermostat head into the corresponding
terminations on the element. Rewire, check, close and secure immersion heater housing cover(s).
EXPANSION VESSEL CHARGE PRESSURE
Remove the dust cap on top of the vessel. Check the charge pressure using a tyre pressure gauge. The pressure (with system
de-pressurised) should be 0.35MPa (3.5 bar). If it is lower than the required setting it should be re-charged using a tyre pump
(Schrader valve type). DO NOT OVER-CHARGE. Re-check the pressure and when correct replace the dust cap.
RE-COMMISSIONING
Check all electrical and plumbing connections are secure. Close the drain cock. With a hot tap open, turn on the cold water
supply and allow unit to rell. DO NOT switch on the immersion heater(s) or boiler until the unit is full. When water ows
from the hot tap, allow to ow for a short while to purge air and ush through any disturbed particles. Close hot tap and
then open successive hot taps in the system to purge any air. When completely full and purged, check system for leaks. The
heating source (immersion heater(s) or boiler) can then be switched on.
BENCHMARK LOG BOOK
On completion of any maintenance or service of the PremierPlus SystemFit, the Benchmark “Installation, Commissioning
and Service Record Log Book” should be lled in to record the actions taken and the date the work was undertaken.
USER INSTRUCTIONS
WARNINGS
IF WATER ISSUES FROM THE TEMPERATURE/PRESSURE RELIEF VALVE ON THE PREMIERPLUS SYSTEMFIT CYLINDER SHUT
DOWN THE BOILER. DO NOT TURN OFF ANY WATER SUPPLY. CONTACT A COMPETENT INSTALLER FOR UNVENTED WATER
HEATERS TO CHECK THE SYSTEM.
DO NOT TAMPER WITH ANY OF THE SAFETY VALVES FITTED TO THE PREMIERPLUS SYSTEMFIT. IF A FAULT IS SUSPECTED,
CONTACT A COMPETENT INSTALLER.
BENCHMARK
The PremierPlus SystemFit cylinder is covered by the Benchmark Scheme which aims to improve the standards of installation
and commissioning of domestic heating and hot water systems in the UK and to encourage regular servicing to optimise
safety, efciency and performance.
Benchmark is managed and promoted by the Heating and Hotwater Industry Council. For more information visit www.
centralheating.co.uk.
Please ensure that the installer has fully completed the Benchmark Checklist (page 26 and 27) of this manual and that you
have signed it to say that you have received a full and clear explanation of its operation. The installer is legally required
to complete a commissioning checklist as a means of complying with the appropriate Building Regulations (England and
Wales).
All installations must be notied to Local Area Building Control either directly or through a Competent Persons Scheme. A
Building Regulations Compliance Certicate will then be issued to the customer who should, on receipt, write the Notication
Number on the Benchmark Checklist.
This product should be serviced regularly to optimise its safety, efciency and performance. The service engineer should
complete the relevant Service Record on the Benchmark Checklist after each service.
20