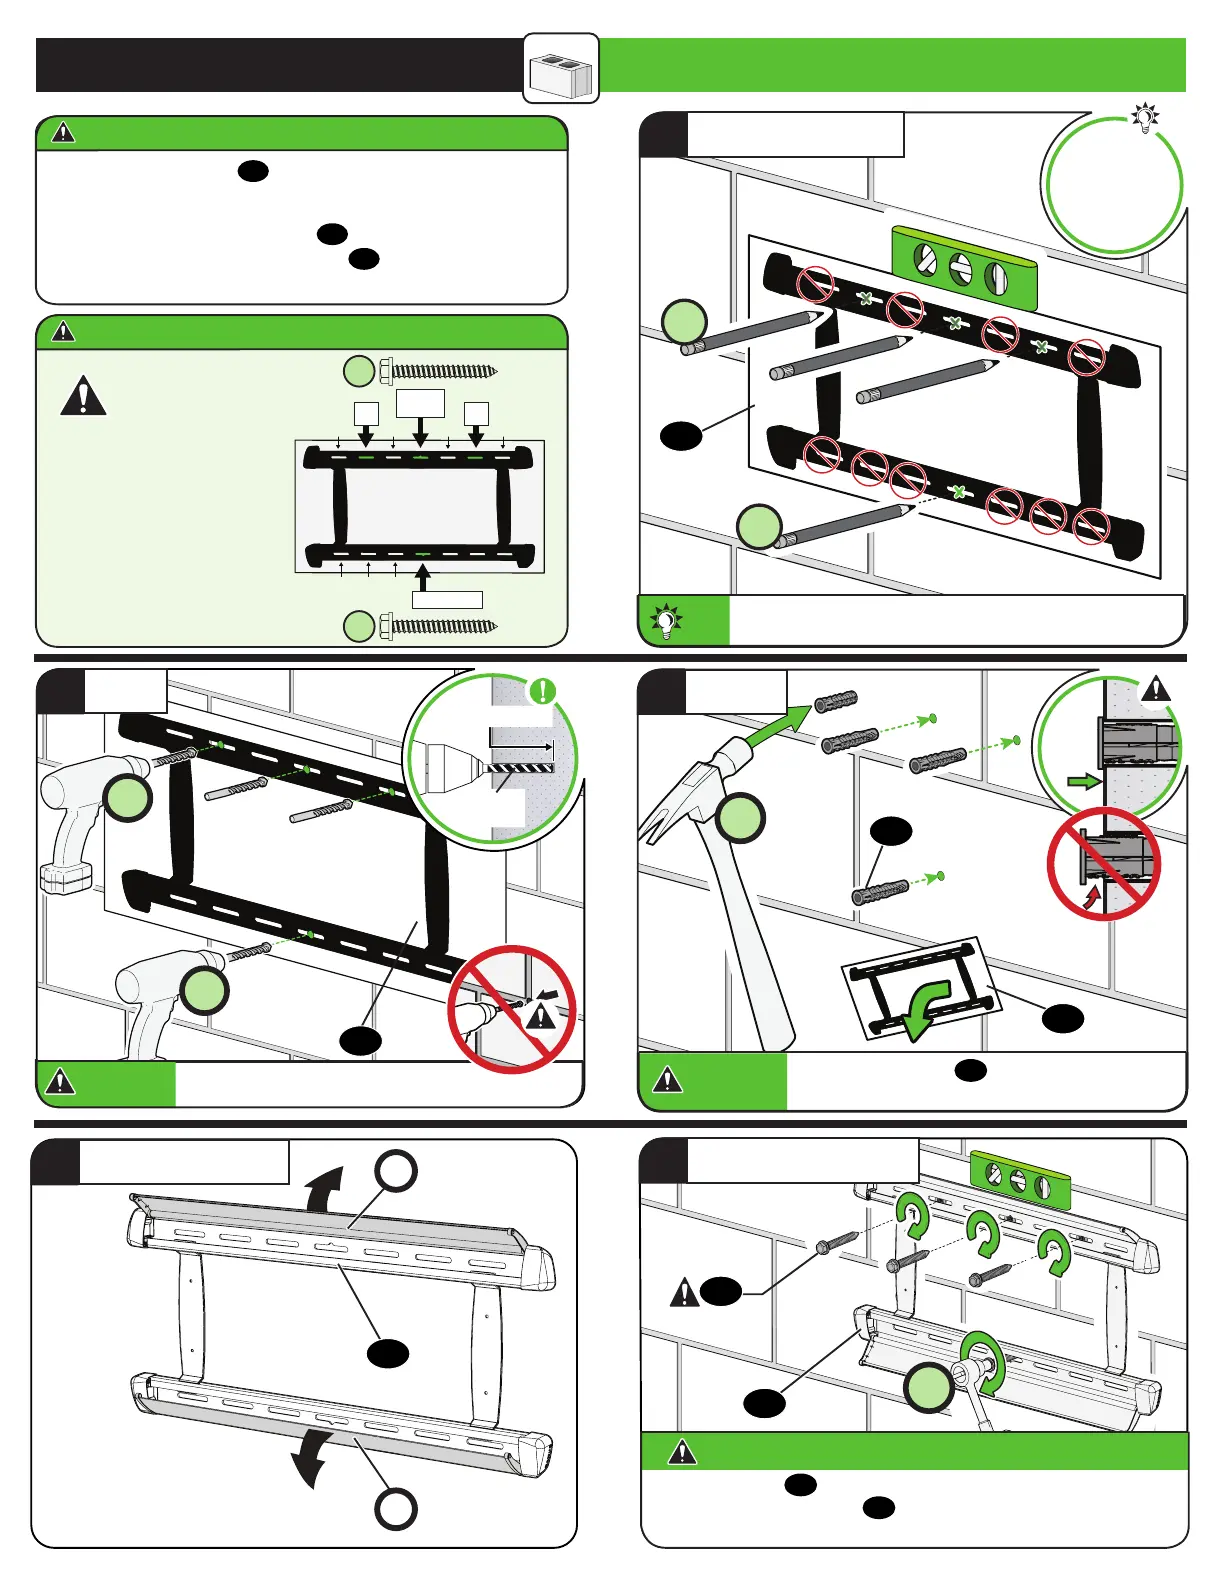
9
● Mount the wall plate
08
directly onto the concrete surface
● Minimum solid concrete thickness: 8 in. (20.3 cm)
● Minimum concrete block size: 8 x 8 x 16 in. (20.3 x 20.3 x 40.6 cm)
● For concrete applications, arm
11
(STEP 3) must remain
centered (horizontally) in wall plate
08
. Keep this in mind
when selecting the wall plate location
CAUTION: Avoid potential personal injury or property damage!
CAUTION: Avoid potential personal injury or property damage!
STEP 2B Attach Wall Plate
Solid Concrete or Concrete Block Installation
3X
1X
TIP:
TIP:
To calculate your precise wall plate location, check out our
HeightFinder at sanus.com [www.sanus.com/1172].
07
sanus.com
/1172
HeightFinder™
Visit
#
1
#
2
#
3
#
4 (Center)
#
2
#
6
#
1
#
3
#
5
#
7
#
4
(Center)
3
X
1
X
Install lag bolts into
the slots AS SHOWN.
Three (3) lag bolts
at the top.
One (1) lag bolt
at the bottom.
14
3
10
4X
CAUTION:
Be sure the anchors
10
are seated flush with
the concrete surface.
CAUTION:
2
DRILL
Never drill into the mortar between blocks.
CAUTION:
Never drill into the mortar between blocks.
CAUTION:
3/8 in.
(10 mm)
3 ¾ in. (9.5 cm)
07
07
3
INSERT
1X
3X
4
OPEN COVERS
08
P
P
All four lag bolts
09
MUST BE firmly tightened to prevent unwanted
movement of the wall plate
08
.
Ensure the wall plate is securely
fastened to the wall before continuing on to the next step.
CAUTION:
Avoid potential personal injury or property damage!
4X
09
08
5
SECURELY TIGHTEN
1
POSITION TEMPLATE