REMOVAL
&
INSTALLATION
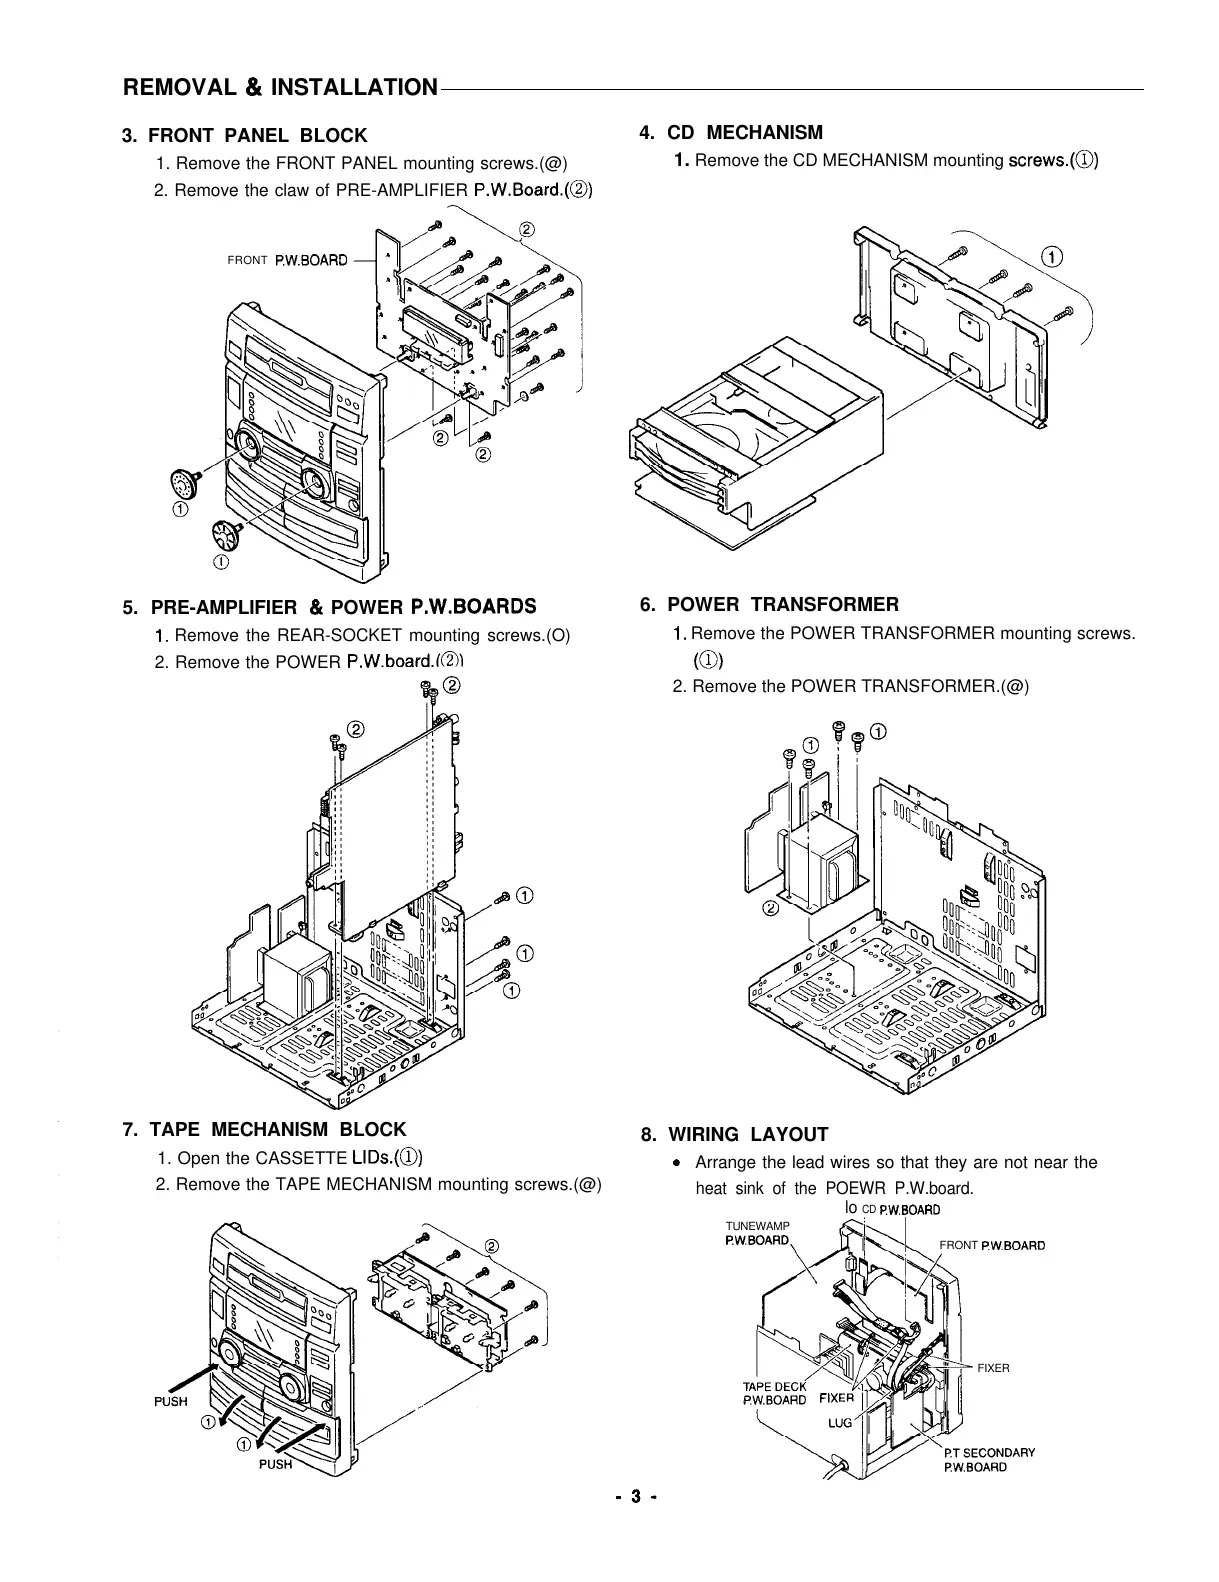
3. FRONT PANEL BLOCK
1. Remove the FRONT PANEL mounting screws.(@)
2. Remove the claw of PRE-AMPLIFIER
P.W.Board.(@)
FRONT
P.W.BOARD
5. PRE-AMPLIFIER
&
POWER P.W.BOARDS
6. POWER TRANSFORMER
1.
Remove the REAR-SOCKET mounting screws.(O)
1.
Remove the POWER TRANSFORMER mounting screws.
2. Remove the POWER
P.W.board.l@)l
(0)
7. TAPE MECHANISM BLOCK
1. Open the CASSETTE
LIDS.(@)
2. Remove the TAPE MECHANISM mounting screws.(@)
4. CD MECHANISM
1. Remove the CD MECHANISM mounting screws.(O)
2. Remove the POWER TRANSFORMER.(@)
8. WIRING LAYOUT
.
Arrange the lead wires so that they are not near the
heat sink of the POEWR P.W.board.
TUNEWAMP
F?W.BOARD,
lo
CD P.W.BOARD
f?N
I\
\
FRONT
F?W.BOARD
FIXER
PW.BOARD FIX
 Loading...