DISASSEMBLE OF THE CD MECHANISM
.
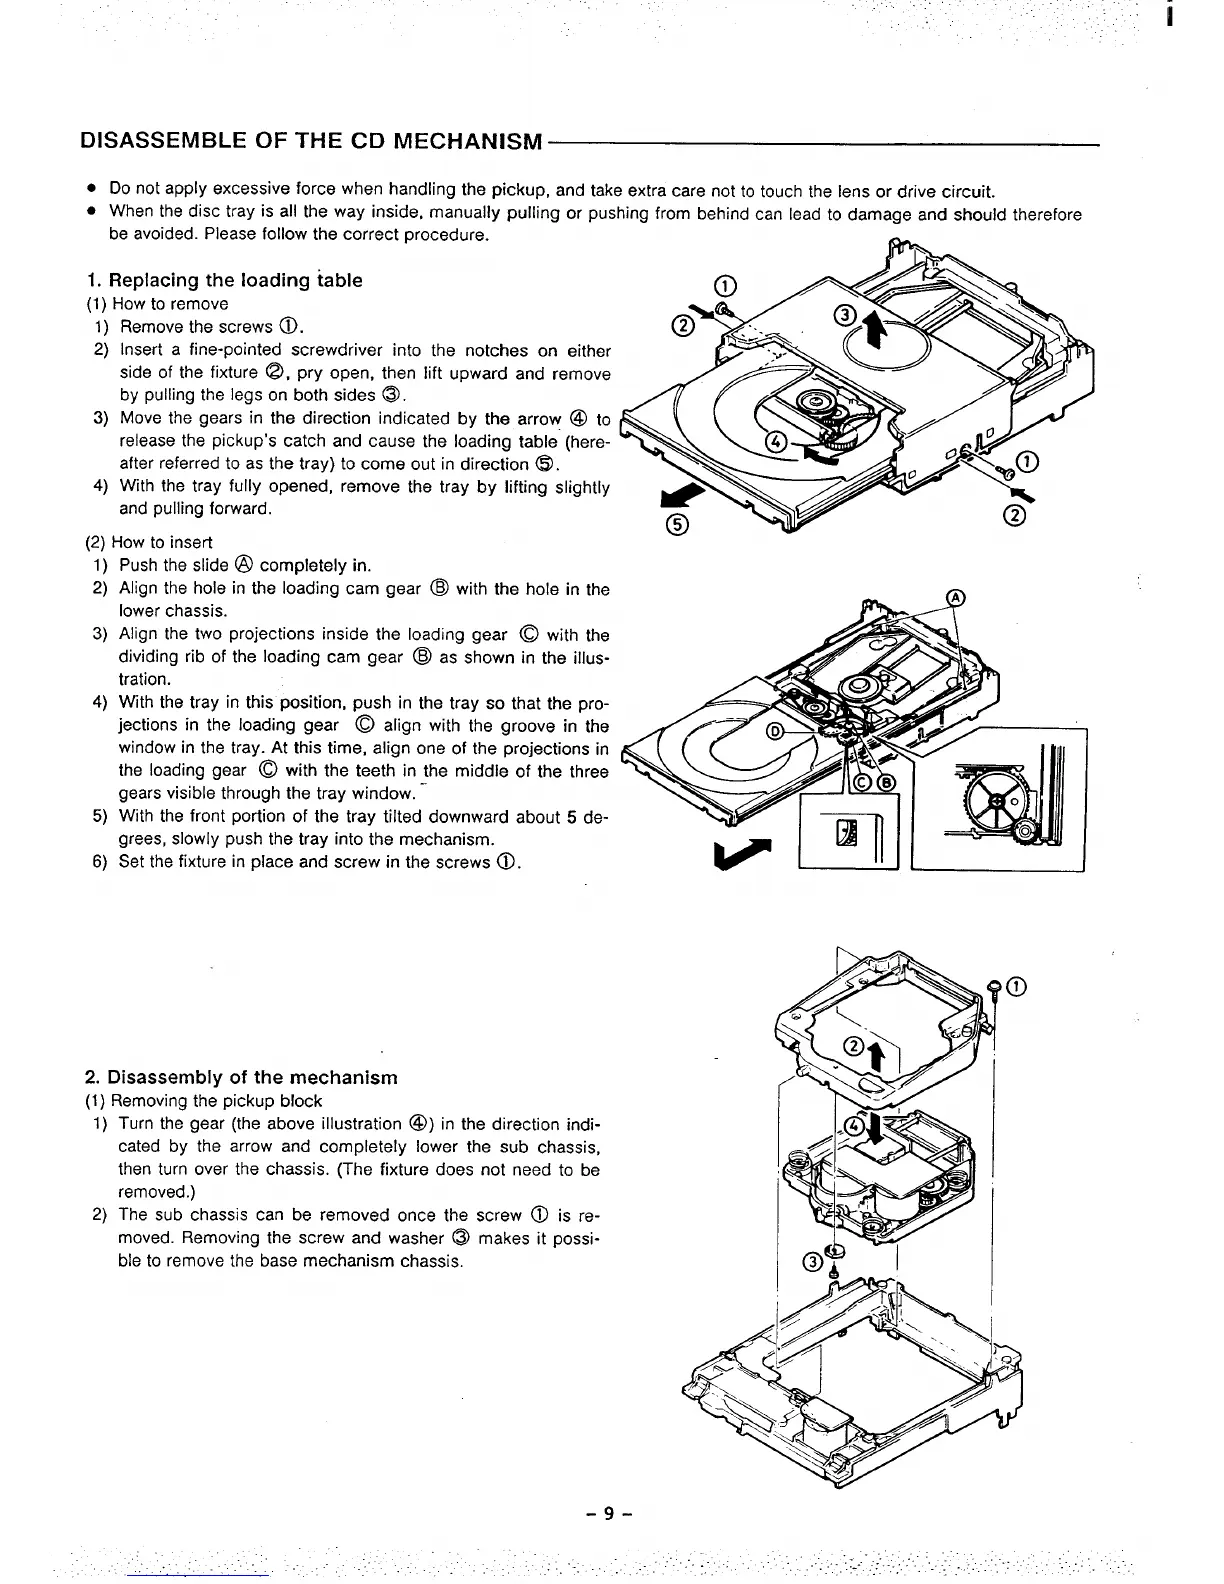
Do not apply excessive force when handling the pickup, and take extra care not to touch the lens or drive circuit.
● When the disc tray is all the way inside, manually pulling or pushing from behind can lead to damage and should therefore
be avoided. Please follow the correct procedure.
1. Replacing
the loading table
(1)
How to remove
lj
2)
3)
4)
Remove the screws @.
Insert a fine-pointed screwdriver into the notches on either
side of the fixture @, pry open, then lift upward and remove
by pulling the legs on both sides @.
Move the gears in the direction indicated by the arrow @ to
release the pickup’s catch and cause the loading table” (here-
after referred to as the tray) to come out in direction @.
With the tray fully opened, remove the tray by lifting slightly
and pulling forward.
(2) How to insert
‘lj
2)
3)
4)
5)
6)
Push the slide @ completely in.
Align the hole in the loading cam gear @ with the hole in the
lower chassis.
Align the two projections inside the loading gear G with the
dividing rib of the loading cam gear @ as shown in the illus-
tration.
With the tray in this position, push in the tray so that the pro-
jections in the loading gear ~ align with the groove in the
window in the tray. At this time, align one of the projections in
the loading gear ~ with the teeth in the middle of the three
gears visible through the tray window. -
With the front portion of the tray tilted downward about 5 de-
grees, slowly push the tray into the mechanism.
Set the fixture in place and screw in the screws @.
2. Disassembly of the mechanism
(1) Removing the pickup block
1) Turn the gear (the above illustration @) in the direction indi-
cated by the arrow and completely lower the sub chassis,
then turn over the chassis. (The fixture does not need to be
removed.)
2) The sub chassis can be removed once the screw @ is re-
moved. Removing the screw and washer @ makes it possi-
ble to remove the base mechanism chassis.
 Loading...