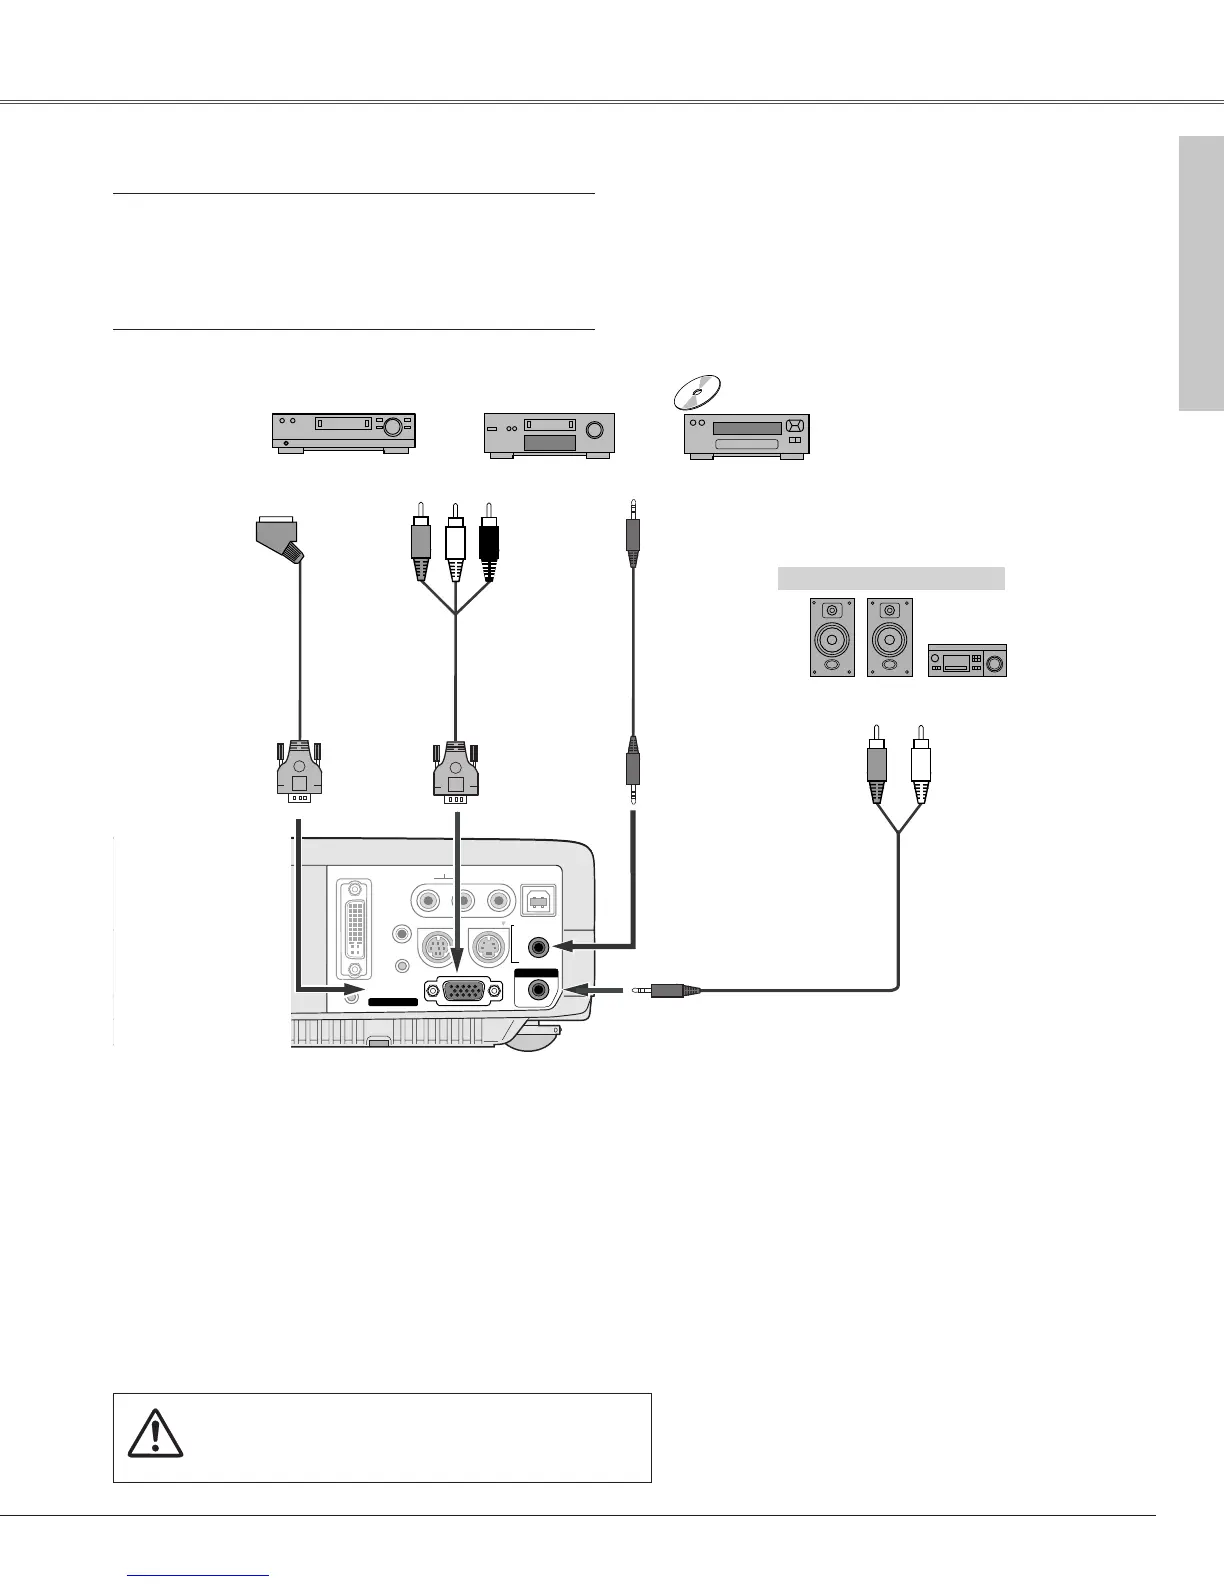
Cables used for connection
• Audio Cables (Mini Plug (stereo) x 2 or RCA x 2) ✽
• Scart-VGA Cable ✽
• Component-VGA Cable ✽
(✽ = Not supplied with this projector.)
Note:
When connecting the cable, the power cords of both the projector and
the external equipment should be disconnected from AC outlet.
✔Note:
• Input sound to the COMPUTER/COMPONENT AUDIO IN terminal when using the
COMPUTER IN 2/COMPONENT IN/MONITOR OUT terminal as input.
• When connecting AUDIO OUT to external audio equipment, the projector's built-in
speaker is disconnected.
External Audio Equipment
COMPUTER IN 2/
COMPONENT IN/
MONITOR OUT
COMPUTER IN 2/
COMPONENT IN/
MONITOR OUT
COMPUTER/ COMPONENT
AUDIO IN
Audio cable ✽
(stereo)
Audio cable ✽
(stereo)
Audio Input
Component Video Output
(Y, Pb/Cb, Pr/Cr)
RGB Scart 21-pin Output Audio Output
Scart-VGA cable ✽ Component-VGA
cable✽
AUDIO OUT
(stereo)
 Loading...