Do you have a question about the Sanyo PLC-XD2200 and is the answer not in the manual?
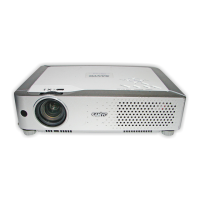
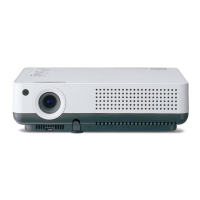
Describes the projector's compact size and portability for easy installation.
Explains the multi-scan system for quick computer signal compatibility.
Details digital zoom and blackboard projection features for presentations.
Allows users to select and adjust projection lamp brightness settings.
Enables immediate power disconnection without needing standby mode.
Customizes the screen logo for startup displays or between presentations.
Lists the 20 available languages for the on-screen menu interface.
Enhances security with key lock and PIN code functions to prevent unauthorized use.
Provides functions to assist with lamp and filter maintenance for optimal performance.
Details operation and management of the projector via wired LAN network.
Automates input search, PC adjustment, and keystone correction.
Allows color matching for projection on colored walls.
Offers a terminal that functions as computer input or monitor output.
Reduces power consumption and extends lamp life through management features.
Displays program sound or other information as text on the screen.
Essential safety warnings regarding electrical shock, ventilation, and proper installation.
Warnings about operating in wet conditions, exposure to chemicals, and ventilation requirements.
General safety advice on handling the projector, cleaning, and servicing.
Importance of maintaining airflow for cooling and preventing overheating.
Guidelines for correct projector placement to prevent hazards and reduce lamp life.
Precautions for safely carrying and transporting the projector to prevent damage.
FCC compliance statement regarding digital device emissions and interference.
Details on correct AC power cord usage and plug types for different regions.
Identifies and describes the components located on the projector's front panel.
Identifies and describes the components located on the projector's back panel.
Identifies and describes the components located on the projector's bottom.
Details all input/output connectors on the projector's rear.
Explains the buttons and indicators on the projector's top control panel.
Identifies and explains the functions of all buttons on the remote control.
Instructions for inserting batteries into the remote control correctly.
Specifies the maximum distance and angle for remote control operation.
Explains how to switch remote control codes to avoid interference.
Guidelines for setting up the projector for optimal screen projection.
Details on using the adjustable foot for tilt and position correction.
Illustrates cable connections for computer input and monitor output.
Shows how to connect various video sources like S-Video and composite.
Diagrams for connecting component and SCART video signals to the projector.
Instructions for connecting the power cord and selecting the correct plug type.
Step-by-step guide for powering on the projector and initial setup.
Detailed instructions for entering the projector's PIN code for access.
Explains the purpose of the PIN code for projector security and preventing unauthorized use.
Procedures for correctly powering down the projector to ensure lamp life.
Allows immediate power disconnection without needing standby mode.
Guide on navigating and interacting with the projector's on-screen menu system.
Overview of the main menu categories and their sub-menu options.
How to use the zoom ring and focus ring for image clarity.
Automates image tuning, including input search and keystone correction.
Manual adjustment to correct keystone distortion for a rectangular image.
How to adjust volume and mute the projector's audio output.
Explains direct operation of key functions using the remote control.
Temporarily blanks the projected image without turning off the projector.
Operates the count-up or count-down timer function for presentations.
Selects various preset image modes to optimize picture quality.
Adjusts the screen size and aspect ratio of the projected image.
How to select computer input sources via direct buttons or menu options.
Automatic and manual selection of computer system modes for optimal signal matching.
Automatically tunes sync, dots, and position for computer video signals.
Provides detailed manual control over PC signal parameters for precise tuning.
Resets PC adjustment parameters to their default factory settings.
Clears stored custom PC adjustment data from memory.
Saves customized PC adjustment settings into memory modes.
Selects preset image modes (Dynamic, Standard, etc.) for computer input.
Fine-tunes image parameters like contrast, brightness, color, and sharpness.
Saves customized image adjustments into memory slots (Image 1-4).
Resizes the projected image to fit the screen or adjust aspect ratio.
Manually adjusts screen scale and position, with options to save.
Allows zooming in or out on the projected image for detail viewing.
How to select Video or S-Video input sources via remote or menu.
Selects Component or SCART RGB input sources for video signals.
Selects the video system (PAL, NTSC) or component signal format.
Selects preset image modes (Dynamic, Cinema, etc.) for video sources.
Fine-tunes video image parameters like color, tint, and sharpness.
Reduces visual noise for a smoother video picture.
Enables progressive display mode for interlaced video signals.
Resets all video image adjustment parameters to default.
Saves customized video image settings into memory slots.
Resizes the projected video image to fit the screen or aspect ratio.
Sets the on-screen menu language from a list of 20 languages.
Allows changing the location of the on-screen menu display.
Configures input search, auto PC adjustment, and auto keystone functions.
Adjusts keystone distortion and allows saving or resetting corrections.
Selects the background screen when no input signal is detected.
Controls which on-screen information displays are visible during operation.
Selects the startup display: User image, factory logo, or off.
Captures the current projected image for use as a startup display.
Prevents unauthorized changes to the screen logo by requiring a PIN.
Instructions for entering and changing the Logo PIN code.
Inverts the image top/bottom and left/right for ceiling mounting.
Reverses the image left/right for rear projection setups.
Configures the Computer 2/Monitor Out terminal for input or output.
Configures automatic lamp shutdown and timer settings for power saving.
Enables the projector to turn on automatically when connected to power.
Controls network functionality and power supply in standby mode.
Sets and executes count-up or count-down timers for operations.
Enables display of closed captions from program audio sources.
Adjusts screen brightness by selecting lamp modes (High, Normal, Eco).
Manages remote control codes to prevent interference with other devices.
Restricts access to projector functions via key lock and PIN code settings.
Instructions for entering and changing the projector's main PIN code.
Provides options for cooling fan operation when the projector is turned off.
Selects fan speed modes (Off, On1, On2) based on altitude.
Adjusts video delay for faster digital image processing.
Resets the lamp replacement counter after changing the projector lamp.
Sets the frequency for filter cleaning alerts and resets the counter.
Records and displays anomalous operations for fault diagnosis.
Resets all projector settings to their original factory defaults.
Displays current input signal status, lamp status, and other operational info.
Explains projector status and troubleshooting based on warning and power indicator lights.
Step-by-step instructions for safely removing and cleaning the projector filters.
Resets the filter counter after cleaning or replacing the filters.
Procedures for securing the lens cap when moving or storing the projector.
How to safely clean the projector's projection lens without scratching.
Instructions for cleaning the projector's external body.
Step-by-step guide for replacing the projector's lamp safely.
Information required when ordering a replacement projector lamp.
Crucial safety precautions for handling high-pressure projector lamps.
A guide to common projector problems and their solutions.
Steps to diagnose and resolve issues when the projector displays no image.
Troubleshooting steps for audio problems, including checking connections and mute settings.
Steps to resolve issues with incorrect or strange color reproduction.
Troubleshooting steps for missing on-screen display elements.
Troubleshooting guide for when the Auto PC adjustment feature fails.
Steps to resolve issues where projector settings are not saved.
Troubleshooting guide for the projector's power management features.
Steps to resolve issues with the image capture function.
Troubleshooting tips for when the auto setup functions are not working correctly.
Troubleshooting steps for the auto keystone correction feature.
Steps to resolve image distortion or misalignment issues.
How to handle the PIN code prompt that appears during startup.
Troubleshooting steps for remote control operational failures.
Interpreting projector status by observing indicator light patterns.
Guidance on correcting invalid operations indicated by an exclamation mark.
Troubleshooting steps for issues with the projector's top control panel.
Procedures for recovering access if security features are locked.
Important warning about high voltages and contacting service for issues.
A visual representation of the projector's menu structure and options.
Explains projector status and conditions based on indicator light combinations.
Lists supported computer resolutions, H-sync, V-freq, and dot clock.
Detailed technical data including dimensions, resolution, interfaces, and power.
Lists the included accessories provided with the projector package.
Lists optional parts that can be purchased separately for the projector.
Information about PJLink Standard Class 1 compliance and network setup.
Detailed pin assignments for various projector connectors like VGA and serial.
A space to record PIN codes and factory default numbers for security.
Provides detailed physical dimensions and ceiling mount screw hole information.
| Vertical scan range | 50 - 100 Hz |
|---|---|
| Horizontal scan range | 15 - 100 kHz |
| Projection technology | LCD |
| Contrast ratio (typical) | 500:1 |
| Projector native resolution | XGA (1024x768) |
| Aspect ratio | 4:3 |
| RS-232 ports | 1 |
| Dimensions (WxDxH) | 332.7 x 246 x 86.3 mm |
| Lamp type | UHP |
| Lamp power | 215 W |
| Light source type | Lamp |
| Focus | Manual |
| RMS rated power | 1 W |
| Serial interface type | RS-232 |
| Power consumption (typical) | 230 W |
| Noise level | 29 dB |
| Weight | 2585 g |
|---|