10
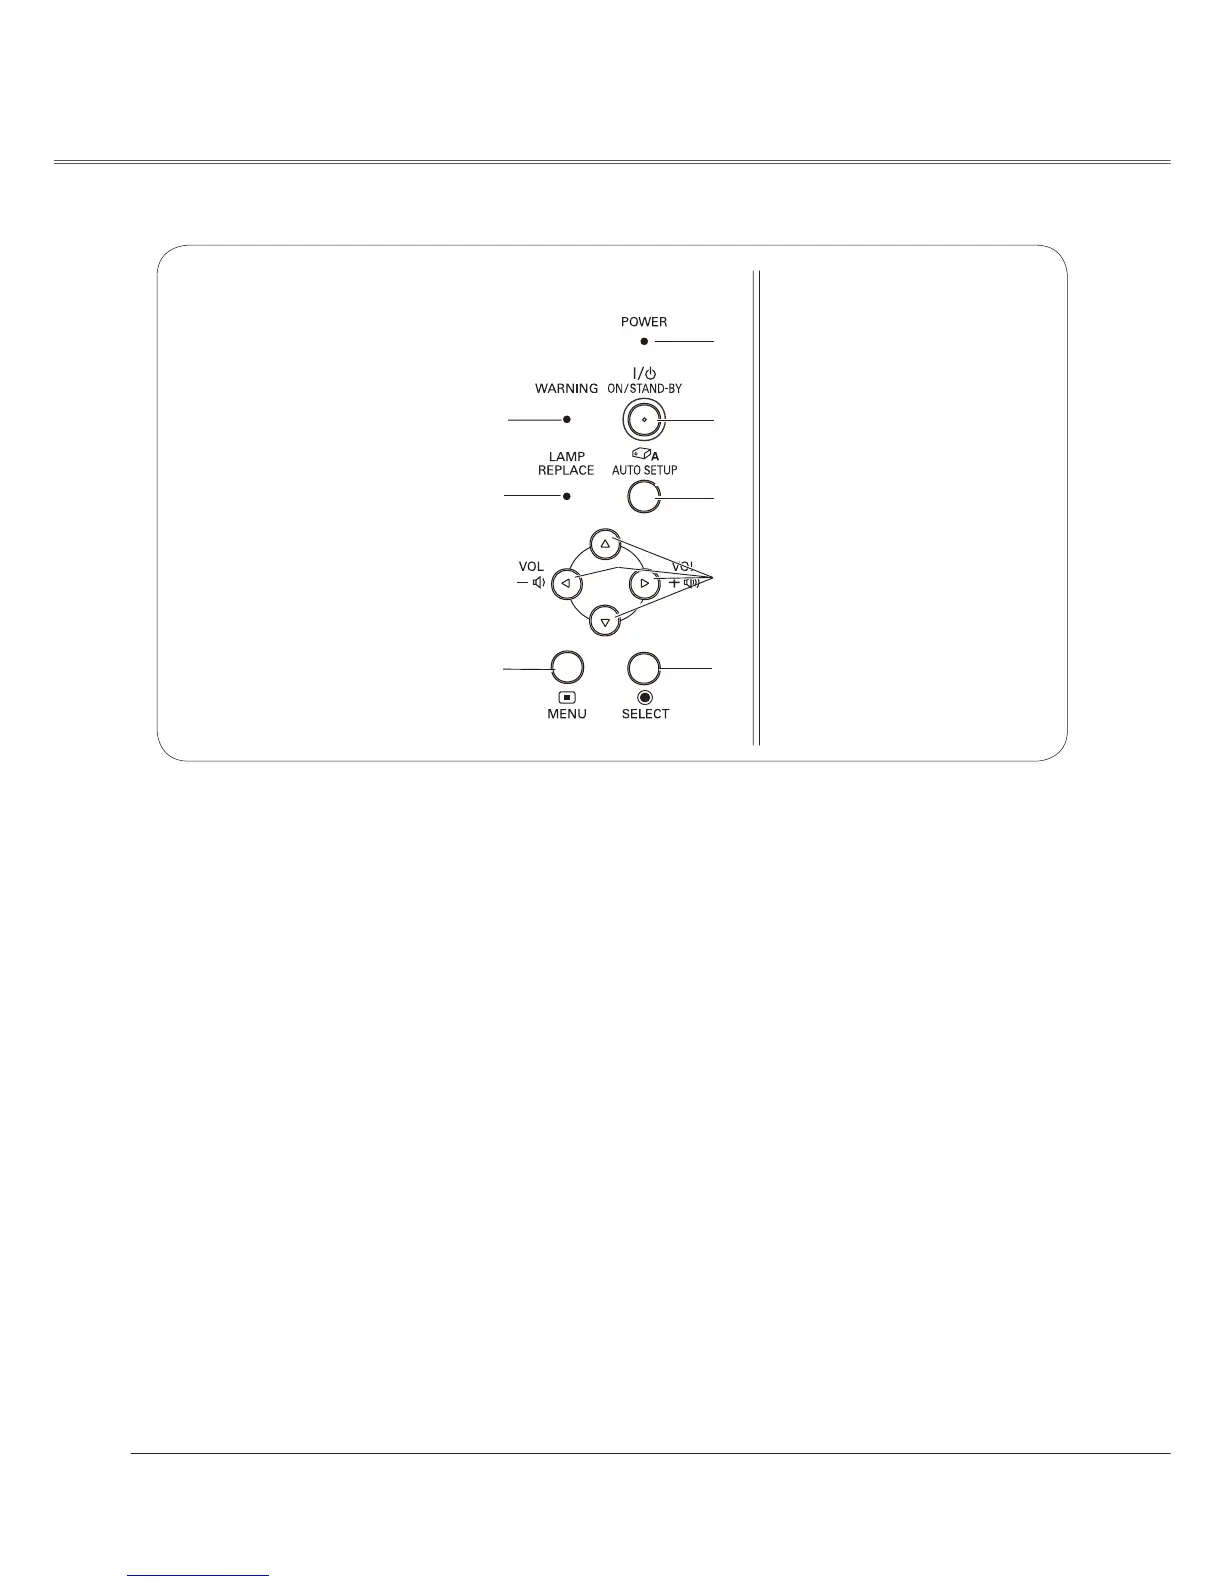
Part Names and Functions
Top Control
⑦ LAMP REPLACE indicator
Lights yellow when the projection lamp reaches its
end of life (pp.61, 69).
⑧ WARNING indicator
–Lights red when the projector detects an
abnormal condition.
–Blinks red when the internal temperature of the
projector exceeds the operating range (pp.58,
69).
④ ON/STAND–BY button
Turn the projector on or off (pp.18-20).
⑤ POWER indicator
–Lights red when the projector is in stand-by mode.
–Lights green during operations.
–Blinks green in the Power management mode
(p.50).
⑥ MENU button
Open or close the On-Screen Menu (p.21).
② POINT
ŸźŻŹ
(VOLUME +/–) buttons
–Select an item or adjust the value in the
On-Screen Menu (p.21).
–Pan the image in the Digital zoom +/- mode
(p.35).
–Adjust the volume level (Point ŻŹbuttons)
(p.24).
③ AUTO SETUP button
Execute the setting of Auto setup (includes Input
search, Auto PC adj. and Auto Keystone functions)
in the setting menu. (pp.23, 44).
① SELECT button
–Execute the selected item (p.21).
–Expand or compress the image in the Digital
zoom mode (p.35).
①
②
③
④
⑤
⑥
⑦
⑧
 Loading...