EasyManua.ls Logo

Sanyo VPC-S600 User Manual

Sanyo VPC-S600
72 pages
To Next Page IconTo Next Page
Page #1 background imageLoading...
Page #1 background image
EN-1
FCC STATEMENT (For customers in USA)
This device complies with Part 15 of the FCC Rules. Operation is subject to the following two conditions:
(1) This device may not cause harmful interference, and
(2) This device must accept any interference received, including interference that may cause undesired
operation.
Note:
This equipment has been tested and found to comply with the limits for Class B digital devices, pursuant
to Part 15 of the FCC rules. These limits are designed to provide reasonable protection against harmful
interference in a residential installation.This equipment generates uses and can radiate radio frequency
energy and, if not installed and used in accordance with the instructions, may cause harmful interference
to radio communications. However, there is no guarantee that interference will not occur in a particular
installation. If this equipment does cause harmful interference to radio or television reception, which can
be determined by turning the equipment off and on, the user is encouraged to try to correct the
interference by one or more of the following measures:
Reorient or relocate the receiving antenna.
Increase the separation between the equipment and receiver.
Connect the equipment into an outlet on a circuit different from that to which the receiver is
connected.
Consult the dealer or an experienced radio/TV technician for help.
Use of shielded cable is required to comply with Class B limits in Subpart B of Part 15 of the FCC rules.
Do not make any changes or modifications to the equipment unless otherwise specified in the manual. If
such changes or modifications should be made, you could be required to stop operation of the
equipment.
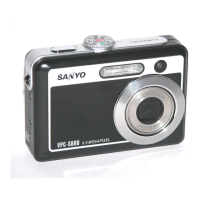
Table of Contents

Questions and Answers:

Sanyo VPC-S600 Specifications

General IconGeneral
Image Sensor1/2.5 inch CCD
Optical Zoom3x
Digital Zoom5.7x
TypeCompact
Sensor TypeCCD
Video Resolution640 x 480
Weight150 g
ISO RangeAuto, 100, 200, 400
Video Recording640 x 480 pixels at 30 fps
StorageSD/SDHC
LCD Screen Size2.5-inch
Battery TypeAA batteries
Dimensions92 x 60 x 28 mm
LCD Screen2.5 inches

Summary

FCC Statement

SAFETY INSTRUCTIONS

Warnings

Important safety warnings regarding potential fire or electric shock hazards.

Cautions

Important safety cautions to prevent damage or injury when handling the device.

FCC Information

Declaration of Conformity

Statement of compliance with FCC rules and regulations for the device.

Notes on Battery Usage

INTRODUCTION

Package Contents

List of items included in the product package.

GETTING TO KNOW YOUR CAMERA

Front View

Identification and description of external controls and features on the camera's front.

Rear View

Identification and description of external controls and features on the camera's rear.

LCD Monitor Information

Explanation of icons and indicators displayed on the camera's LCD monitor.

PREPARING THE CAMERA

Installing the Batteries

Step-by-step guide for inserting AA batteries into the camera.

Inserting and Removing an SD/SDHC Memory Card

Instructions for handling SD/SDHC memory cards for storage expansion.

Attaching the Camera Strap

Procedure for attaching the camera strap for portability and security.

LED Indicators and Self-timer Indicators

Explanation of the meaning of different LED and self-timer indicator lights.

GETTING STARTED

Turning the Power On/Off

Basic instructions for powering the digital camera on and off.

Choosing the Screen Language

Steps to select the desired display language for the camera interface.

Setting the Date and Time

Guide for setting the camera's date and time display.

Formatting an SD/SDHC Memory Card or Internal Memory

Procedure for initializing memory cards or internal storage for use.

Using the LCD Monitor

How to use the LCD monitor for composing shots and reviewing images/settings.

PHOTOGRAPHY MODE

Shooting Images

Instructions on how to capture still photographs using various modes.

Mode Dial

Overview of different shooting modes available on the mode dial.

Setting the Panorama Mode

Guide for capturing sequential images to create a panorama.

Setting Image Resolution and Quality

How to adjust image size and compression settings for photos.

Using the Zoom Function

Instructions on operating optical and digital zoom for capturing distant subjects.

Using the Flash

Explanation of different flash modes and their usage.

Setting Focus

How to select focus modes like Standard, Macro, and Infinity.

CAPTURE MODE

Burst

How to take rapid sequence shots for capturing action.

Auto Bracket

Procedure for taking multiple shots with varying exposure settings automatically.

Self-Timer

Using the self-timer for group shots or to avoid camera shake.

Adjusting the Exposure (EV Compensation)

Manually adjusting exposure levels to fine-tune image brightness.

Setting White Balance

Adjusting color balance based on lighting conditions for accurate colors.

PLAYBACK MODE - THE BASICS

Viewing Images

How to view individual still images stored on the camera.

Magnifying Images

Enlarging parts of an image to see fine details.

Thumbnail Display

Viewing multiple images simultaneously in a grid format.

Slideshow Display

Automatically playing back stored images in a sequence.

Resizing an Image

Changing the pixel dimensions of captured still images.

MOVIE MODE

Recording Movie Clips

Steps to record video clips with sound using the camera's microphone.

Playing Back Movie Clips

How to review recorded video clips on the camera's LCD screen.

PLAYBACK MODE - ADVANCED FEATURES

Playing Back Still Images/Movie Clips on TV

Connecting the camera to a TV for playback of images and videos.

Deleting Images/Movie Clips

Procedure for removing unwanted still images or movie clips.

Protecting Images/Movie Clips

Preventing accidental deletion of important images or movie clips.

Setting the DPOF

Embedding print order information for direct printing with compatible devices.

TRANSFERRING RECORDED IMAGES AND VIDEOS TO YOUR COMPUTER

Connect the digital camera to your computer

Steps to establish a connection between the camera and a computer via USB.

Download images or movie clips

How to copy image and video files from the camera to a computer's storage.

EDITING SOFTWARE INSTALLATION

Installing Photo Explorer

Instructions for installing the Photo Explorer software from the included CD-ROM.

Installing Photo Express

Instructions for installing the Photo Express software from the included CD-ROM.

Installing Cool 360

Instructions for installing the Cool 360 software from the included CD-ROM.

MENU OPTIONS

Camera Menu

Basic settings for capturing still images via the camera's menu system.

Movie Menu

Settings specific to recording movie clips.

Playback Menu

Options for managing and viewing recorded images and videos.

Setup Menu

Customizing default camera settings and preferences.

SPECIFICATIONS

TROUBLESHOOTING GUIDE

POSSIBLE NUMBER OF RECORDABLE IMAGES

CONNECTING TO A PICTBRIDGE-COMPATIBLE PRINTER

Connecting the camera to the printer

Guide for establishing a direct print connection between camera and printer.

Related product manuals