91 English
RECORDING MENU 3
Exposure setting
The shutter speed and aperture size can be set individually.
1 Select the desired icon from the
exposure menu, and press the
SET button.
<If T, g or , was
selected>
1 Press the [W/P] or [T/]]
button to select aperture value
or shutter speed.
2 Press the [G] or [H] button to
change the setting for the
selected parameter.
2 Press the SET button.
h This completes the exposure setting.
HINT
i To prevent the effects of camera shake at slow shutter speeds, it is
recommended to use a tripod or other method to stabilize the camera.
i A slow shutter speed may be useful for photographing in a darker
environment, but noise in the image may be increased.
i To minimize noise in the image, complete the noise reduction setting
(page 120).
i The exposure setting automatically becomes @ if the scene select
function is active.
i In the sequential shots mode, the shutter speed is faster than 1/15 sec.
i Even if the shutter speed is set to slower than 1/29 sec., the shutter speed
during video clip recording is 1/30 sec.
i If the exposure setting is set to T, g or H, by assigning an operation
shortcut to an arrow button (pages 120 and 123), you can select the T,
g or H exposure setting from the Recording Screen.
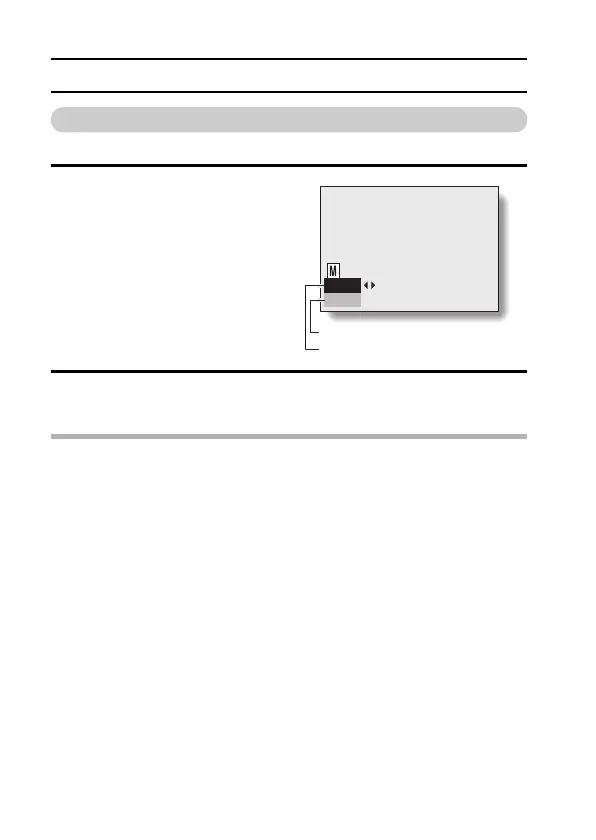
F3.5
1/500
Shutter speed
Aperture
 Loading...