JP 1
JP 11
11
The Sapling Company, Inc.
670 Louis Drive
Warminster, PA 18974
USA
P. (+1) 215.322.6063
F. (+1) 215.322.8498
www.sapling-inc.com
11
The Sapling Company, Inc.
670 Louis Drive
Warminster, PA 18974
USA
P. (+1) 215.322.6063
F. (+1) 215.322.8498
www.sapling-inc.com
Before Installation - Static IP (ctd.)
Option 2: Another way to set the clock with a designated static IP address without the use of a DHCP
server would be by using crossover cable.
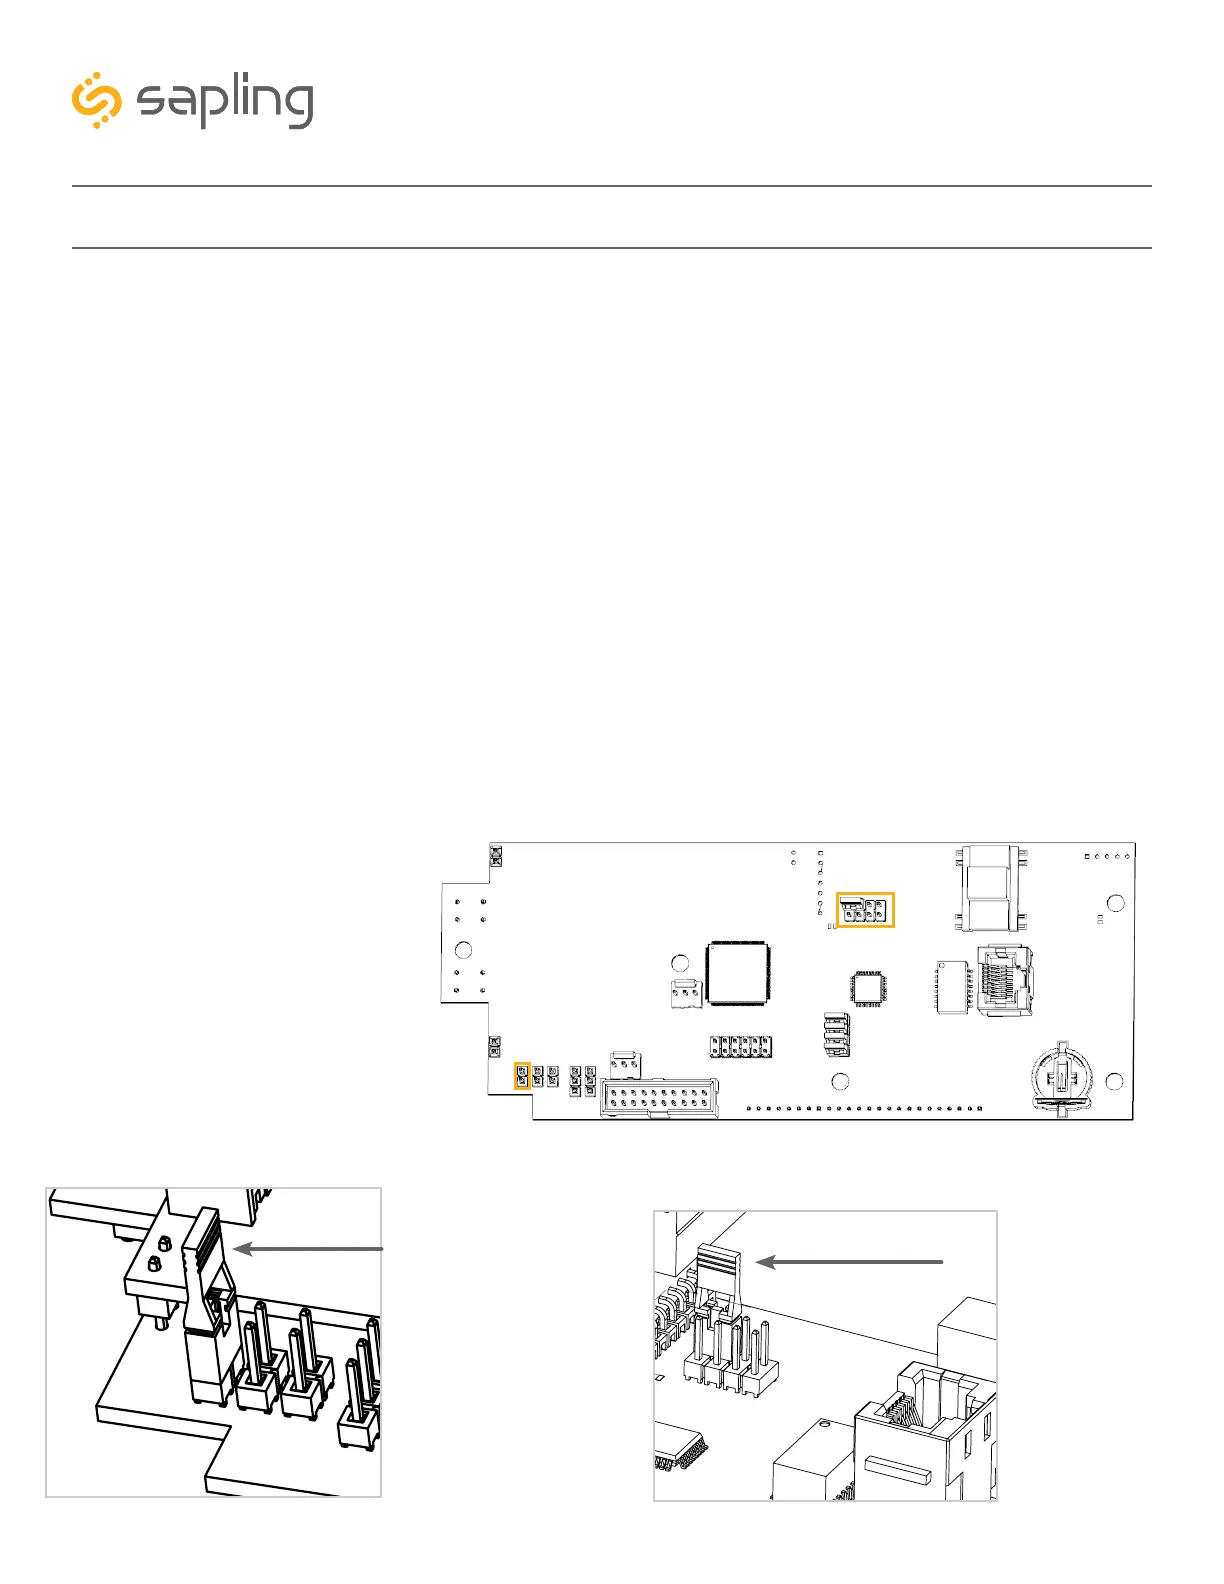
1. Locate the jumper on the circuit board. Move the jumper from the STORAGE POSITION to the
SETUP POSITION, as shown in the diagrams below. Power the clock. You should now be able to
access the clock through a web browser at IP address 192.168.0.123.
2. Use a crossover cable to attach the clock to a PoE injector, and the injector to your computer.
a. If you are connecting from the clock to the computer using a PoE switch, the injector is not
needed.
3. Access the web interface using the default password 6063, then click on the “Network Settings” tab.
Refer to image A shown in the previous page.
4. Confirm that DHCP is set to OFF. Refer to image A shown in the previous page.
5. Enter the following parameters provided by your network administrator: Gateway IP Address, Subnet
Mask, DNS Router, and the designated Static IP Address of the clock. After entering these settings,
click on the “submit” button.
6. Write the Clock Number, IP Address, MAC Address, and intended installation location in your personal
record.
7. Click the “submit” button.
8. Exit the Web interface.
9. Detach the data cable.
10. Move the jumper back to
STORAGE POSITION.
11. Reattach the data cable and
log in to the clock by using
the new Static IP.
SETUP POSITION
JP 1
Position
1 & 2
STORAGE POSITION
JP 11
Position
2