15
The Sapling Company, Inc.
670 Louis Drive
Warminster, PA 18974
USA
P. (+1) 215.322.6063
F. (+1) 215.322.8498
www.sapling-inc.com
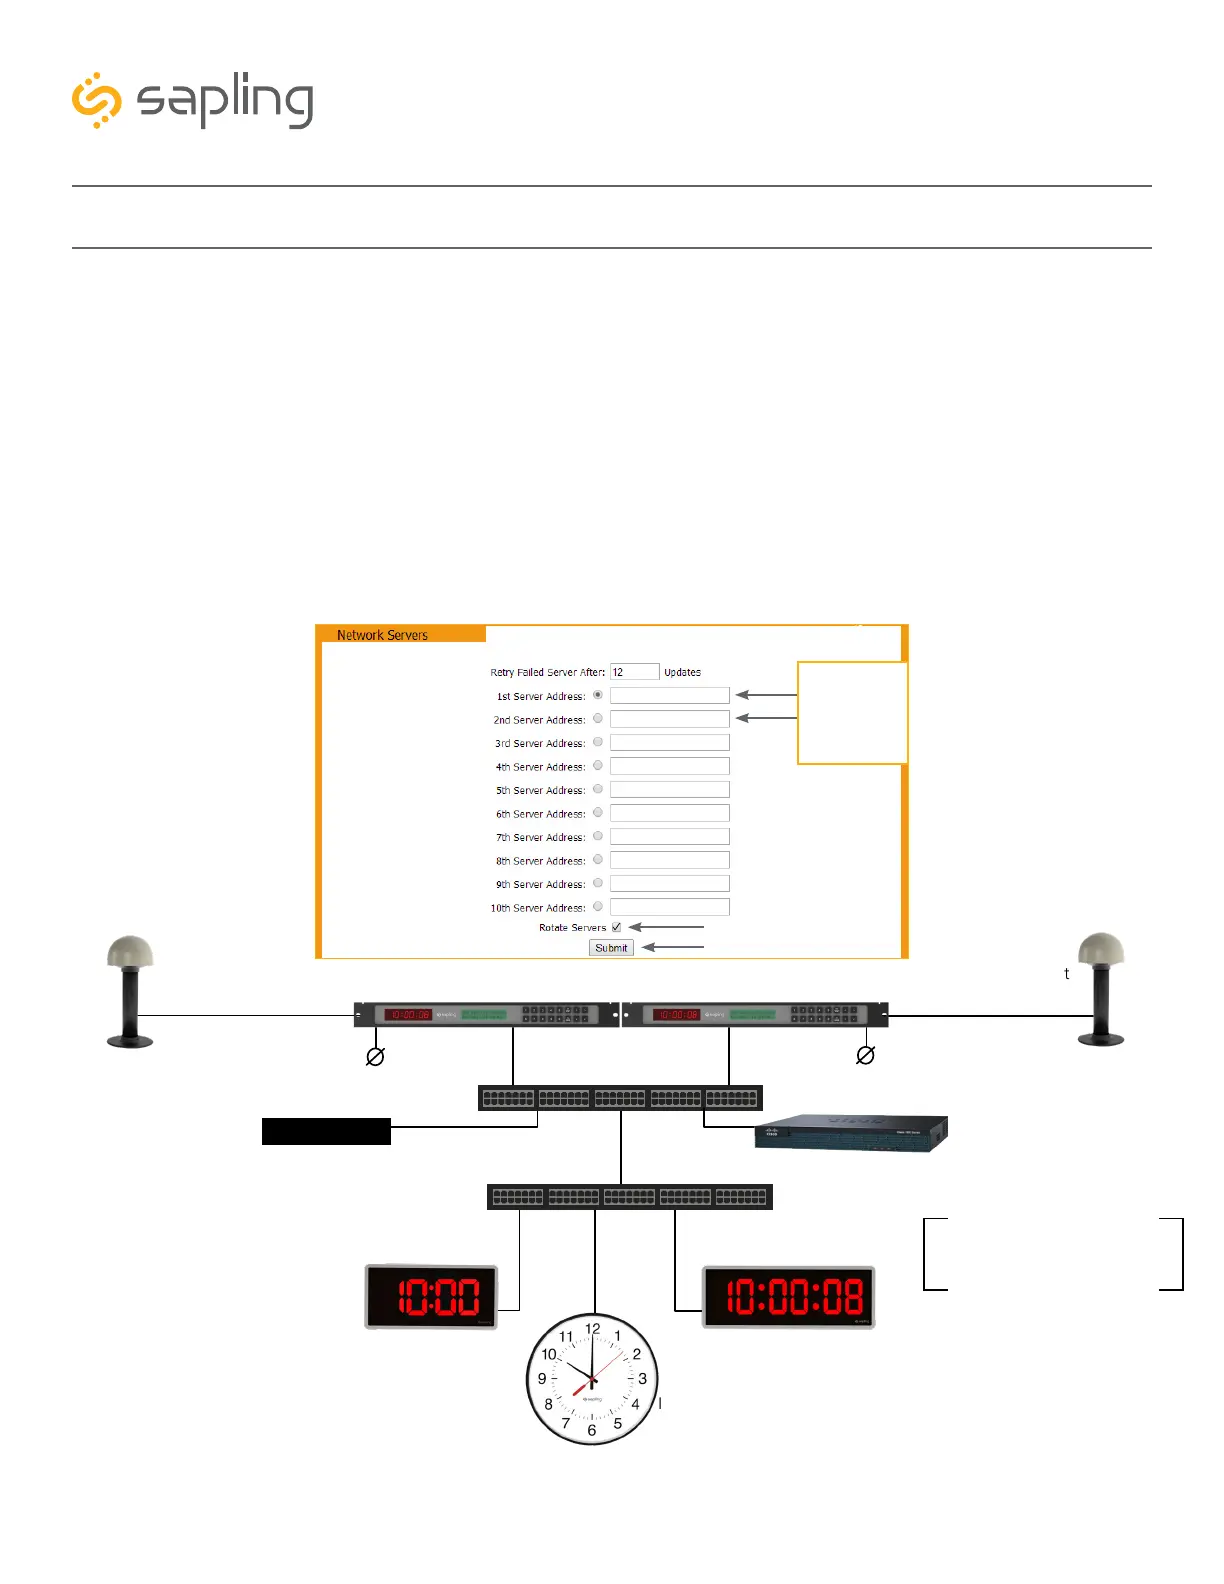
Before Installation - Clock Setup - Network Servers
Time Input – From two In-House NTP Time Servers or from two Master Clocks
• Set the in-house NTP Time Servers or master clocks (capable of providing time data to the IP clocks) with
a static IP address.
• Once the IP addresses of the in-house time sources have been identified, program these two static IP
addresses into the clock’s “1st Server Address” and “2nd Server Address” text boxes in the “Network
Servers” tab of the clock’s built-in web interface.
• Delete all other Server Addresses that came pre-programmed in the clock and make sure to leave only
the two IP addresses of the in-house time sources that you have programmed into the clock.
• Make sure that the option “Rotate Servers” is selected, which commands the clock to rotate between
the two time sources.
• Regardless of what server or master clock you are using as a time source, all IP clocks must still be set
with the UTC/GMT Offset and DST separately, as explained in this manual.
GPS Time Input
(optional)
GPS Time Input
(optional)
GPS Cable
GPS Cable
Network Cable
Network Cable
Network Cable
Network Cable
Network Cable
Master Clock #1
Master Clock #2
PoE Switch
Data Switch
IP Digital ClockIP Digital Clock
IP Analog Clock
Local Power
Local Power
*Dedicated DHCP Server or
Router acting as DHCP server
The need for a DHCP server is
eliminated when IP clocks are set
with a static IP address
Router
000.000.000.0
000.000.000.0
Click on “Rotate “Servers”
Static IP
Addresses of the
in-house time
servers / master
clocks
4) Close the web interface and IP monitor. The clock should now be able to accurately display time when
connected to your network. More information on selectable IP clock settings are provided later on in this
manual.