10
The Sapling Company, Inc.
670 Louis Drive
Warminster, PA 18974
USA
P. (+1) 215.322.6063
F. (+1) 215.322.8498
www.sapling-inc.com
10
The Sapling Company, Inc.
670 Louis Drive
Warminster, PA 18974
USA
P. (+1) 215.322.6063
F. (+1) 215.322.8498
www.sapling-inc.com
Before Installation - Static IP
The IP-PoE clock can be set to DHCP or Static IP address.
The clock is shipped in DHCP mode as default. This means that once the clock is connected to the
network it is assigned the next available IP address by a DHCP server. It is user changeable, meaning
that the clock can be set with a static IP address and changing these settings in the clock built-in web
interface (as explained in this manual).
For setting your IP-PoE clock to a static IP address, there are two options for doing so.
Option 1: If the facility where clock(s) will be installed into has a DHCP server, please follow these steps:
1. Connect and power the clock to the network via a network cable. (Note: in order to have clock be
powered, network cable must be receiving power through a PoE Switch or PoE Injector)
2. Once clock is powered, press the two buttons on the front of the clock and write down the IP
address that displays. (or, double click on the clock when using the Network Clock Monitoring
Software)
3. Go onto a web browser that is connected to the same LAN (Local Area Network) as the clock and type
the IP address of the clock into the address bar.
4. This should bring you to the web interface of the clock and you will be prompted to log in.
The default password is 6063.
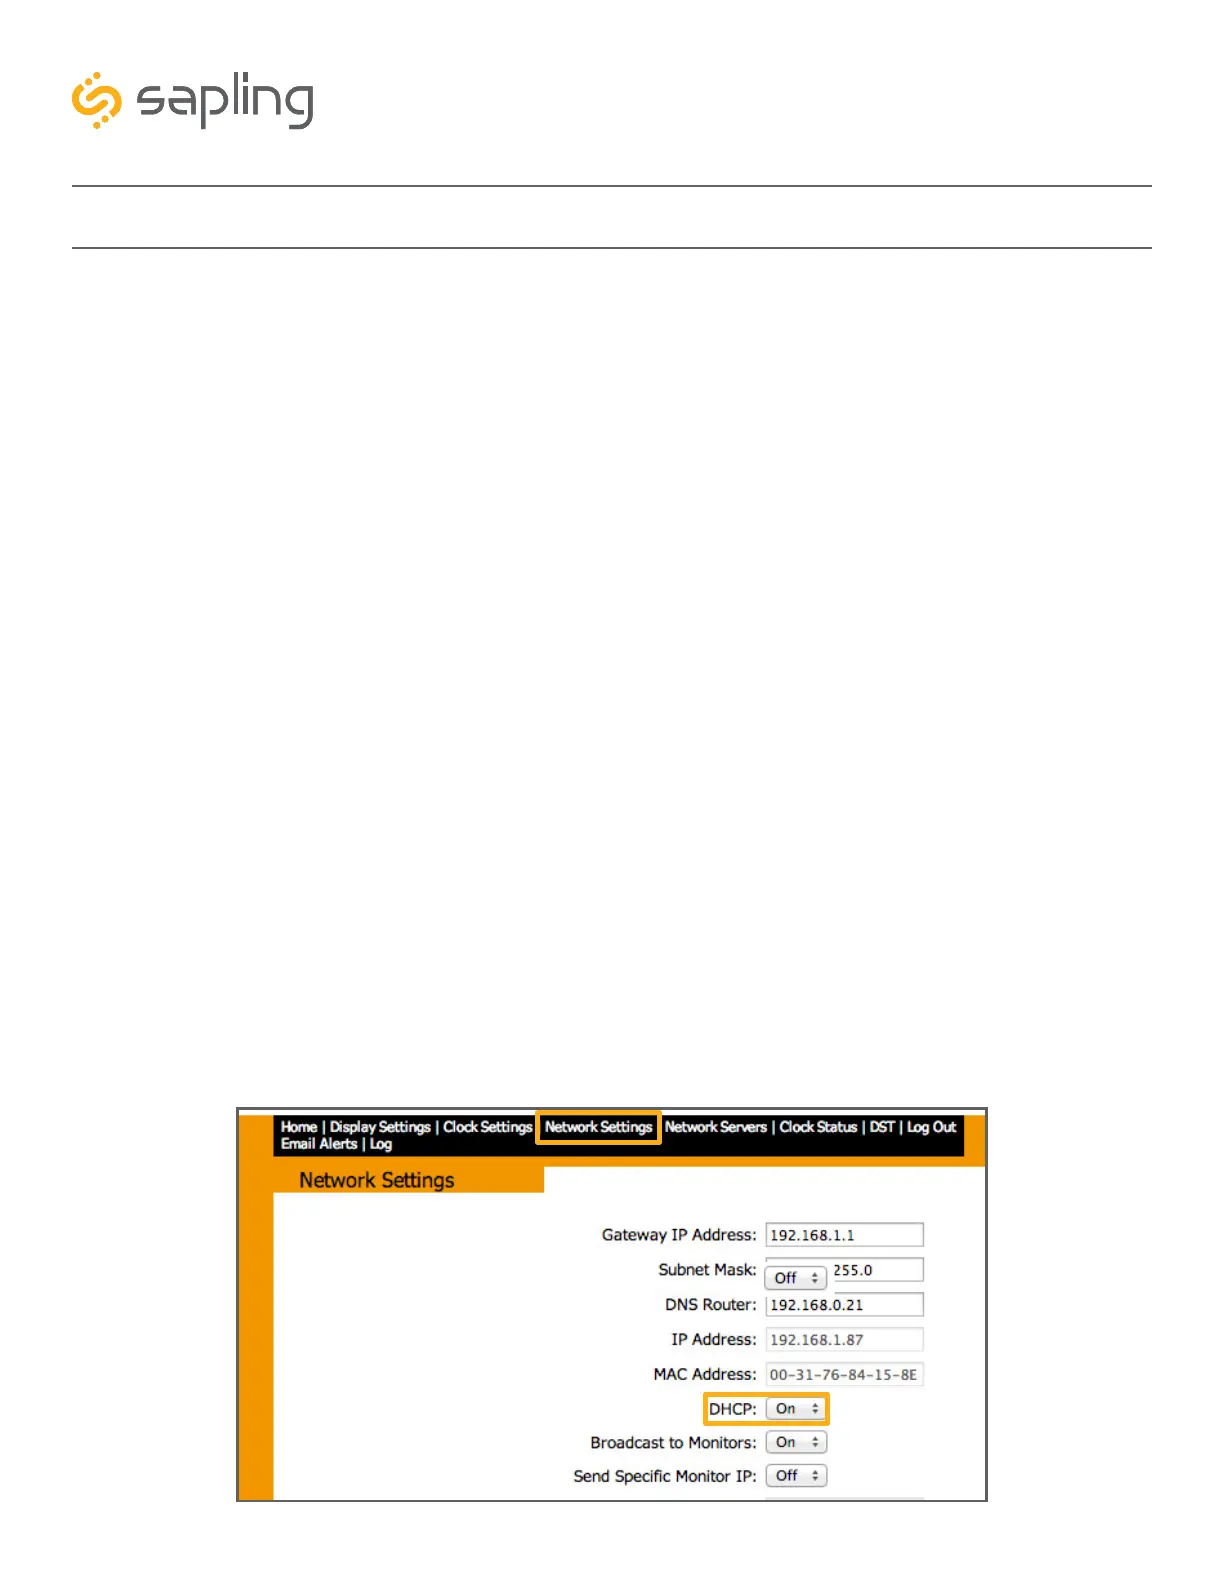
5. Once logged in, select “Network Settings” on the top of the page. Refer to image A shown below.
6. In “Network Settings” note the DHCP option. Toggle DHCP from “ON” to “OFF”. This will make the
current IP address of the clock static. Refer to image A shown below.
7. Enter the Gateway IP Address, Subnet Mask, DNS Router, and Static IP Address as provided by your
network administrator.
8. After DHCP is switched to off, power cycle the clock by unplugging the network cable from the
clock’s RJ-45 receptacle, waiting 10 seconds, and then plugging it back in. Press the two buttons on
the front display of the clock and, if all was done correctly, the clock will display its new Static IP
Address.
Image A