6
23
The Sapling Company, Inc.
670 Louis Drive
Warminster, PA 18974
USA
P. (+1) 215.322.6063
F. (+1) 215.322.8498
www.sapling-inc.com
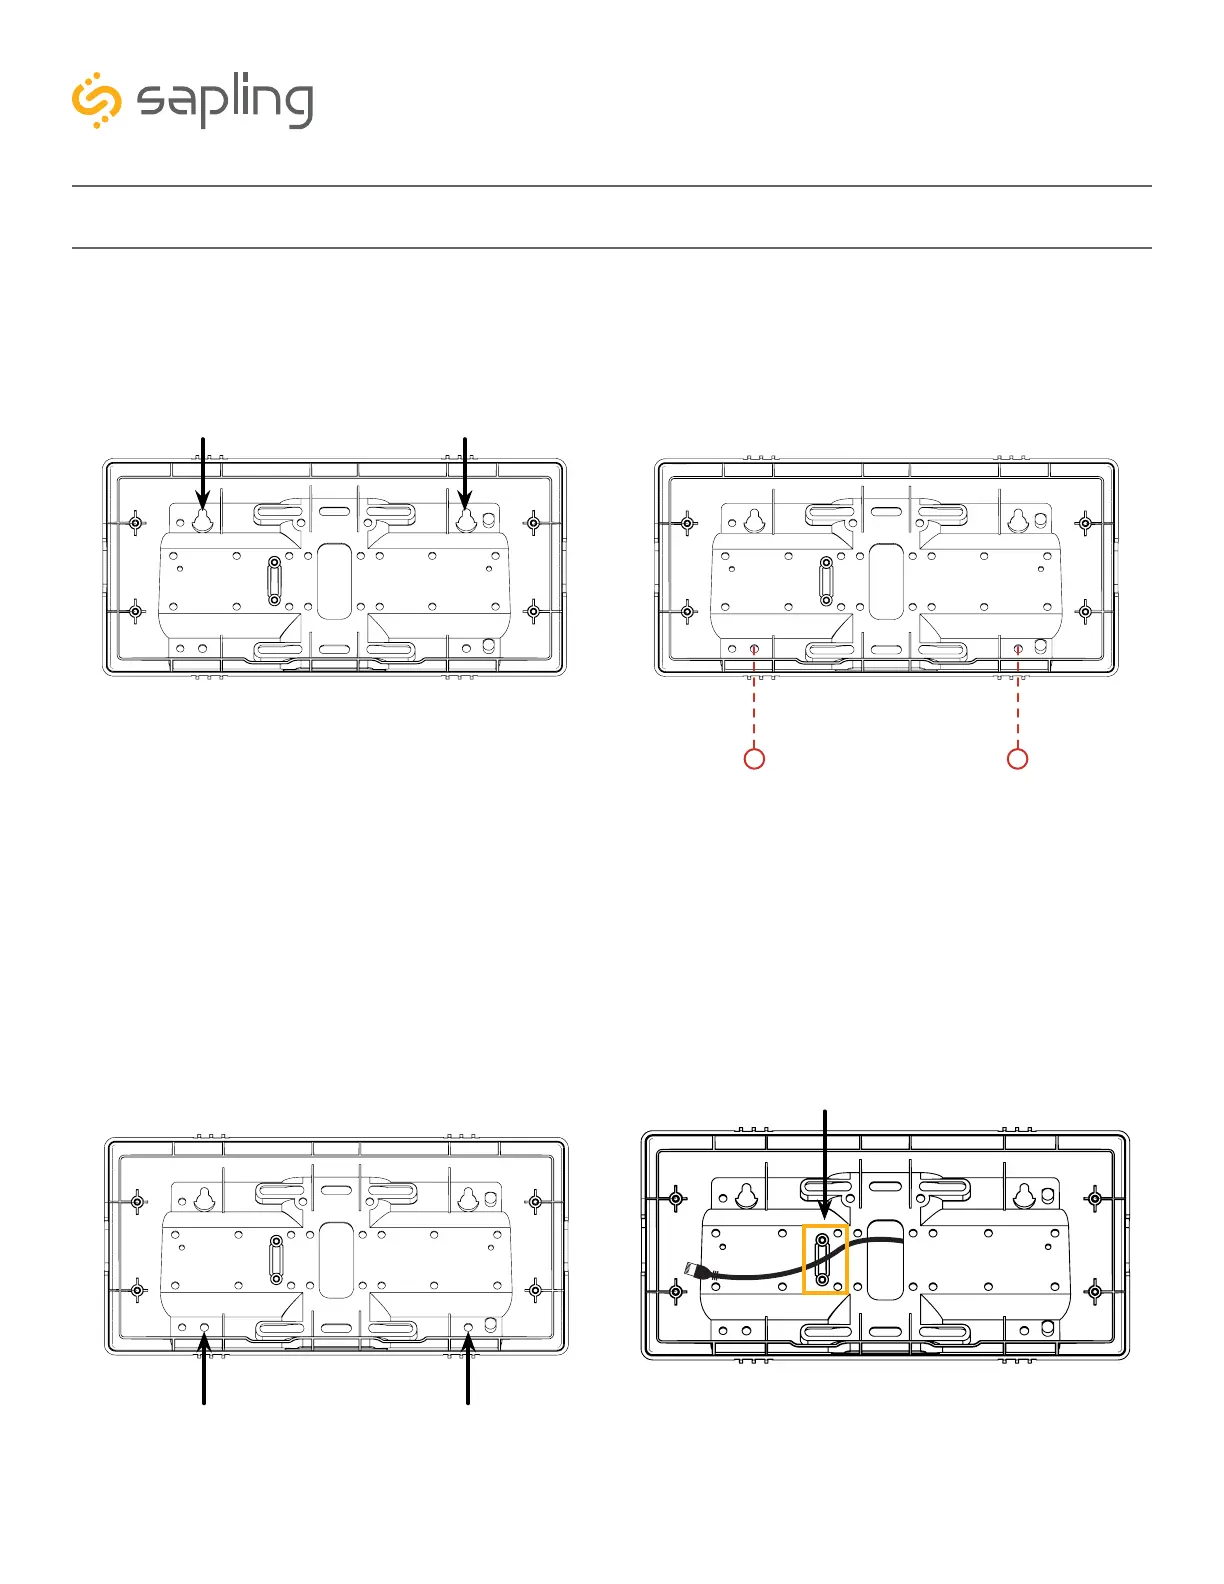
5F
5D 5E
Wall Mounted Clock Mechanical Installation
5E) Use a pencil to trace the holes beneath each
keyhole onto the wall as shown in the below image.
Take the clock housing off the wall, drill holes at
the marked locations, and add another two wall
anchors.
5F) Place the housing back on the wall in order
to screw a second pair of #8 screws through the
bottom holes and secure them in the remaining two
wall anchors. This is to fixate the clock housing to
the wall.
6) Run the network cable through the large hole
in the back of the housing. Secure it by passing it
through the wire clamp. The wire clamp is mounted
in the clock housing and can be opened by using a
Phillips head screwdriver.
5D) Use the keyholes in the back of the housing to
hang the clock onto the screws.
wire clamp