35
The Sapling Company, Inc.
670 Louis Drive
Warminster, PA 18974
USA
P. (+1) 215.322.6063
F. (+1) 215.322.8498
www.sapling-inc.com
4
Uniform Stage Installation
5
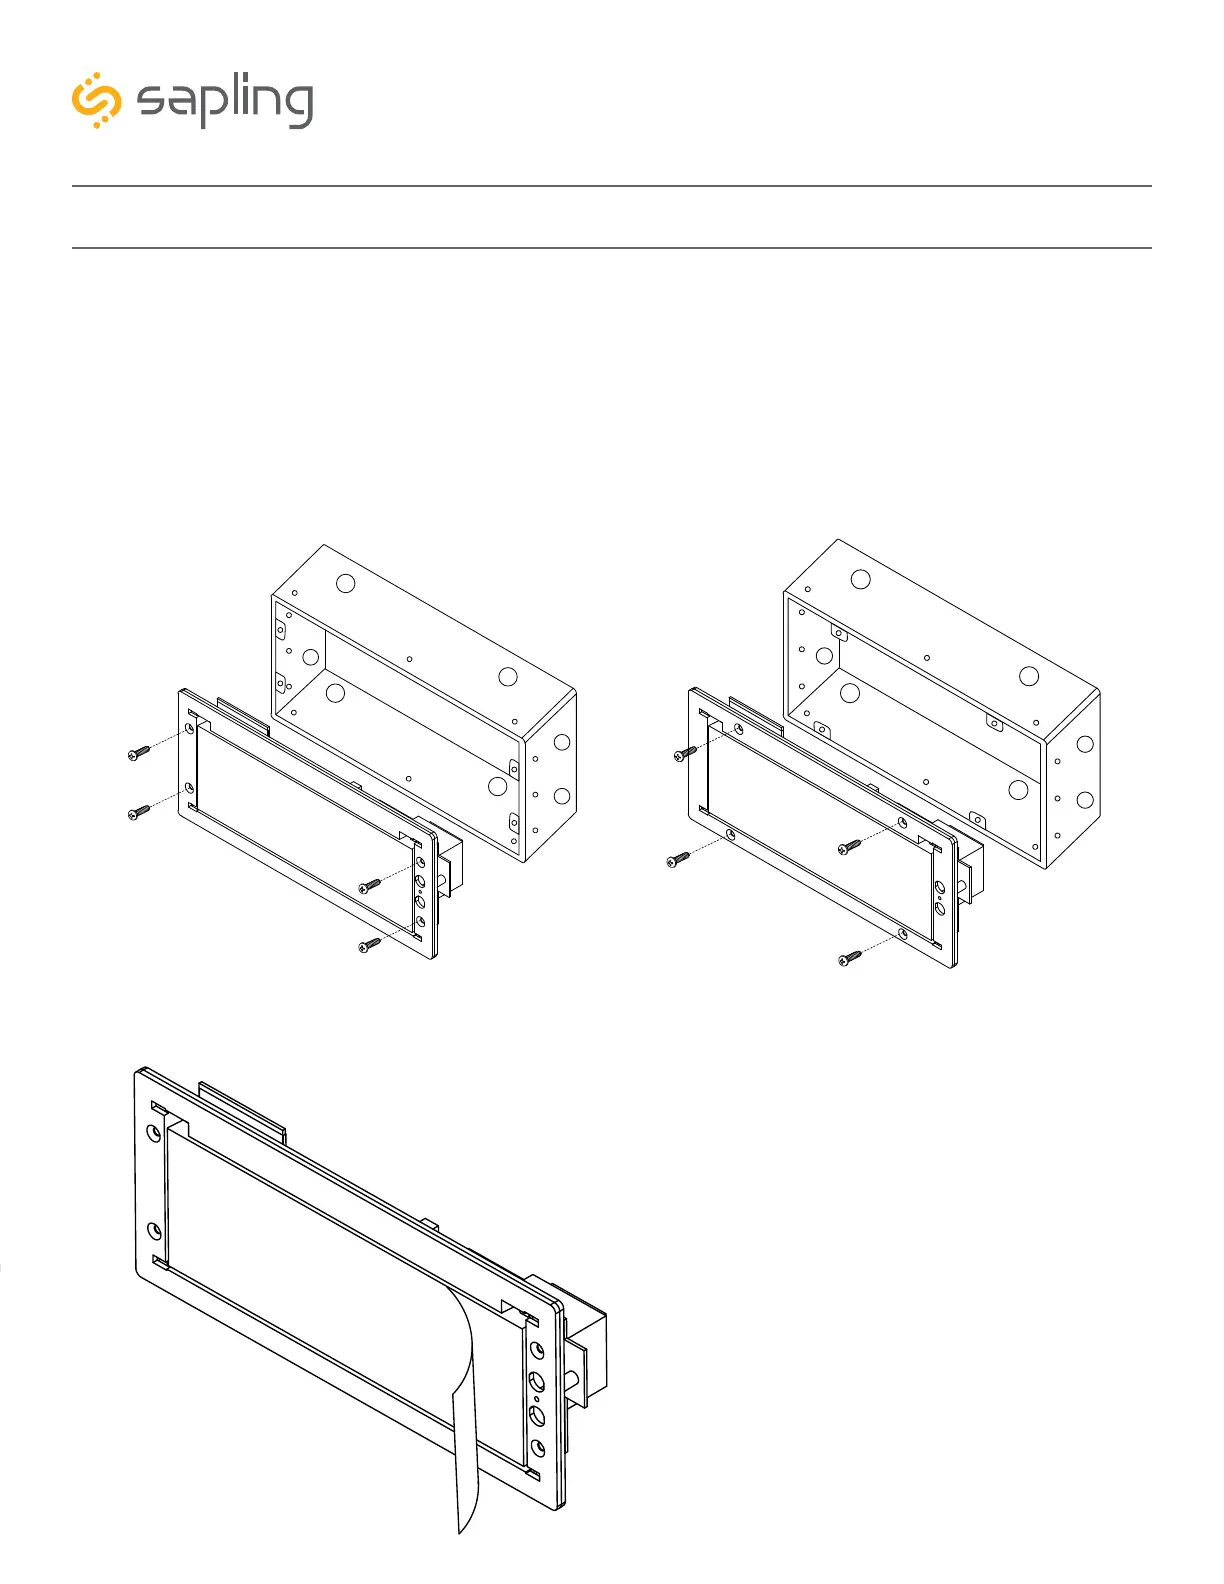
4) For flush mount installation: Use the four (4) #6-32x1/2 flat head machine screws that are provided
with the clock to screw the display to the housing board.
For wall mount, double mount, or flag mount installation: Use the four (4) #6-19x3/8 black flat
head thread-forming screws that are provided with the clock in order to screw the display board to the
clock housing.
NOTE: For 2.5” Digital clocks, the holes for the screws will be on the left and right inner surfaces of the
housing. For 4.0” Digital Clocks, the holes will be on the top and bottom surfaces.
5) Remove the clear plastic protective film from
the display board.
2.5” 4.0”