Page 11
Part No. 000643, 26-m02-2013 Multilift Installation Guide
Step 8
Install landing gate or door
Install the landing gate or door.
Procedure
The installation of the landing gate/door is specific to each
job site. Refer to your site plan drawings for details.
Install the gate or door at the upper landing using the
hardware provided.
Install gate
Note that there are two options for installing the gate.
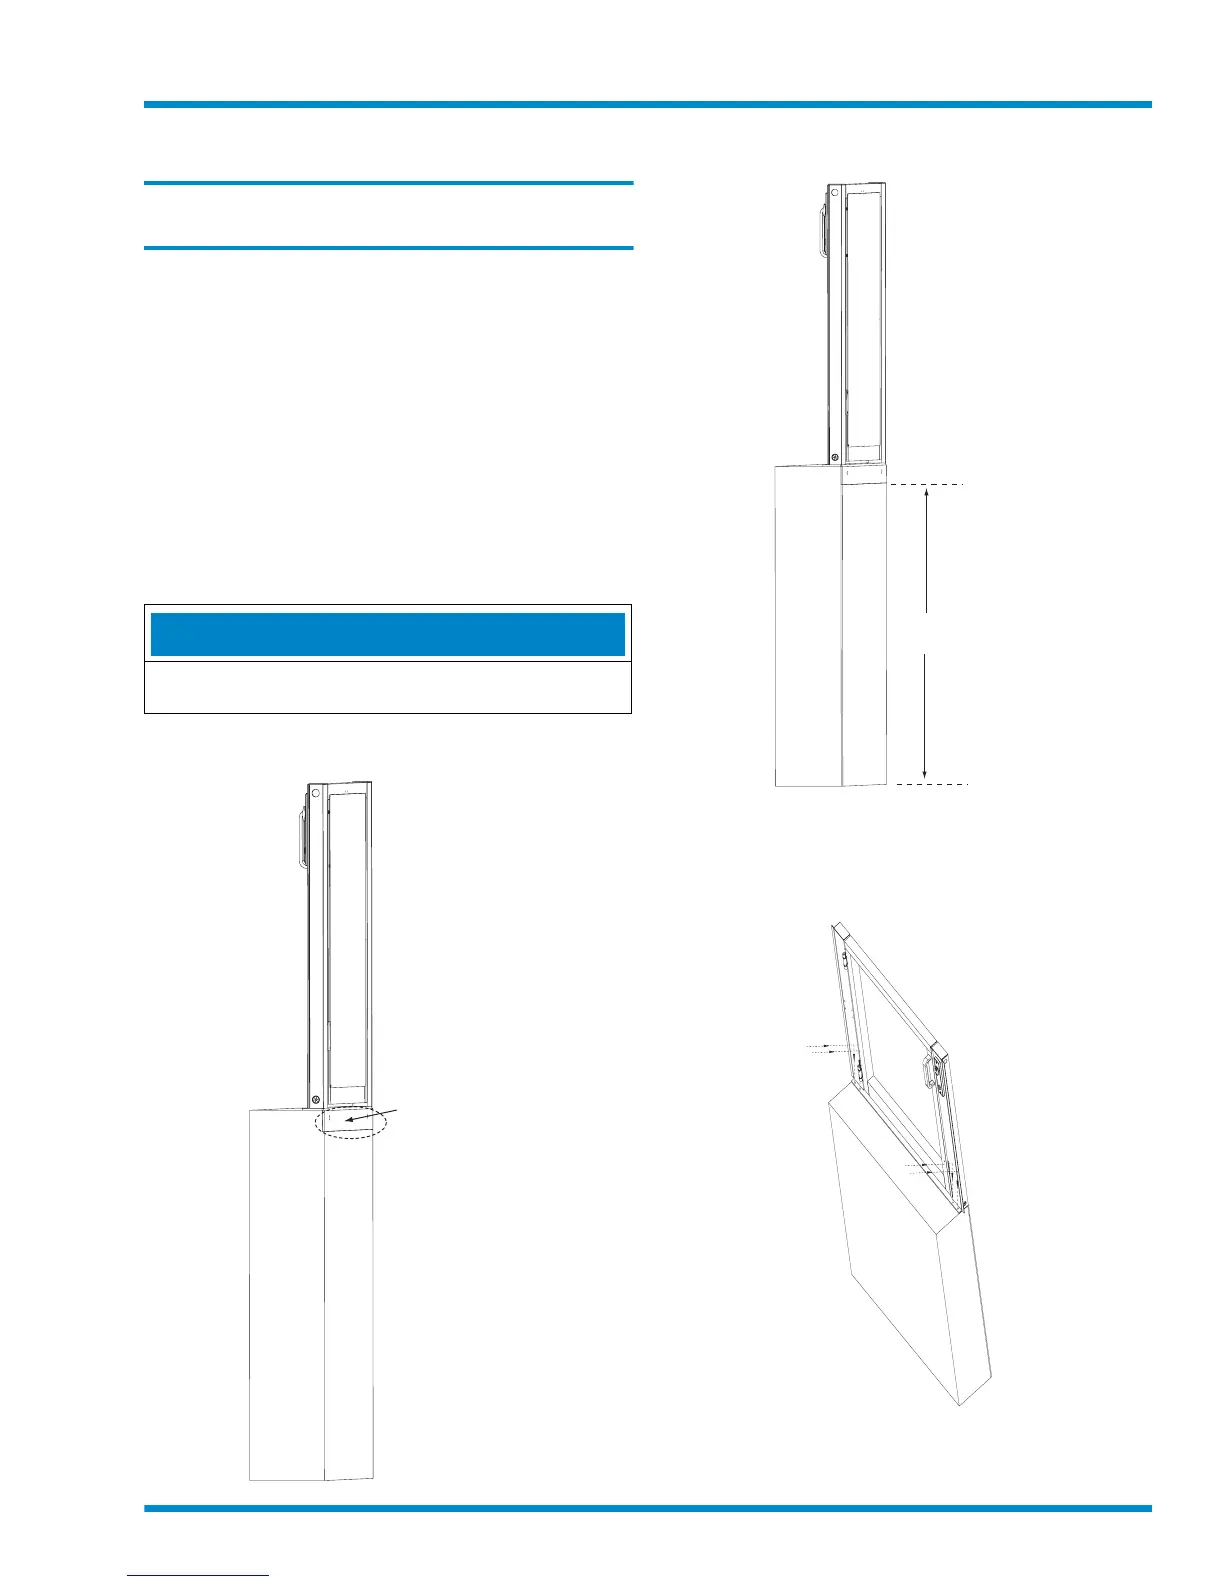
• Option 1 – Notch out the landing so the gate angle
bracket is flush with the vertical landing surface. See
Figure 11.
• Option 2 – Install a 1/4” fascia panel to fill in the gap in
the vertical landing surface from underneath the gate
angle bracket down to the floor/ground. See Figure
12.
NOTE
Note that if your site has a hoistway or pit, be sure to add
the 1/4” to those dimensions.
Figure 12
Notch out landing
Gate
Landing
Notch out landing
so gate angle bracket
is flush with vertical
landing surface
to install gate
Figure 13
Install fascia panel
Gate
Landing
Fascia
panel
1/4” plywood
for gate
1 Center and then anchor the gate to the landing using
the hardware provided (four bolts at the front; two bolts
at the back) as shown below.
Figure 14
Anchor gate to landing
Anchor gate
to landing through
sill angle bracket
at front (4 bolts,
2 per side)
Gate
Landing
Anchor gate to
landing through
sill angle bracket
at back (2 bolts)
(not shown here)
2 Wire the gate per the wiring diagrams shipped with the
lift. Refer also to the landing gate harness drawings in
Appendix A.