Page 15
Part No. 000643, 26-m02-2013 Multilift Installation Guide
Step 12
Adjust gate closer (as required)
Adjust the gate closer (as required)
Procedure
The self-closing device inside the gate top crosspiece has
been preset to ensure closing. The gate closer is concealed
within the top aluminum section of the gate on the hinge
side. The closer arm is held in place by two screws visible on
the inside of the gate.
NOTE
The arm does NOT need to be removed in order to adjust
the gate closer. (These screws will only need to be
removed if the closer arm needs adjustment).
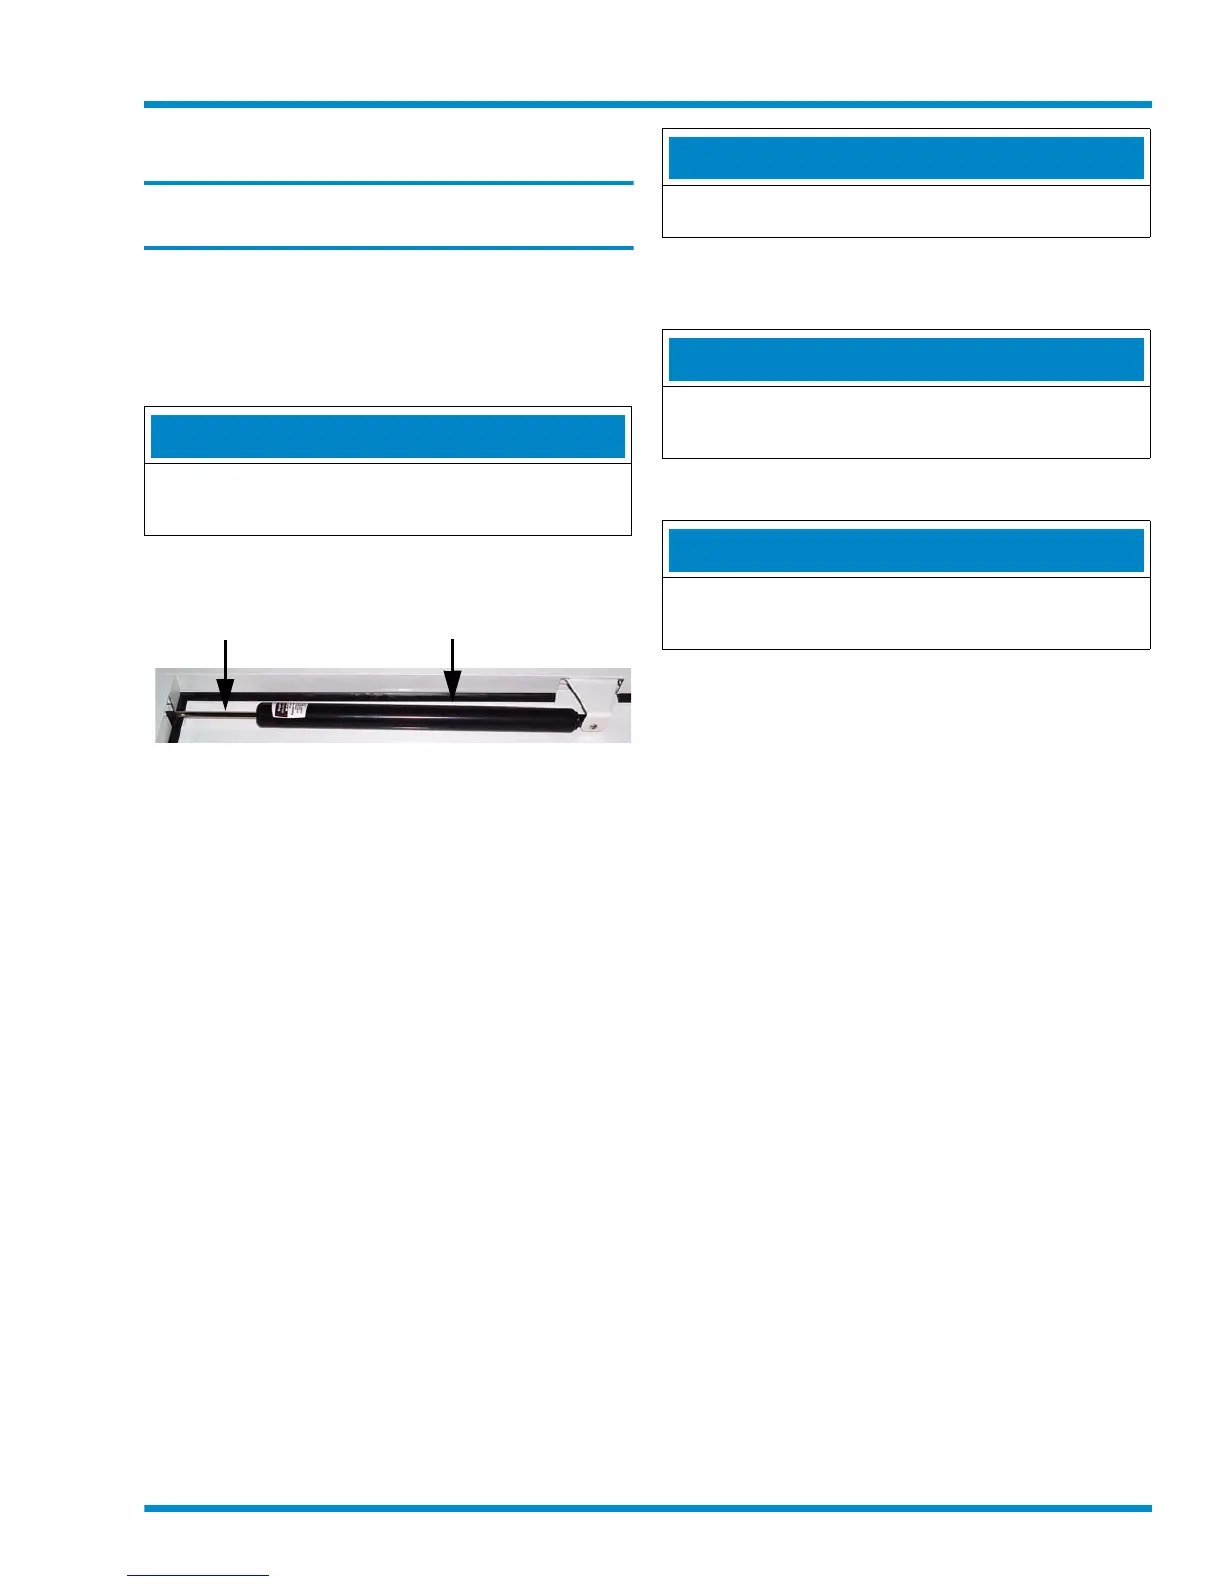
Figure 21
Gate closer
Hydraulic cylinder
Closure rod
To adjust the gate closer, you will need:
• Vise-grip pliers
• 18” (457 mm) length of 18 gauge stranded wire
1 Open the gate to about 75 degrees and attach a pair of
vise-grip pliers on the visible closer rod, as close to the
gate as possible. This prevents the closer rod from
retracting inside the tube (jack unit) when the rotation
pin is removed.
2 Slack off the pressure on the rotation pin. Partially close
the gate so that the pin can be easily removed. Move
the end of the closer rod clear of the jamb bracket so
that the hole in the rod’s end is accessible.
3 Thread the 18 gauge wire through the hole in the end of
the closer rod and FIRMLY grasp both ends of the wire.
Release the vise-grip pliers from the closer rod. When
the vise-grip pliers are released, slowly allow the closer
rod to retract under pressure into the aluminum tube.
The 18 gauge wire enables you to control the retraction
into the tube. More importantly, it enables you to
withdraw the closer rod again for adjustment and re-
attachment with the rotation pin.
4 To adjust the closer speed, grasp the 18 gauge wire and
manually pull the closer rod until you can access the
end of the closer rod. To reduce the gate closing speed,
turn the closer rod clockwise. To increase the gate
closing speed, turn the closer rod counter-clockwise.
This can be done while holding the wire and turning the
rod manually or with pliers, as required.
NOTE
Adjustments are sensitive. Adjust by a 1/2 turn at a time
only.
5 To test the closing speed of the gate, the closer rod and
rotation pin must be reinstalled into the jamb bracket
using the previous procedure for removing the pin.
NOTE
Never adjust the gate closer so that the gate slams closed
or closes too slowly. Both situations will cause erratic and
unreliable operation of the gate.
6 Reinstall the closer rod and rotation pin into the jamb
bracket.
NOTE
Never adjust the gate closer so that the gate slams closed
or the gate closes too slowly. Both situations will cause
erratic and unreliable operation of the gate.