2 MAGENTA SATEL
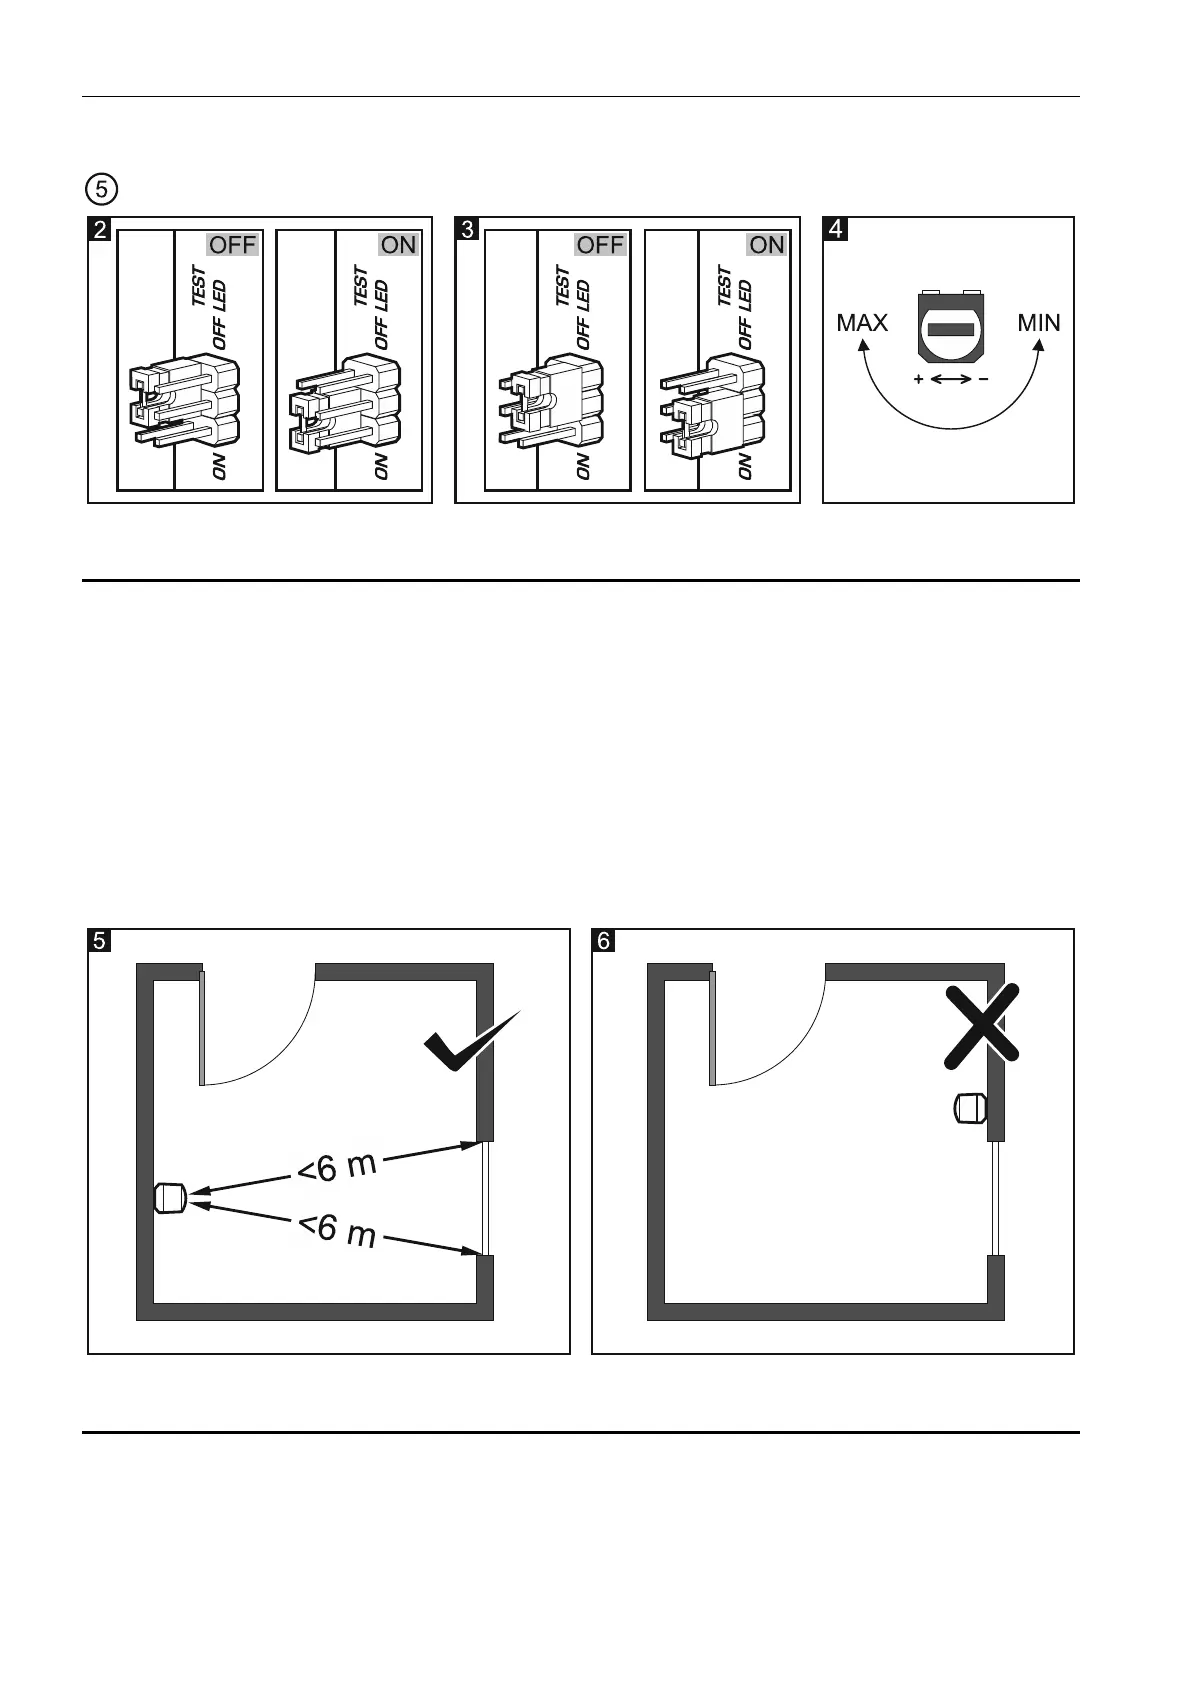
LED – enabling/disabling the LED indicator. The LED indicator is enabled when the
jumper is set in ON position (Fig. 3).
potentiometer for the adjustment of detection sensitivity (Fig. 4).
3. Selecting a mounting location
The detector is designed for indoor installation.
The detector microphone should be directed towards the protected glass, so the best
place to mount the detector is the wall opposite the protected glass.
The distance between the detector and the protected glass must not exceed the detection
range (6 m).
There must be no objects between the detector and the glass.
The detection range depends on the room acoustics. The shades, curtains, furniture
upholstery, acoustic tiles, etc. absorb the sound and adversely affect the detector
operating range.
Do not mount the detector on the same wall as the protected glass.
4. Range test
Check that the detector located in the selected installation location can detect the glass-
break. A temporary 12 V DC power supply will be needed for the test.
1. Open the detector enclosure (Fig. 7).
2. Make an opening for the wires in the enclosure base.