34
Section 5
4. Establish a test area (make sure this area is an area
that you wouldn't mind having streaking or burning from
the fertilizer, OR use a paved surface and collect all of
the material after, to avoid possibility of turf damage
from run off).
5. Adjust the granular drop rate cam to the desired
application rate. Refer to the Spreader Chart in Section
5-10 (this is a starting point).
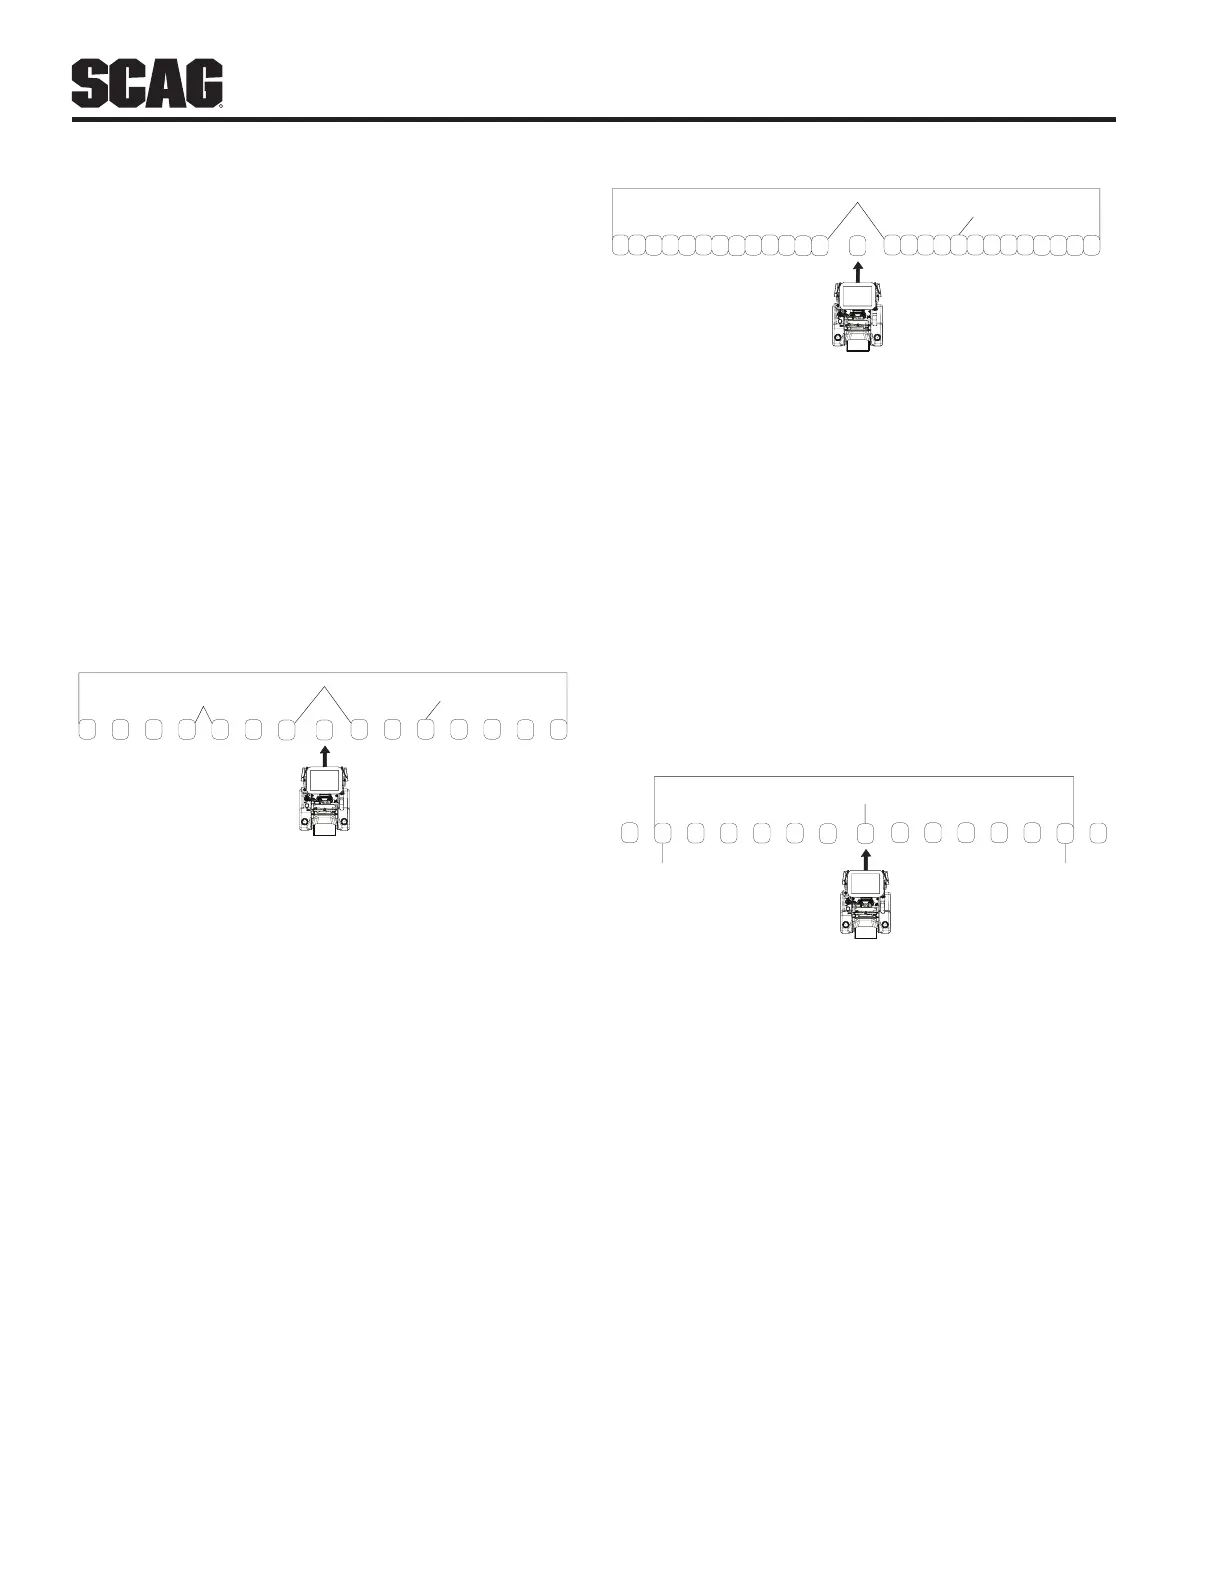
6. To determine the effective spread width for large
granular items you will need 15 small pans (1ft², 1 or
2 inches high). Arrange 7 pans to the right (about 1
foot apart), 7 pans to the left (about 1 foot apart), and
1 pan in the center. Make sure to allow room for the
machine to drive between the 7 left pans and 7 right
pans with the center pan placed so it will miss the drive
tires and go underneath the machine during the pass.
See Figure 5-9
CL1 R1 R2 R3 R5R4 R6 R7L2L3L4L5L6L7
1 Foot Gap
Machine Width (+2 Inches on each side)
Pan (1’x1’x2”)
About 29 Feet
Figure 5-9. Large Granular Material
- NOTE -
Give the machine plenty of room to make the pass.
Operate the machine at "application" speed while
making the pass. Activate the spreader with ample
time to create a consistant path before getting to
the pans.
To determine the effective spread width for small granular
items you will need 27 small pans (1ft², 1 or 2 inches high).
Arrange 13 pans to the right (no gap), 13 pans to the left
(no gap), and 1 pan in the center. Make sure to allow room
for the machine to drive between the 13 pans on the left
and the 13 pans on the right, with the center pan placed so
it will miss the drive tires and go underneath the machine
during the pass. See Figure 5-10
- NOTE -
Give the machine plenty of room to make the pass.
Operate the machine at "application" speed while
making the pass. Activate the spreader with ample
time to create a consistant path before getting to
the pans.
CL1 R1 R10R2 R8R3 R9R5 R12R4 R11R6 R13R7L2L8 L3L10 L4L9 L5L11L12 L6
L7
Machine Width (+2 Inches on each side)
Pan (1’x1’x2”)
About 29 Feet
Figure 5-10. Small Granular Material
7. Each pan's material should then be measured and
recorded. The effective spread width is determined by
taking these measurements and finding which pan on
each side has half of what the center pan has. (EX. If
the center pan has 16 ounces, and the 6th pan away
from the machine on each side has 8 ounces. The
effective spread width would be the distance between
the outside of the pan with 8 ounces on the left to the
outside of the pan with 8 ounces on the right.) See
Figure 5-11. If the path is not equal on each side, adjust
the diffuser control, and repeat the procedure until the
spread pattern is even on each side.
CL1 R1 R2 R3 R5R4 R6 R7L2L3L4L5L6L7
16 Ounces
Eective Spread Width
8 Ounces
8 Ounces
Figure 5-11. Measuring Effective Spread Width
Example
- NOTE -
For less accurate spread width, the pattern can
be aligned by using a cone on each side of the
spreader, adjust the pattern so the material barely
hits both cones with both cones equal distance
from the spreader. Measure the distance between
the two cones.
8. The next step is to establish the desired application
rate. Refer to the chemical manufacturer's
recommendations for application rate (lbs/1000 ft²).