50
Section 6
B. CLEANING THE STRAINER
-IMPORTANT-
If a wettable powder chemical was used, clean the
strainer after each time the spray tank was rinsed.
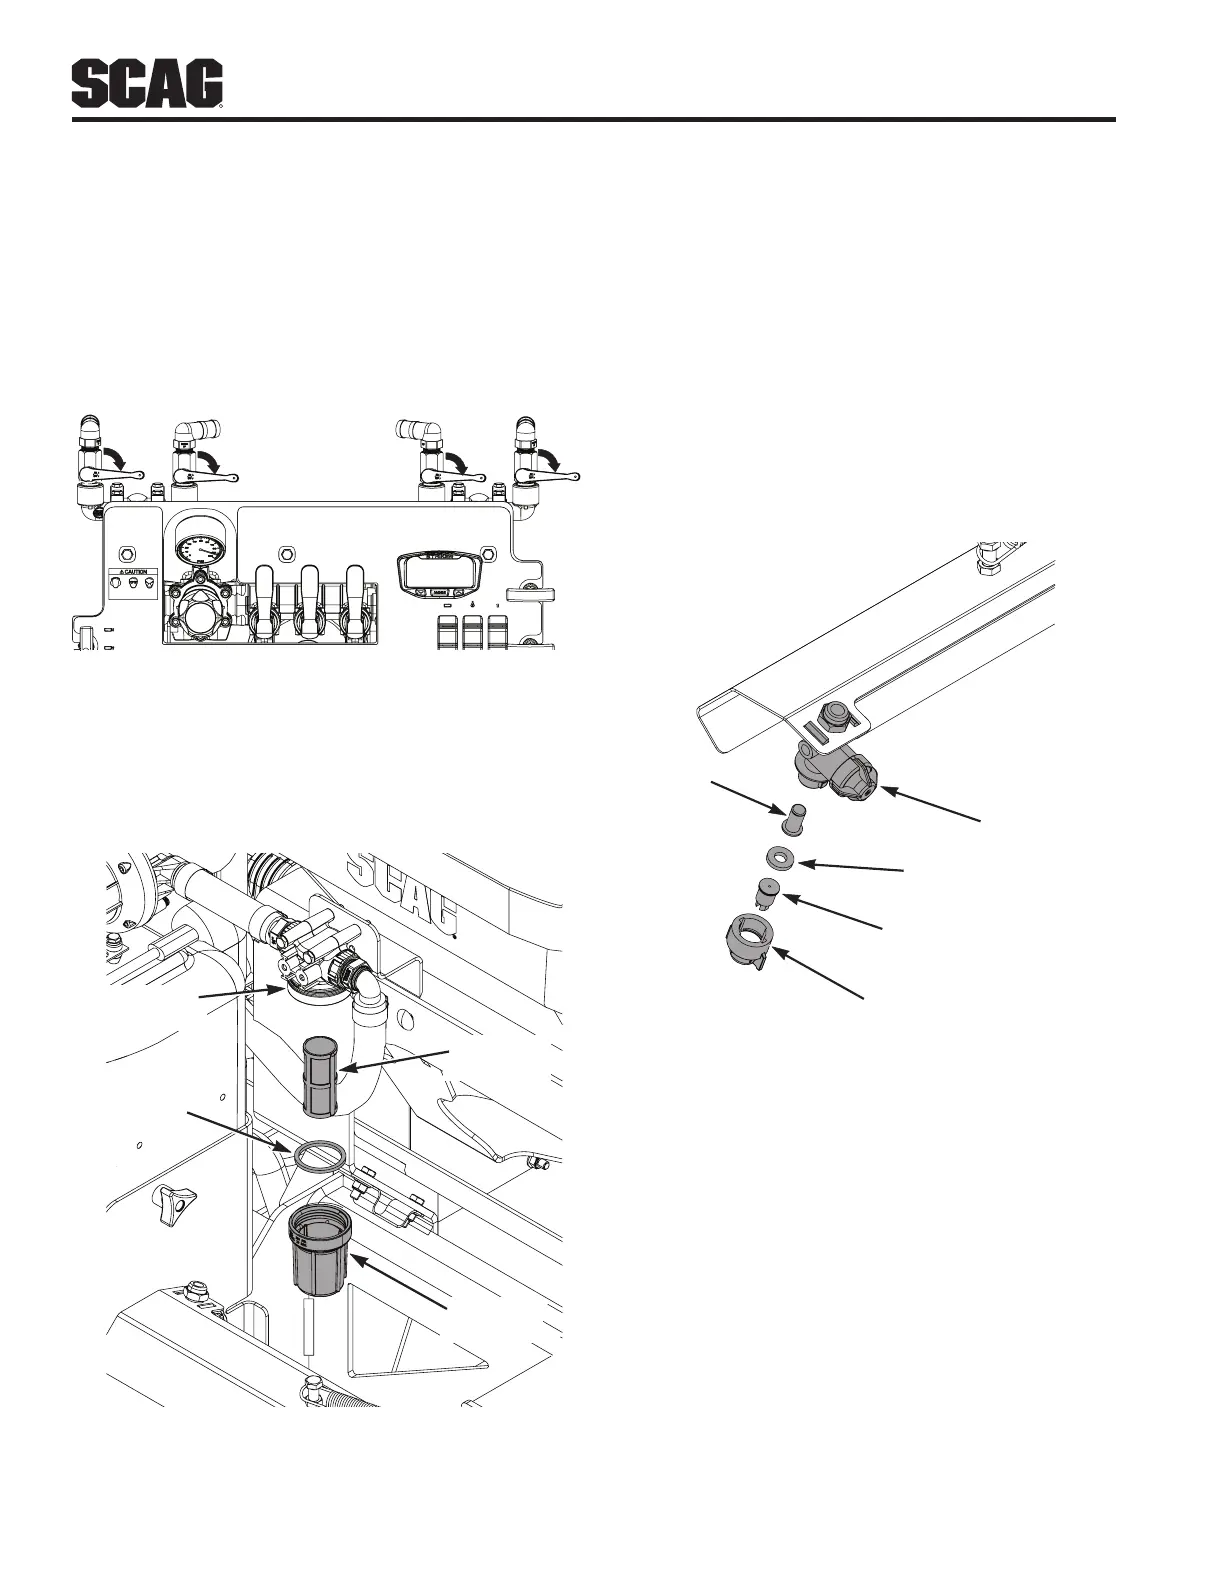
1. Rotate the left and right spray tank supply and return
valves to the closed position. See Figure 6-6.
RH
Supply
LH
Supply
LH
Return
RH
Return
CLOSED
Figure 6-6. Close Supply and Return Valves
2. Place a catch pan under the strainer assembly.
3. Rotate the strainer bowl counterclockwise to remove
the bowl, screen and gasket from the strainer body.
See Figure 6-7.
STRAINER
BOWL
GASKET
STRAINER
BODY
STRAINER
SCREEN
Figure 6-7. Removing the Strainer
4. Allow the chemical solution to drain from the strainer
body.
5. Use a soft bristle brush and clean water to clean the
screen, bowl and gasket.
6. After cleaning, install the strainer screen into the
strainer body.
7. Install the gasket and strainer bowl onto the strainer.
Rotate clockwise to tighten by hand.
C. CLEANING THE SPRAYER NOZZLES
1. Rotate the nozzle cap 90 degrees counterclockwise
to remove from the nozzle body. See Figure 6-8.
NOZZLE CAP
GASKET
NOZZLE
STRAINER
SPRAY TIP
NOZZLE BODY
Figure 6-8. Removing the Nozzle
2. Remove the spray tip, gasket and nozzle strainer
from the nozzle body.
3. Use a soft bristle brush and fresh water to clean the
spray tip, gasket and nozzle strainer.
4. Install the nozzle strainer and gasket into the nozzle
body.
5. Install the spray tip into nozzle cap.
6. Install the spray tip and nozzle cap into the nozzle
body. Rotate 90 degrees clockwise to secure.