www.scheppach.com
46
|
GB
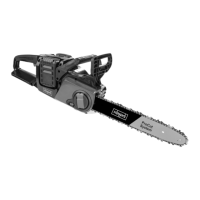
3. Fit the open end of the chain bar over the bar pins
(Fig. 3/pos. B).
To install the saw chain
• Spread the chain out in a loop with the cutting edg-
es (Fig. 4) pointing CLOCKWISE around the loop.
• Slip the chain around the sprocket behind the
clutch as shown in gure 4. Make sure the links t
between the sprocket teeth.
• Guide the drive links into the groove and around
the end of the bar as shown in gure 4 - 7.
m NOTICE
The saw chain may droop slightly on the lower part
of bar.
This is normal.
• Pull the chain bar forward until the chain is closely
seated. Make sure that all the drive links are in the
groove of the bar.
• Align the chain bar such that the TANG ts into the
hole in the chain bar shown in gure 7.
• Align the Chain brake lever / front hand guard such
that the Tang ts into the hole in the machine-case
as shown in gure 6.
• Fit the Chain brake lever / front hand guard and
turn the bar fastening knob & lever (Fig. 9/pos. 18)
clockwise to secure it. The chain is not allowed to
slip o the guide bar when you do this. Only loose-
ly tighten the bar fastening knob & lever at this
stage and then follow the instructions for adjust-
ing the chain tension as described in the section
ADJUSTING THE CHAIN TENSION.
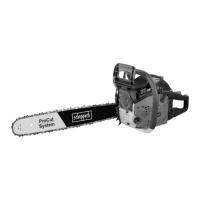
2. If it is necessary to re-tension the chain
Adjusting the chain tension
The correct tension of the saw chain is extremely im-
portant and must be checked before starting and peri-
odically during all sawing work. If you take time to ad-
just the saw chain correctly, you will be able to make
better cuts and the life of the chain will be prolonged.
• Undo the bar fastening wheel (Fig. 9/pos. 18) by
1/2 of a turn COUNTERCLOCKWISE.
• Hold the tip of the chain bar upwards and turn
the chain tensioning wheel (Fig. 9/pos. 3) IN A
CLOCKWISE DIRECTION in order to increase
the chain tension. If you turn the chain tensioning
wheel IN A COUNTER-CLOCKWISE DIRECTION,
the chain tension will be reduced. Check that the
chain is seated around the entire chain bar (Fig.
4/pos. X3).
• After making the adjustment and with the tip of the
bar still upwards, tighten the bar fastening wheel (Fig.
9/pos. 18). The chain is correctly tensioned when it
is closely seated and can be pulled right around by
hand, when the chain brake (5) is released.
Chain with low kickback
yes
Weight without bar and
chain
4.5 kg
Weight with bar and chain
5.7 kg
Subject to technical changes!
Wear ear-mus.
The impact of noise can cause damage to hearing.
Keep the noise emissions and vibrations to a
minimum.
• Only use appliances which are in perfect working
order.
• Service and clean the appliance regularly.
• Adapt your working style to suit the appliance.
• Do not overload the appliance.
• Have the appliance serviced whenever necessary.
• Switch the appliance o when it is not in use.
• Wear protective gloves.
Sound and vibrations
Sound Pressure Level L
pA
98,8 dB(A)
Uncertainty K
pA
3 dB(A)
Sound Power Level L
wA
114 dB(A)
Measured sound power level L
wA
109.6 dB(A)
Uncertainty K
wA
3 dB(A)
Vibration Front Handle a
hv
max. 6.17 m/s²
Vibration Rear Handle a
hv
max. 5,83 m/s²
Uncertainty K
hv
1.5 m/s²
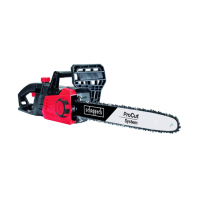
7. Set up
Before starting the equipment
m CAUTION
Do not start the engine until the saw is fully assem-
bled.
m CAUTION
Wear protective gloves at all times when handling
the chain.
Fit the chain bar
To ensure that the bar and the chain are supplied
with oil, USE ONLY THE ORIGINAL BAR.
The oiling hole (Fig. 4/pos. C) must be kept clear of
dirt and any build-up of residue.
1. Make sure the Chain brake lever is pulled back
into the DISENGAGED position (Fig. 11)
2. Turn the chain tensioning wheel (Fig. 9/pos. 3)
IN A COUNTER-CLOCKWISE DIRECTION until
the TANG (Fig. 7) (projecting pin) is at the end of
its sliding path in the direction of the clutch and
gear wheel (Fig. 9).