www.scheppach.com
GB
|
31
Attention: When releasing the motor brake lever, it must
return to the starting position causing the motor to stop.
If this is not the case, the device must not be used.
1. Move the main switch into the “ON” position (Fig.
14/ item a) and then open the petrol valve (item c).
To do this, set the valve to “ON”.
2. Set the choke lever (Fig. 14/ Item b) to the “Choke”
position. Note: The choke is not normally required
when restarting a warm motor.
3. Actuate the motor brake lever (Fig. 13) and rm-
ly pull the start pull cord (Item 14) until the motor
starts.
4. Allow the motor to warm up for a short time and
then set the choke lever (Fig 14 Item b) to the
“RUN” position.
5. Move the transport lever (3) into the working po-
sition
Attention: Always slowly pull out the start pull cord
until you feel the rst resistance before pulling it out
quickly to start. Do not allow the start pull cord to ing
back after starting has been completed
Attention: Do not start the motor if the transport lever
(3) is in the working position!
Attention: The scarifying roller rotates when the motor
is started.
Attention! Never open the discharge ap when the
motor is still running. The rotating roller may lead to
injuries. Always carefully secure the discharge ap. It
is folded back into the “closed” position by the tension
spring!
The safety distance between the housing and the user
given by the guide rails must always be maintained.
Special care must be taken when working and chang-
ing direction on embankments and slopes. Make sure
you have a secure footing, wear shoes with non-slip,
well gripping soles and long trousers. Always work
across slopes.
For safety reasons, slopes with an inclination of more
than 15 degrees must not be scaried with the device.
Exercise particular caution when moving backwards
and pulling the device, risk of tripping!
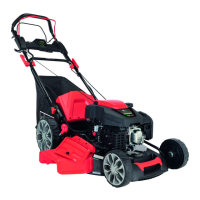
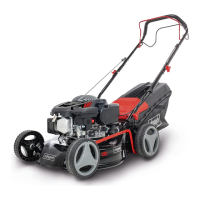
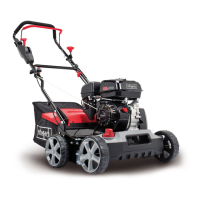
Speed adjustment (g. 1)
The speed can be adjusted using the throttle lever (15).
We recommend working at high speed.
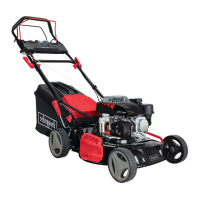
Installing the catch basket (Fig. 10 - 11)
• Lift the discharge ap (Fig. 11/Item. 7) with one
hand and hook the catch basket (Fig. 11/ Item
6) into the handle at the top with the other hand.
Attention! The motor must be switched o and the
roller must not rotate when attaching the catch bas-
ket!
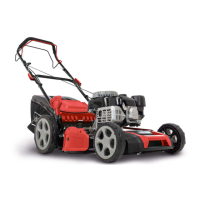
Setting the scarifying depth (Fig. 12)
The scarifying depth is set using the depth adjustment
(11). To do this, gently pull the depth adjustment (11)
to the left or the right to set the required position. The
height can be adjusted innitely from 0 mm to -15 mm.
If the transport lever (3) is in the transport position, the
blades do not touch the ground.
m ATTENTION: Move the transport lever (3) (Fig. 12)
into the transport position in order to make the roller
non-contacting. Only move the scarier in the trans-
port position when not scarifying/aerating.
Adjusting the aerator roller depth
In order to guarantee faultless operation and avoid
damage to the aerator roller, only use the aerator roller
with the depth setting “O”.
Change the roller (Fig. 19 - 23)
ATTENTION! Be sure to wear gloves!
Remove the hexagonal screws and the retainer plate.
Lift the roller at this end. Pull the roller in the direction
of the arrow, out of the drive square.
Slide the new roller in the direction of the arrow back
into the drive square and then press it into the brack-
et. Use the hexagonal screws to fasten the roller back
onto the housing.
9. Operation
m Attention!
The engine does not come with oil in it. Therefore,
ensure that you add oil before starting it up. The
oil level in the motor must be checked before any
work is undertaken.
Starting the device
In order to avoid unintentional starting of the motor, it
is equipped with a motor brake (Fig. 1/ Item 1), which
must always be actuated during operation, since other-
wise the motor will stop.
 Loading...