www.scheppach.com / service@scheppach.com / +(49)-08223-4002-99 / +(49)-08223-4002-58
GB
|
23
Important!
If the grinding wheel becomes jammed during op-
eration, remove the workpiece and wait until the tool
reaches its top speed again.
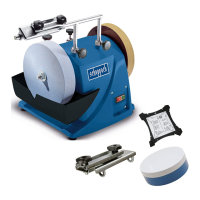
Changing the grinding wheels
Important note: In order to prevent injuries from ac-
wheel. Pull power plug!
•
out as far as possible. Do not remove these parts!
• Loosen work rest and pull out as far as possible.
• Undo the screws of the grinding wheel guard (6)
and remove the guard.
•
then assemble the new one.
Important note:
• Do not remove the pieces of card board on the
strengthening the grip of the Flange against the
grinding wheels.
• Examine the new grinding wheels on cracks or
•
•
the grinding wheel to break.
• Re-install the grinding wheel guard (6) in the re-
verse order.
• -
cording to installation instructions.
9. Cleaning and maintenance
Cleaning
•
housing free of dirt and dust as far as possible.
Wipe the equipment with a clean cloth or blow it
with compressed air at low pressure.
• -
•
and some soft soap. Do not use cleaning agents or
solvents; these could attack the plastic parts of the
equipment. Ensure that no water can seep into the
device. The ingress of water into an electric tool
increases the risk of an electric shock.
Maintenance
There are no parts inside the equipment which re-
quire additional maintenance.
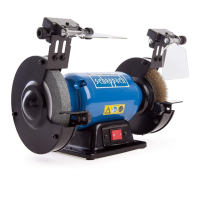
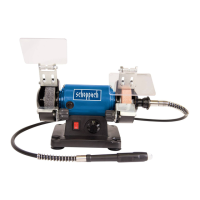
Spark guard with LED work lamp (left and right)
(Fig. 1, 3)
Fasten the spark guard (2) with LED work lamps (5)
to the grinding wheel guard (6) with two M5x8 pan
head screws (c).
The distance to the grinding wheel (3) should be not
more than 2 mm. The distance between the spark
guard (2) and the grinding wheel (3) can be adjusted
LED work lamp (Fig. 1, 4, 4.1, 4.2)
change the batteries (2xAAA R03 1.5 V) . Insert the
-
verse order (Fig 4.1).
Safety screens (Fig. 1, 5, 5.1)
with the M5x55 mushroom head screw (e) and the
knurled head screw (f).
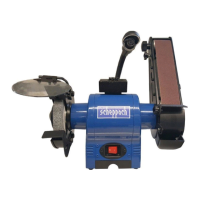
8. Operation
On/O switch (8)
•
(8) to position On.
•
After switching on, wait for the equipment to reach
begin with the grinding.
Work practice
•
that it can be machined at constant speed.
•
will cause the drive unit to slow down and even
stop, thus overloading the motor.
•
workpieces with a screw clamp or vise.
Grinding
• Place the workpiece onto the workpiece support (4)
-
ing wheel (3) at the desired angle to the point where
workpiece and grinding wheel make contact.
• -
-
-
 Loading...