EasyManua.ls Logo

Schlage S-480 User Manual

Schlage S-480
2 pages
To Next Page IconTo Next Page
Page #1 background imageLoading...
Page #1 background image
How to Install
(Door thickness 40-50mm)
1. Please read the installation manual before you install the product.
2. The strike guider is served to install correctly, remove the strike guider
after installation.
3. Please check door thickness and door handing before installation.
This product can be installed with door thickness 40-50mm
Firstly, check the door opens and closes smoothly.
Fold 90° angle on the fold line of the installation template and stick it to the
door and mark for installation.
Drill holes as specified on template.
Where replacing existing mechanical auxiliary lock, use center hole on the
mounting plate to adjust position and install the product.
Fasten the front using screw (M5x30, 2pcs), to fix the mounting plate (as
required check the direction of the mounting plate). Use screw (FH1x 30, 5pcs)
to increase the strength of the mounting plate fixing.
Pull through Front cable and connect to Back connector, and then fix to the
mounting plate by using screw (M5x29, 4pcs).
1.
2.
3.
4.
5.
6.
7.
8.
9.
10.
Fix the strike with screw (FH1x 30, 6pcs) and ensure the deadbolt aligns
correctly with strike.
Insert batteries (check polarity).
Check the door opens and closes properly.
Read the user’s manual to register PIN code.
*For Metal Doors: Please use the T4x19 screws instead of FH1x 30
(Timber Doors).
(Use on indoor side)
Installation Template S-480
Please check measurements
when printing template
83mm
58mm
FH1x 30 (5pcs)
FH1x 30 (3pcs)
Screw

Other manuals for Schlage S-480

Question and Answer IconNeed help?

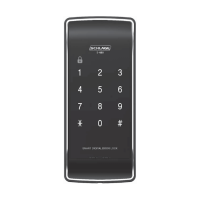
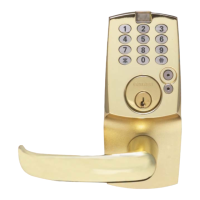
Do you have a question about the Schlage S-480 and is the answer not in the manual?

Schlage S-480 Specifications

General IconGeneral
BrandSchlage
ModelS-480
CategoryLocks
LanguageEnglish

Summary

Pre-Installation Precautions

Installation Manual Review

Thoroughly read the installation manual before commencing product installation.

Strike Guider Management

Remove the strike guider after ensuring the installation is correct.

Door Compatibility Check

Verify door thickness (40-50mm) and handing before installation.

Installation Procedure

Initial Door Smoothness Test

Confirm the door opens and closes smoothly prior to starting installation.

Template Placement and Marking

Fold and affix the installation template to the door to mark hole locations.

Hole Drilling

Drill holes precisely as indicated on the installation template.

Mounting Plate Adjustment

Use the center hole for adjustment when replacing existing mechanical locks.

Mounting Plate Fastening

Secure the front and mounting plate using specified screws for stability.

Cable Connection and Routing

Connect the front cable to the back connector and attach to the mounting plate.

Strike Plate Installation

Install the strike plate with screws, ensuring correct deadbolt alignment.

Battery Installation

Insert batteries, ensuring correct polarity is observed.

Final Door Functionality Test

Check that the door operates properly after all installation steps are completed.

PIN Code Setup Guidance

Consult the user manual for instructions on registering the PIN code.

Metal Door Screw Note

For metal doors, use T4x19 screws instead of FH1x 30 screws.

Installation Template Details

Template Dimensions and Use

Details on template measurements (58mm, 83mm, 74mm) and hole placements for different door handings.

Door Handing Identification

Illustrations and labels explaining Left Hand (LH), Left Hand Reverse (LHR), Right Hand (RH), and Right Hand Reverse (RHR) door configurations.

Related product manuals