15
3.4 Operating procedure
Have you read and understood the Operating Instructions, in particular
chapter 1 “Warranty and liability”? You are not permitted to operate the
device before doing so.
Before working with the device you must put on your personal protective
clothing, if necessary. For example, eye protectors, gloves, etc.
The ID plate with the CE mark and the serial number as well as the calibration
label (optional) and the SCHMIDT Quality Seal are provided on the surface of the
instrument.
- Switch on the instrument as described in chapter 3.21.
- Instrument settings as described in chapter 3.3.
- Select a material characteristic curve (chapter 3.3) or
generate a new adjustment (chapter 3.4)
- Allow approx. 10 minutes for thermal stabilization
of the instrument.
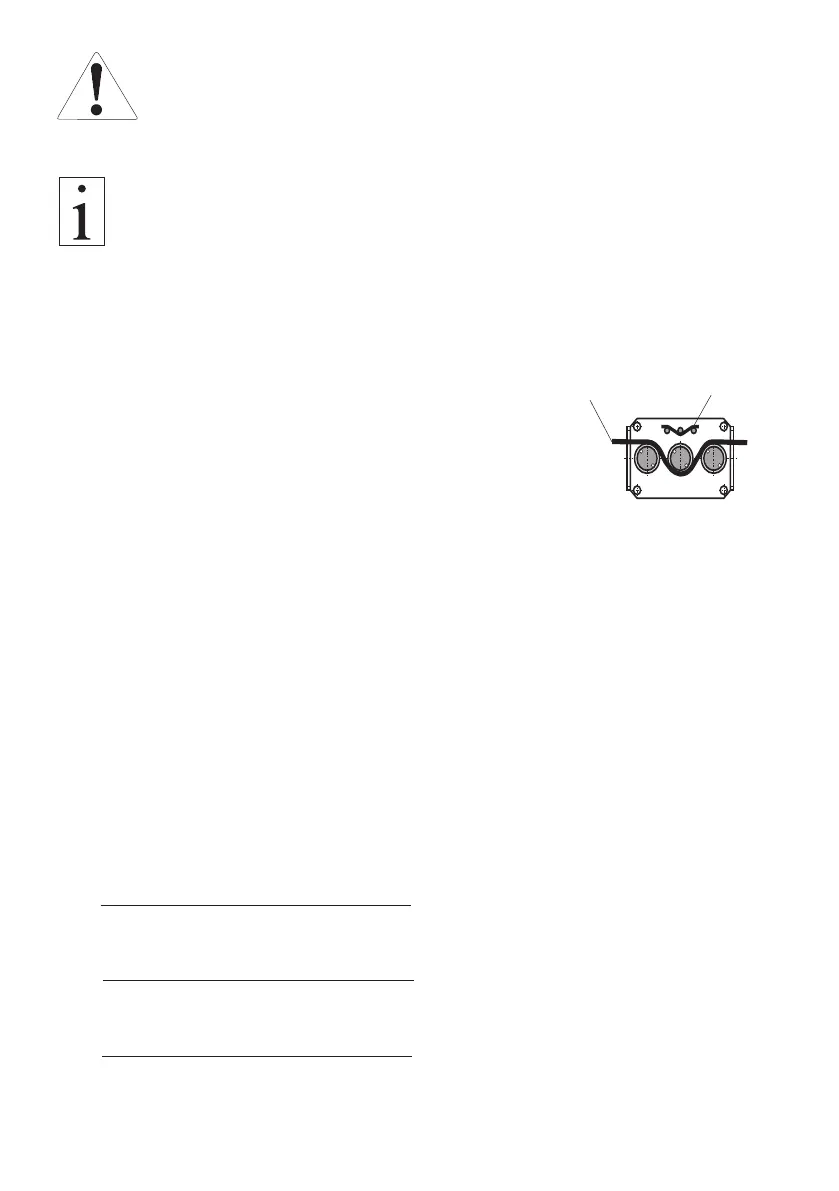
- Thread the process material through the measuring and
guide rollers, following the red material path symbol on
the front of the sensor.
The measured tension can be read in the display.
Material path
symbol
Process
material
3.4.1 Damping
Feature to be used for tensions that vary strongly
In the “Damping” submenu, a damping factor can be selected for each material char-
acteristic curve. In the “Display damping” menu, the damping factor of the currently
selected material characteristic curve is displayed. This can be changed in the “Display
damping” menu without changing the setting in the material characteristic curve. To use
the damping factor assigned to the material characteristic curve again, this must be set
in the “Display damping” menu or the material characteristic curve must be selected
again.
The factory setting for the damping factor is 5. The average shown on the display is
calculated as follows:
5 old measured values + 4 new measured values
9
Damping can be changed in 9 steps from 01 = low damping:
1 old measured value + 8 new measured values
9
to 9 = high damping:
8 old measured values + 1 new measured value
9