18
3.5.1 Zero and gain adjustment
You can save up to three different calibrations.
The instrument is factory-set to material characteristic curve 1.
This is the factory calibration, which should not be overwritten.
Requirements:
- Two weights, one corresponding to 10% and one to 90% of the selected tension range,
must be provided. Pay attention to the selected unit of measure (cN or kg).
- Sensor installed at measuring location.
- Instrument switched on as described in chapter 3.2.1.
- Allow approx. 10 minutes for thermal stabilization of the instrument.
- The desired material characteristic is selected according to chapter 3.3
Zero adjustment:
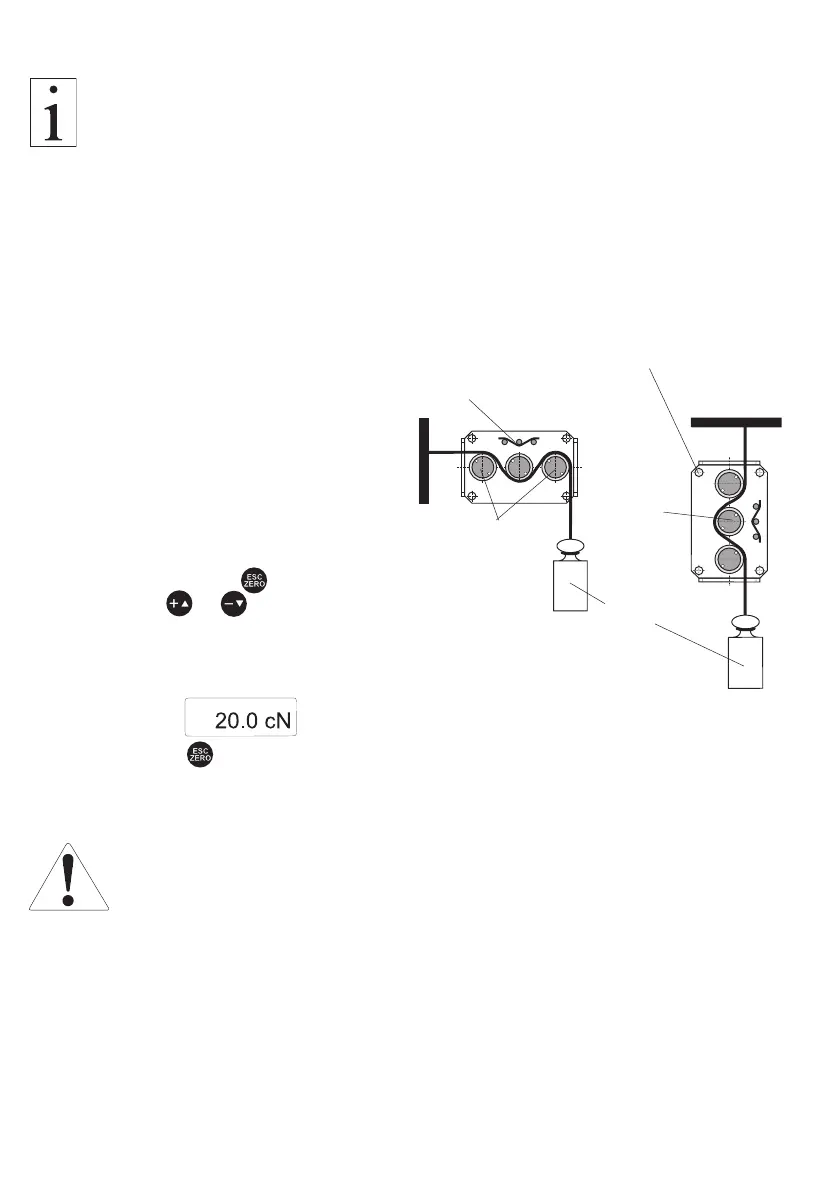
- Thread the process material through the
measuring and guide rollers, following
the red material path symbol on the front
of the sensor.
- Hang a weight that corresponds to e.g.
10% of the tension range (pay attention
to the correct unit of measure) from the
process material, vertically, as shown
in fig. 3.4.1.(Always use a fresh portion
of the material to be measured.)
- Press and hold the key.
- Press the or key repeatedly
until the tension value on the LCD is
equal to the value of the suspended weight.
For example: Sensor model TS1-200
Weight 20 cN =
TFT display
- Release the key.
The set value is saved to the calibration curve after approx. 20 seconds and the
instrument changes back to measuring mode.
Mounting holes 4 x
Weight
fig. 3.4.1
Material path symbol
Measuring
roller
Guide rollers 2x
The zero adjustment values are only saved permanently in the SC-PM mem-
ory after approx. 20 seconds. Therefore the unit must not separated directly
from the power supply.