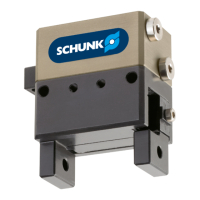
10
Montage- und Betriebsanleitung für 3-Backen-Parallelgreifer
PZN-plus mit Werkzeugschnittstelle HSK/KM/Capto
Operating manual for 3-Finger Parallel Gripper
PZN-plus with tool interface HSK/KM/Capto
7.2 Zerlegen des Greifers
Der Zusammenbau erfolgt in umgekehrter Reihenfolge. Be achten
Sie dabei die Kapitel 7.1 und die Schraubenanzugsmomente
Kapitel 7.3.
1. Entfernen Sie die Druckluftleitungen.
2. Drehen Sie die Schrauben (Pos. 47) heraus und entfernen
Sie dann das Abdeckblech (Pos. 5).
3. Markieren Sie die Einbaulage des Kolbens (Pos. 3/8) und der
Grundbacken im Gehäuse.
Achtung!
Im Falle eines Defekts kann der Deckel (Pos. 9) unter
Federspannung stehen.
4. Spannen Sie den Greifer vorsichtig zwischen den Grundbak-
ken (Pos. 2/7) und dem Deckel (Pos. 5) so in einen Schraub-
stock ein, dass Sie die 8 Schrauben (Pos. 46) noch entfernen
können. Drehen Sie die Schrauben (Pos. 46) heraus. Öffnen
Sie danach den Schraubstock vorsichtig und entfernen Sie
den Deckel (Pos. 5). Anschließend entfernen Sie die Zen-
trierstifte (Pos. 55).
Achtung!
Bei der Version »Außensichern« steht der Zylinder-
kolben (Pos. 10) unter Federspannung.
5. Markieren Sie die Einbaulage zwischen Zylinderkolben (Pos.
10) und Gehäuse (Pos. 1). Spannen Sie den Greifer vorsichtig
zwischen Grundbacken (Pos. 2/7) und Zylinderkolben (Pos.
10) in einen Schraubstock ein. Drehen Sie die Schraube (Pos.
45) heraus und entspannen Sie dann den Schraubstock vor-
sichtig, bis die Druckfeder entspannt ist. Entfernen Sie den
Zylinderkolben (Pos. 10) und die Druckfedern (Pos. 25) aus
dem Gehäuse (Pos. 1).
6. Drücken Sie den Kolben (Pos. 3/8) nach oben aus dem
Gehäuse (Pos. 1) heraus.
7. Ziehen Sie die Grundbacken (Pos. 2/7) aus dem Gehäuse
(Pos. 1) heraus.
8. Entfernen Sie alle Dichtungen.
9. Reinigen Sie alle Teile gründlich und kontrollieren Sie alle
Teile auf Defekt und Verschleiß.
10.
Erneuern Sie alle Dichtungen (siehe Dichtsatzliste, Kap. 9.1).
Beim Zusammenbau montieren Sie den Greifer in umgekehrter
Reihenfolge bis auf die Federn (Pos. 25), den Zylinderkolben
(Pos. 10), die Schraube (Pos. 45), den Deckel (Pos. 9) und der
Schrauben (Pos. 46). Diese Teile können nur mit einer Montage-
vorrichtung montiert werden.
(Zeichnungen zum Bau der Montagevorrichtung sehen Sie in
Kapitel 10).
Beachten Sie beim Zusammenbau auch das Kapitel 7.1 und die
Schraubenanzugsmomente Kapitel 7.3.
Montage mit Vorrichtung für PZN-plus 64 / 80 / 100
1. Vorrichtung 1 montieren (siehe Abb. Seite 11) und die Zentrier-
bohrung mit Renolit HTL 2 fetten.
2. Federn (Pos. 25) durch die Zentrierbohrung in das Gehäuse
stecken
3. Zylinderkolben (Pos. 10) an der Zentrierbohrung ansetzen und
von Hand gleichmässig in die Bohrung drücken (Achtung, nicht
verkanten), bis der Zylinderkolben an der Feder anstößt.
4. Schraube (Pos. 45) einsetzen und mit leichtem Druck in den
Kolben (Pos. 3/8) einschrauben.
5. Vorrichtung entfernen, die Dichtung (Pos. 32) einlegen und
den Deckel (Pos. 9) montieren.
7.2 Disassembling the gripper
Carry out assembly in the reverse order from the above. When
re-assembling, chapter 7.1 and the screw tightening torques
specified in chapter 7.3 must be complied with.
1. Remove the air pressure lines.
2. Undo the screws (Item 47) and then remove the cover plate
(Item 5).
3. Mark the installation position for the piston (Item 3/8) and the
base jaw in the housing.
cAutIOn!
In the event of a defect, the cover (Item 9) may be
spring loaded.
4. Carefully clamp the gripper in a vice between the base jaws
(Item 2/7) and the cover (Item 5) in such a way that the
8 screws (Item 46) can still be removed. Undo the screws
(Item 46). Then carefully open the vice and remove the cover
(Item 5). Finally, remove the centring pins (Item 55).
cAutIOn!
In the case of the version for „O.D. gripping”, the
cylinder piston (Item 10) is spring-loaded.
5. Mark the installation position between the cylinder piston
(Item 10) and the housing (Item 1). Carefully clamp the gripper
in a vice between the base jaws (Item 2/7) and the cylinder
piston (Item 10). Undo the screw (Item 45) and then carefully
open the vice until the compression spring is fully extended.
Remove the cylinder piston (Item 10) and the compression
springs (Item 25) from the housing (Item 1).
6. Push the piston (Item 3/8) upwards and out of the housing
(Item 1).
7. Pull the base jaw (Item 2/7) out of the housing (Item 1).
8. Remove all the seals:
9. Clean all components thoroughly and check them for defects
and wear and tear.
10. Replace all seals (see seal kit list, chapter 9.1).
When re-assembling, fit the gripper in the reverse order from
the above, apart from the springs (Item 25), the cylinder piston
(Item 10), the screw (Item 45), the cover (Item 9) and the screws
(Item 46). These components can only be fitted with an assembly
device.
(For drawings showing the installation of the assembly device,
see chapter 10).
When re-assembling, chapter 7.1 and the screw tightening
torques specified in chapter 7.3 must be complied with.
Assembly using device for PZN-plus 64 / 80 / 100
1. Fit device 1 (see figure on page 11) and grease the centring
bore with Renolit HTL 2.
2. Insert the springs (Item 25) into the housing through the
centring bore.
3. Place the cylinder piston (Item 10) on the centring bore and
press it evenly into the bore by hand (caution - do not tilt it) until
the cylinder piston comes up against the spring.
4. Insert screw (Item 45) and applying gentle pressure, screw it
into the piston (Item 3/8).
5. Remove the device, fit the seal (Item 32) and the cover
(Item 9).
 Loading...